7.31.2017

Make it Monday // Yummy Banana & Butterscotch Smoothie

If there is one thing I love during the summer (and every other season of the year) is ice cream.  Now I'm not saying this is in anyway the healthy version of ice cream...but there's like 2 to 3 bananas in here....so that's got to count for something.  Isn't it about subbing things out?  So like eat all of the bananas and none of the ice cream, right?  That's a thing right?

And before you say 'Ewwww this sounds like the worst thing ever!', hear me out.  Bananas are a good substitute for ice cream, that is a thing!  There are tons of banana ice cream recipes out there.  Butterscotch milkshakes are a thing too...at least for me.  So if you don't like bananas, or bananas as an ice cream substitute, or butterscotch....might want to skip this post. 
this post contains affiliate links, please read my full disclosure here.
Anywhoooo...I do try to make banana smoothies when I'm craving something sweet because then I won't eat the ice cream.  In addition to an ice cream weakness, my favorite ice cream topping in butterscotch.  I love butterscotch flavor everything! So I thought I'd try tossing in some butterscotch topping into my banana smoothie.  So that makes it less healthy...but still a good treat.  Better than a big bowl of ice cream, right? right?
Supplies // 2 to 3 bananas, half cup milk, ice cubes, 2 tbsp butterscotch topping (or add to taste), Nutribullet

First off, can we talk about the only thing I've used my Nutribullet for is milkshakes and these smoothies....nothing truly healthy. Whoops!  I really do love this little guy though.  It's perfect for when you want to make a single serving of something as you don't waste ingredients.  When I use my big blender I always over estimate - because really my whole life is just throw it in the blender - so I have too much.  If it's just me, that means I drink more than the serving I need.  If I'm splitting something with Zach, we may still have too much...or not enough to satisfy us!  The Nutribullet makes guessing the perfect way to make a single serving!
Chop up the bananas into the cup, add the half cup of milk (you can use almond milk, cow's milk, whatever milk you like), add the ice, & then blend.  I mean it's really that easy to make a smoothie.
Once it's all blended up, add the 2 tbsp of butterscotch topping & blend.  Taste the concoction & if you need a bit more topping, add it in.  You can get the low sugar topping, or even try adding in butterscotch flavoring.  I love the smoothness of the ice cream topping.
What I love about the Nutribullet is that the cups you use to blend also turn into the cups you can drink from.  You don't have to....but you totally can!  Some of the screw on tops even have handles.  How convenient.  
Now if you need me I'll be out on my porch drinking these guys all day, everyday.  Again...defeats the purpose of being healthy but it's so delicious.
On a serious note....I have been trying to make good substitutions for things in my life.  For example, drinking cold brew coffee has cut out a giant part of the sugar during my day.  I've also been drinking club soda + essential oil concoctions instead of soda (not everyday....but a few times a week.  Ingesting essential oils is a personal preference and personally because of their concentration, I don't suggest ingesting EO's everyday).


So I hope this little recipe inspires you to sub out the ice cream treat for an equally satisfying treat!  I know this meets my sweet tooth when I need it.

How do you substitute snacks to make healthier choices?

xoxo, Moe

7.27.2017

Self-Care & Creativity // 7 Ideas for a Self-Care Retreat (at home)

Self care is an important part of a mindful existence.  When we focus on taking care of ourselves we are more aware, more energized, and more inspired to live a creative life.  Self care gives us the ability to work on our well being allowing us to live solely in the moment.  In the Five Sixteenths Blog | Live Creatively Facebook group, you'll find a few mantras in the Mindful Meditations album.  One of these is from a very favorite gentleman of mine, Newt Scamander:
"Worrying means you suffer twice."
Dedicating time to self care means we are dedication time to life with out worry.  We aren't focused on what will happen next, we're not focused on the work we must do tomorrow, we're not focusing on the chores that need to be done.  We're focusing on what we need, in this moment, right now.
this post contains affiliate links, please read my full disclosure here.

There are a ton of weekend retreats where like minded individuals gather to focus on personal growth & development, relax, and simply leave stress at the door.  We don't always have the time (or the money) to schedule elaborate retreats for ourselves but we can always benefit from the me time that comes from these gatherings.  You can do a simple retreat at your own home, even if you only have a few hours.  If you live by yourself, or maybe with just a partner, you may have an easier time of this.  But if you can organize some child care, maybe send them to their grandparents', or even spend a bit and sneak away to a local hotel - it's definitely worth it.  Check out groupon or other coupon/discount style websites to see if you can get a good deal on a decent hotel down the road!

Here are 7 ways to enjoy a self care retreat at home

Enjoy a long bath or shower

Taking a long, relaxing bath or shower is great me time.  Enjoy a glass of wine and a soak in Epsom or Himalayan Sea Salt bath.  Stir in some essential oil blends for an even more centering effect.  Use Lavender for relaxation or try Wild Orange to feel nurtured and supported.  

Back yard happiness

Going outdoors is good for you!  If you have a back patio or a even a balcony, enjoy time in nature.  You can journal or meditate, but why not slip from your relaxing bath into your back yard for some sunshine and fresh air (clothed, of course!)  Light a few candles or even burn some incense on a side table.  Take in the greenery or even lay in the grass and sunbathe.  

Meditation & journaling

Even if you haven't set aside a room or area in your house as a sacred space, take time to intentionally choose an area that makes you feel the most comfortable.  You personal space like a bedroom or even an outside space where you feel connected to yourself is perfect.  Practice your breathing, focus on your breath, repeat a mantra.  Meditate with a crystal that calls to you.  Or journal your thoughts & feelings.  Art journaling is a good thing to do, too!  Each week in the Five Sixteenths | Live Creatively group you'll find a new journal prompt, too.  In case you need some inspiration!

Sleep in

Who doesn't need a good excuse for a goodnight's rest.  Fall asleep with your favorite essential oils diffusing or make a pillow mist so that you sink into relaxing bliss.  Sleep in the next morning, or if you're a natural riser just enjoy a little more time in bed.  Let yourself be pampered by drinking your coffee or tea surrounded by your comfy pillows.


Eat good foods

You may want to take a trip to a farmer's market by yourself.  Surround yourself with good, healthy foods that make you feel good when you eat them.  Cook yourself your favorite breakfast or lunch if you can't really get away.  Enjoy the meal slowly & with out distraction.


Unplug

The best part about moving to a different place in your house, outside, or to a whole new venue is that you can leave your phone alone.  Unplug from your devices and plug into yourself.  Use this time to plug into your intuition, learn something new, read a spirituality or self development book.  If you do use an iPad or the like to read ebooks, consider turning the data or the wifi off so you're not distracted by notifications that come through.  I like to put my devices in night shift mode if I'm able to do so.

Get creative

Currently were going through a major lunar phase here - we're working through not one, but two lunar cycles where the new moon will fall in Leo.  Leo asks us to be passionate & creative.  Leo asks us to express from the heart! Self care is about working with your self to be your best self.  Take the time during a retreat like this to make something.  Paint, draw, craft, try something new.  Even an art journal can be a great way to work towards self care.  I'm sharing in the Live Creatively Facebook group some journal prompts to get you through this lunar cycle & connect you with your Heart Chakra.  The prompts are based off of the cards in the Connected Chakras Affirmation deck which you can purchase here.  So be sure to jump over to the group for creative inspiration!

A self care retreat can be as elaborate as you need it to be.  I would say if you can't dedicate a whole weekend, dedicate one day or even a solid afternoon.  Don't do this in haste!  Take a good 5 or 6 hours to focus on you.  This is not something you want to rush.

Hopefully a retreat here & there will realign you with yourself and enlighten your creativity.

How do you implement self care?  What routines are important to you?  Share in the comments below or in the Five Sixteenths Blog | Live Creatively Facebook group.

xox, Moe

7.24.2017

Make it Monday // How to Make & Use a Mala Neckalce for Mindfulness

A big part of my personal mediation practice is to use a Mala necklace, or mediation beads, to help reinforce the mantras & vision I've chosen for myself.  Using meditation beads is a great habit to get into especially if you find your mind wanders quite a lot during mediation.  You may find having a manual way to focus your thoughts will help center you better.
How to Make and Use Mala Beads
this post contains affiliate links, please read my full disclosure here

While meditation isn't about the absence of thought, sometimes when I find I am very, very busy my mind seriously wants to think about every single thing I need to do.  Counting the beads & repeating a mantra keeps my intentions in line.  You can buy a Mala aligned with your intentions, I have quite a few (because they are both helpful and pretty) or you can take it to the next step and make your own.


What is a Mala?

A Mala is a string of 108 beads + one guru bead (or a fraction of this number). Usually strung into a certain pattern, the Mala is used to pace & count off the recitation of a mantra during mediation.  They can be made for specific intentions - Rose Quartz beads for love, Howlite for calming & awareness, etc - or can be made & programmed for your own intentions.  Most often there is a knot between each bead so if the Mala breaks beads don't scatter.  It's also a good sign if your Mala breaks.  You've made a breakthrough & have been seeing through your intention.


How to make a Mala

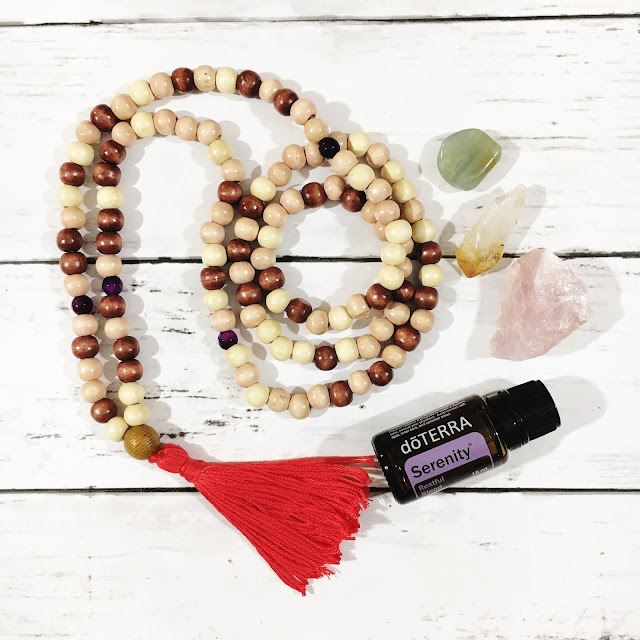
In this case we won't be tying a knot between each bead.  This Mala DIY is made to be simple yet elegant to get you into reciting and working towards your intentions.  I plan on sharing a more focused DIY Mala in the future.  But the whole point here is that you don't have to do these long drawn out things to start with your spiritual & mindful practice.
DIY Tassel Necklace
Shop the supplies on Amazon below!
supplies // 2 skeins embroidery thread, 104 wooden beads, 4 glass beads, 1 large wooden bead, scissors, needle

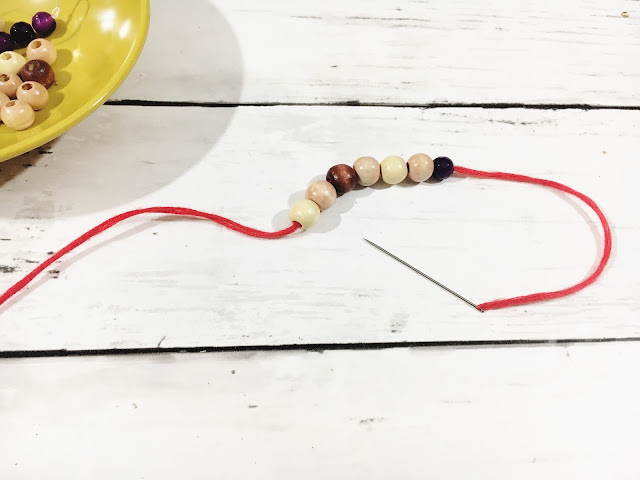
Cut a length of the embroidery thread about 36 inches long, thread the needle and double over the entire length of the string.  Leaving about a 4 inch section empty, begin threading the beads onto the string in the following pattern:
How to Bead a Mala Necklace
6 wooden beads, 1 glass bead, 20 wooden beads, 1 glass bead, 52 wooden beads, 1 glass bead, 20 wooden beads, 1 glass bead, 6 wooden beads
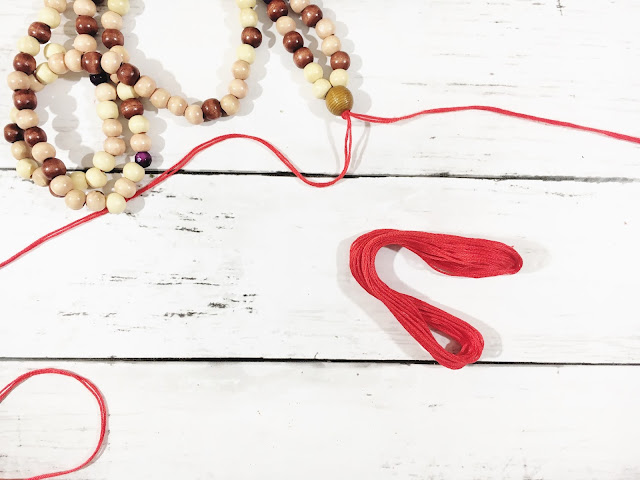
Thread the larger bead on both ends of the string and tie an overhand knot.  Depending on the opening on the larger bead you may need to tie a few knots.
How to make a tassel necklace
DIY Tassel Necklace
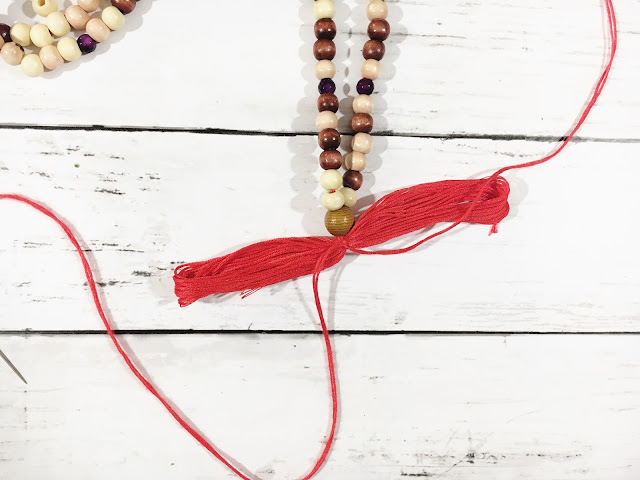
Take the other skein of embroidery thread and fold it over on itself to create a tassel.  Tie the middle of the loop to the end of the larger bead using the two strands hanging from the bead.  Wrap the two long strands around the tassel to gather it together.  Using the needle. thread the end behind the wrapped string leaving a small loop.  Pass the needle through the loop to secure.  Tie a not to ensure it does not unravel.

How to Program & Use your Mala

To cleanse your Mala, you can start off with the same idea behind the Energy Clearing kit.  Choose the intention you'd like to set - this can be different for each time you meditate if you wish.  Again, this ritual can be as involved or as simple as you'd like.

You don't need anything special to do this. In fact, the ritual should be unique to you and be what you feel most connected to.  Here is my simple ritual -

Cup the Mala in your hands as if you are praying & hold it up as if you are offering it.  I tend to bow my head and place the thumbs of my folded hands against my crown chakra.  Imagine a white light enveloping the beads, cleansing them of past energies and aligning them for your highest good.  Take a few deep breaths during this process.  Recite aloud or in your mind an intention you'd like to work towards for your highest good.  As an example:
I cleanse this Mala to use for my highest good as I work towards self love.
Substitute self love for any intention - I wish to be open to abundance, I wish to express my authentic self, etc.  As you pass your folded hands from your Crown Chakra to your Heart Chakra breath out and across your beads.  Sweeping away the negative energy.  Pull your folded hands towards your chest and lift your head towards the sky to be open to receive the guidance you wish for.
Charge a Mala Necklace
I find that I do this often with crystals as well...and it's something I just fell into once during a crystal meditation.  I hadn't brought any of my crystals to this class (silly me!) so I was able to work with a beautiful Aqua Aura Quartz that belonged to the teacher.  After I picked it up I just imagined clearing it that way....and that's what I did.  Clearing & connecting with your spiritual tools is a personal journey.  There's no right or wrong way to work with what you feel drawn to.

So, now during your meditation you can pick up your Mala and count off your recitations.  Hold the Mala in the hand your feel comfortable and as you recite your mantra (aloud or in your mind) pass a bead between your fingers.  I usually hold the remaining beads in the hand that isn't counting so they don't rattle, fall, or get tangled. If you're not sure of a mantra to use consider printing out the Positive Affirmation Deck for free on the blog or you can even purchase my new Chakra Affirmation deck here!


Grab the Free Ebook!

* indicates required


Your meditation practice should be unique to you.  I chose to create this Mala DIY with wooden beads as they can be the most receptive to your intentions.  If you choose to work with a certain crystal or even a certain color tassel to align with your Chakras, that is completely up to you!  I also use essential oils when I'm meditating.  There are certain oils that correspond to our Chakras but there is also some intuitive work that can be done.  Check out the free getting started guide above to learn how to use Essential Oils Spiritually.

Making this little guy should be a mindful and exciting experience.  If you'd like to diffuse some Essential Oils while you're reciting your mantras - maybe your on the go and have just sneaked off for a little me time - make this diffuser bracelet with Howlite and Lava beads!  Find some inspirational blends here & don't forget to join the Five Sixteenths Blog | Live Creatively Facebook group for more positive inspiration!

How do you practice mindfulness and self improvement?

xoxo, Moe

Ready to get started on your Essential Oil Journey?  Click here to learn more about doTERRA!

7.20.2017

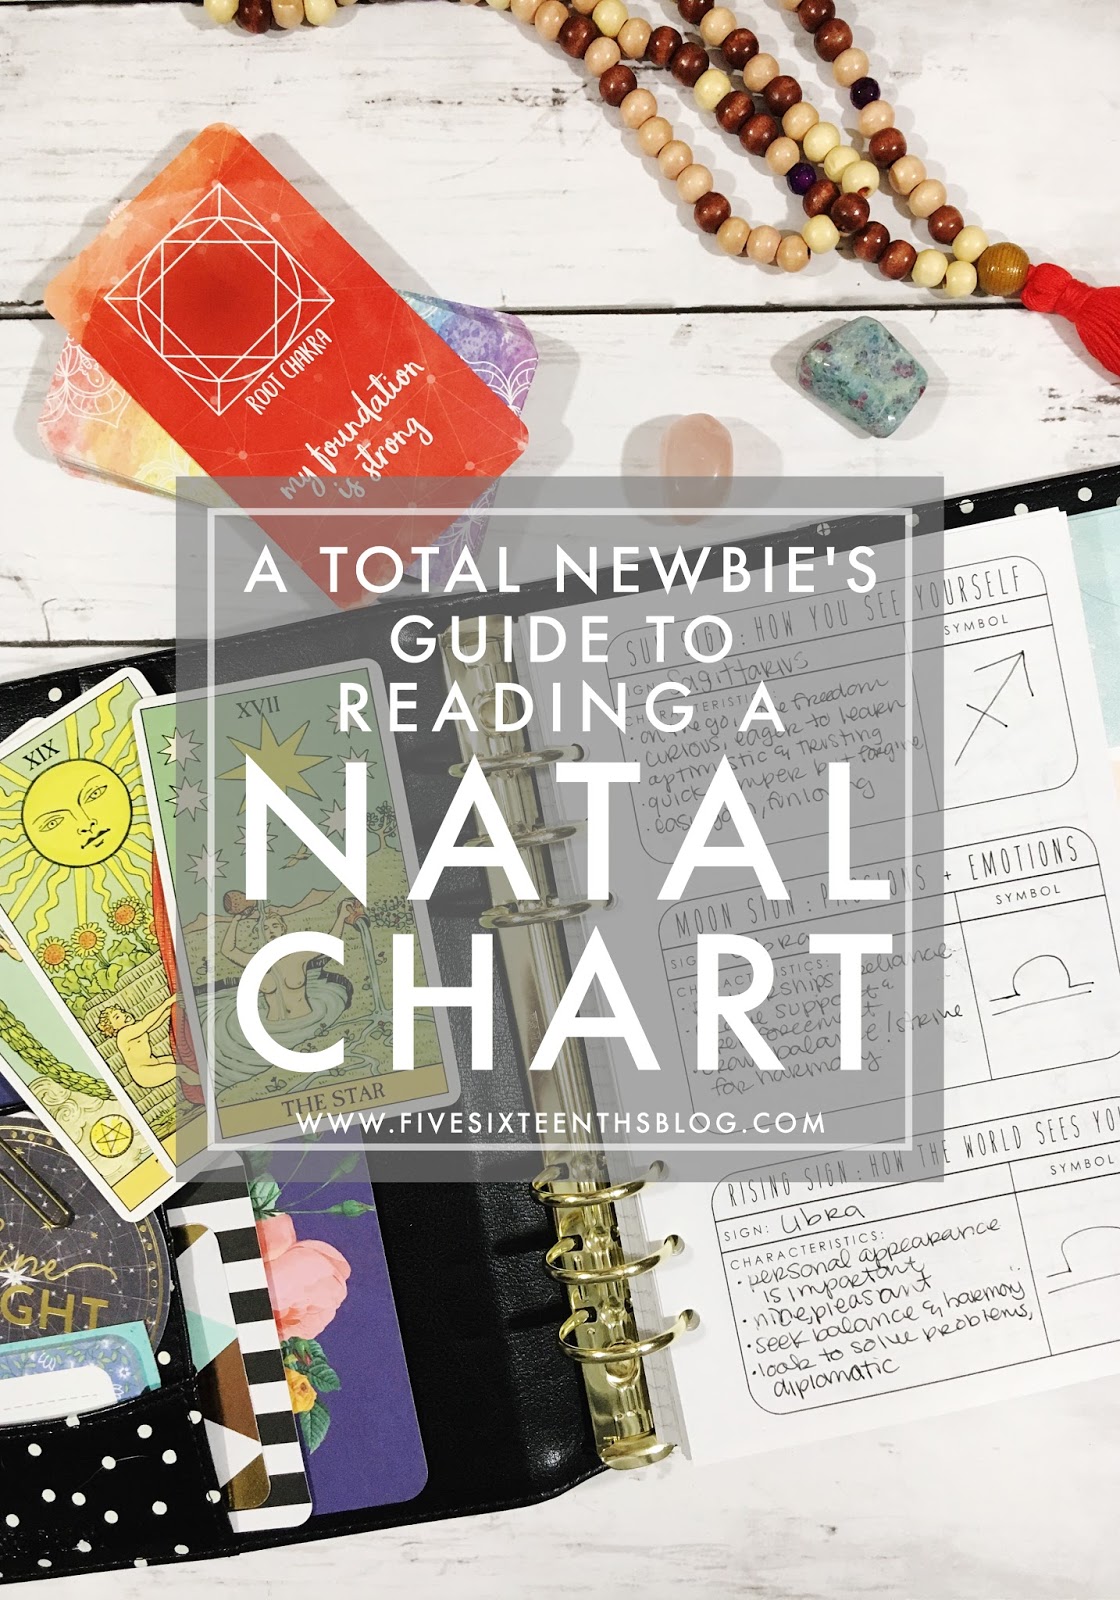
Total Newbie's Guide to the Natal Chart (+ a Workbook!)

A natal chart - or birth chart - is an astrological snapshot of where the planets were (in relation to earth) on the day of your birth.  Analyzing your natal chart can give you an in depth look at who you are & tell you where you may want to focus your efforts in order to become the best person you can be.  You'll learn that you have these little quirks for a reason and may figure out the hidden meaning behind a certain habit of yours.  I know I'm learning a lot from mine
Newbies Guide to Reading a Natal Chart
this post contains affiliate links, please read my full disclosure here.
One of the best things about the internet is you can generate your birth chart, for free, on quite a few different sites (this is the one I used).  These sites will give you all sorts of in depth information on your chart but it can be hard to sort through.  Two of my favorite resources are Cafe Astrology & Dark Pixie Astrology.  You can also get a chart reading by a professional - that is the route I went when I was first interested in my natal chart.  I worked with Madeleine Jones.

If you're down to learn a bit on your own, here are the three sections of your chart that can help you get started understanding this snapshot of yourself:

Sun, Moon, & Rising Signs

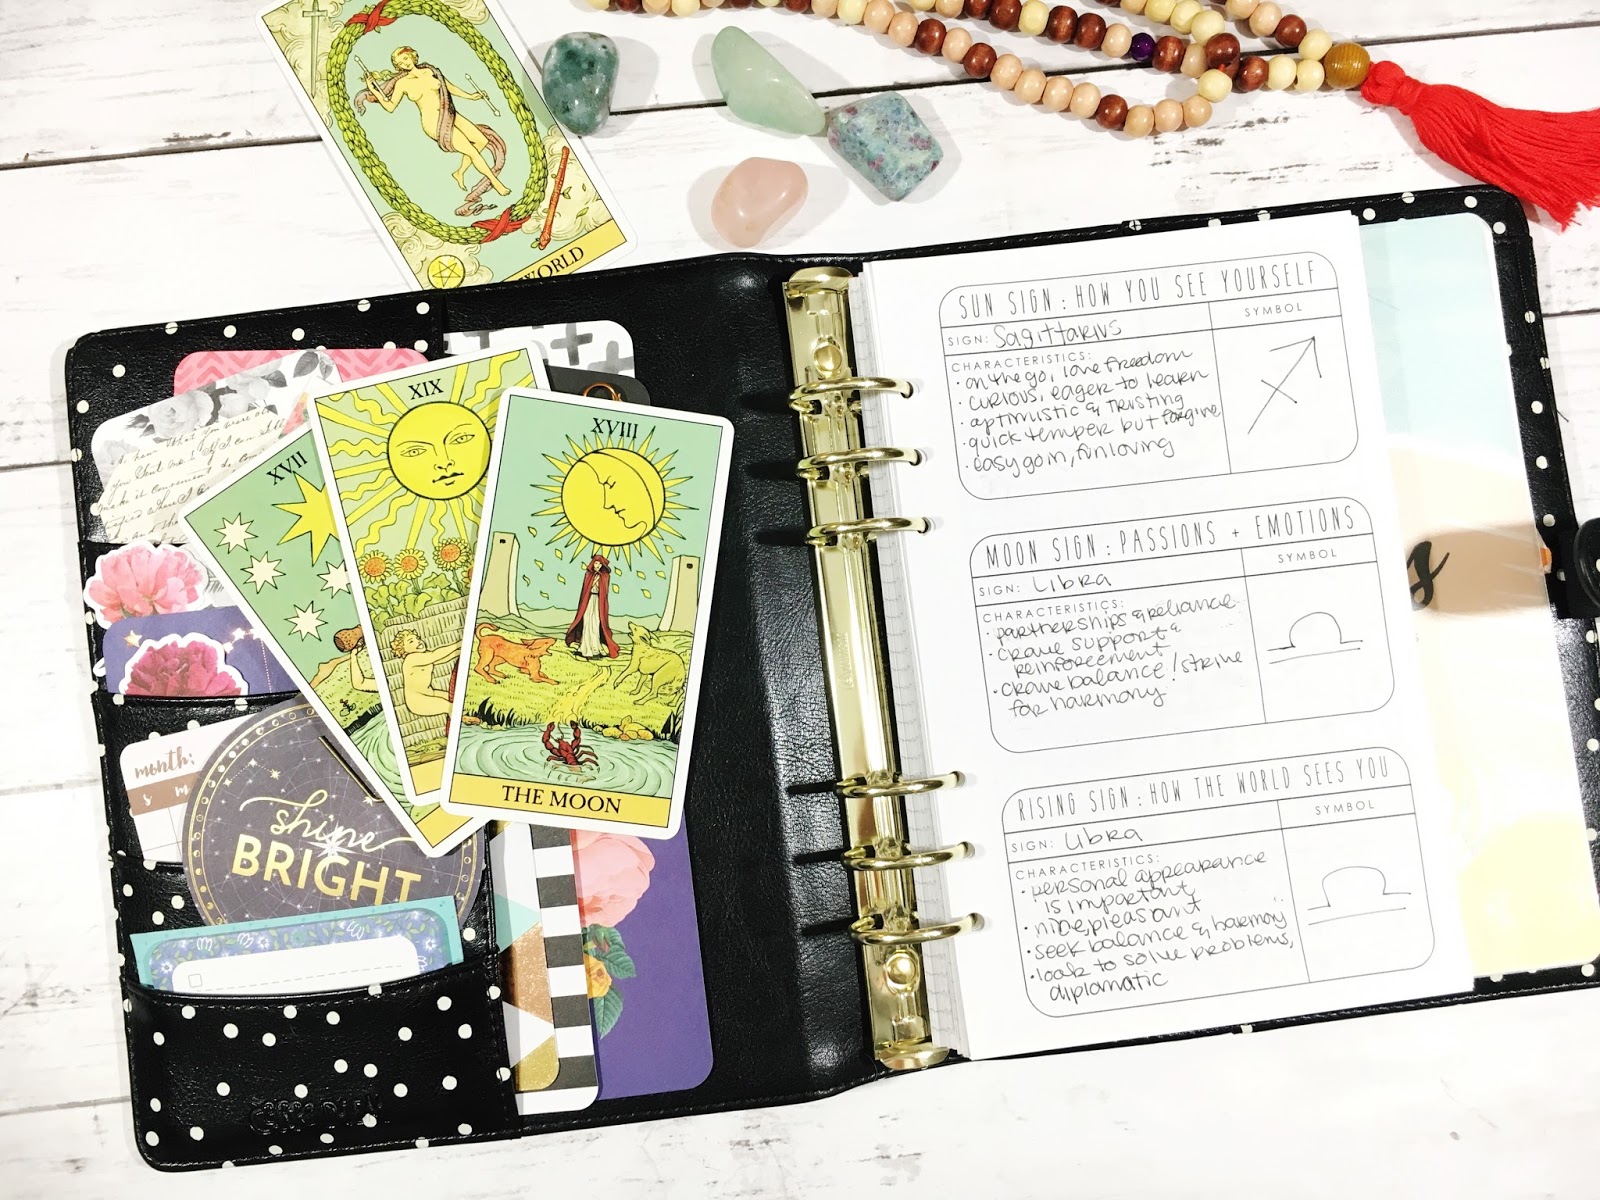
If you've ever read your horoscope, you've probably read for your Sun sign.  This is the sign that is based off of the month you were born.  For example, I was born 12/15 so my sign is Sagittarius because that date falls with in the range of November 22 - December 21.  You may not know your moon or rising sign.  Generating your birth chart will tell you both of these by utilizing the exact time of your birth as well as your location.
Sun Moon and Rising Signs
This gives you a better idea of your whole self. If you just rely on your Sun sign you're getting a limited view of who you are.  Your sun sign is how you feel about yourself.  It is the key essence of who you are.  Your moon sign represents your passions & emotions.  Your rising sign represents what you aspire to be & is how others see you.  Your rising sign is what you try to present to the world.  All three of these signs have traits that make up our whole selves and when reading 

Wheel of Houses

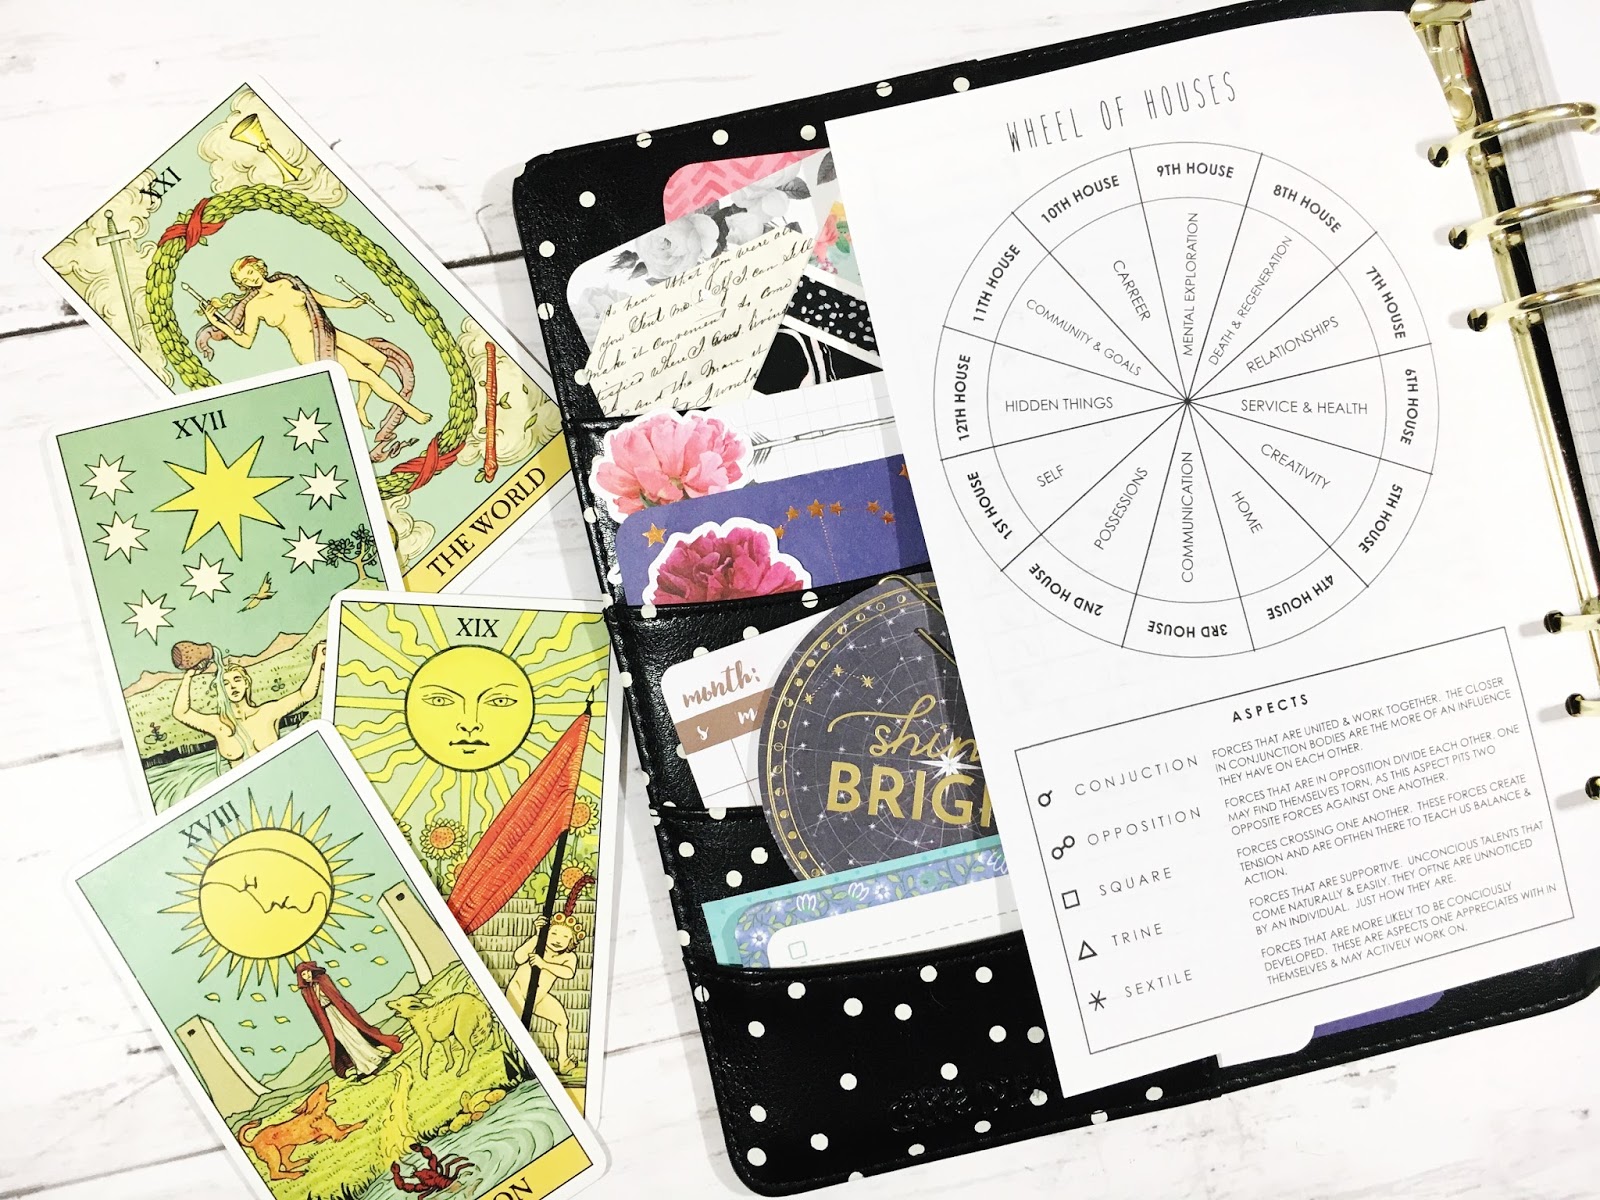
There are 12 astrological houses that correspond to the same signs as the zodiac.  However, the zodiac wheel and the wheel of houses are two different things - The Wheel of houses in your birth chart is based on the earths rotation on it's axis in a 24 hour period.  Your personal Wheel of Houses is determined by your birth time and location.  It is a map of the sky at the time and area of your birth.  
Wheel of Houses Birth Chart
Various planets fall in your houses on your birth chart - the planets (including planets like Mars, Jupiter, etc + the Sun and the Moon) of the chart show how the signs in the houses express themselves.  The houses show in what area this will play out.

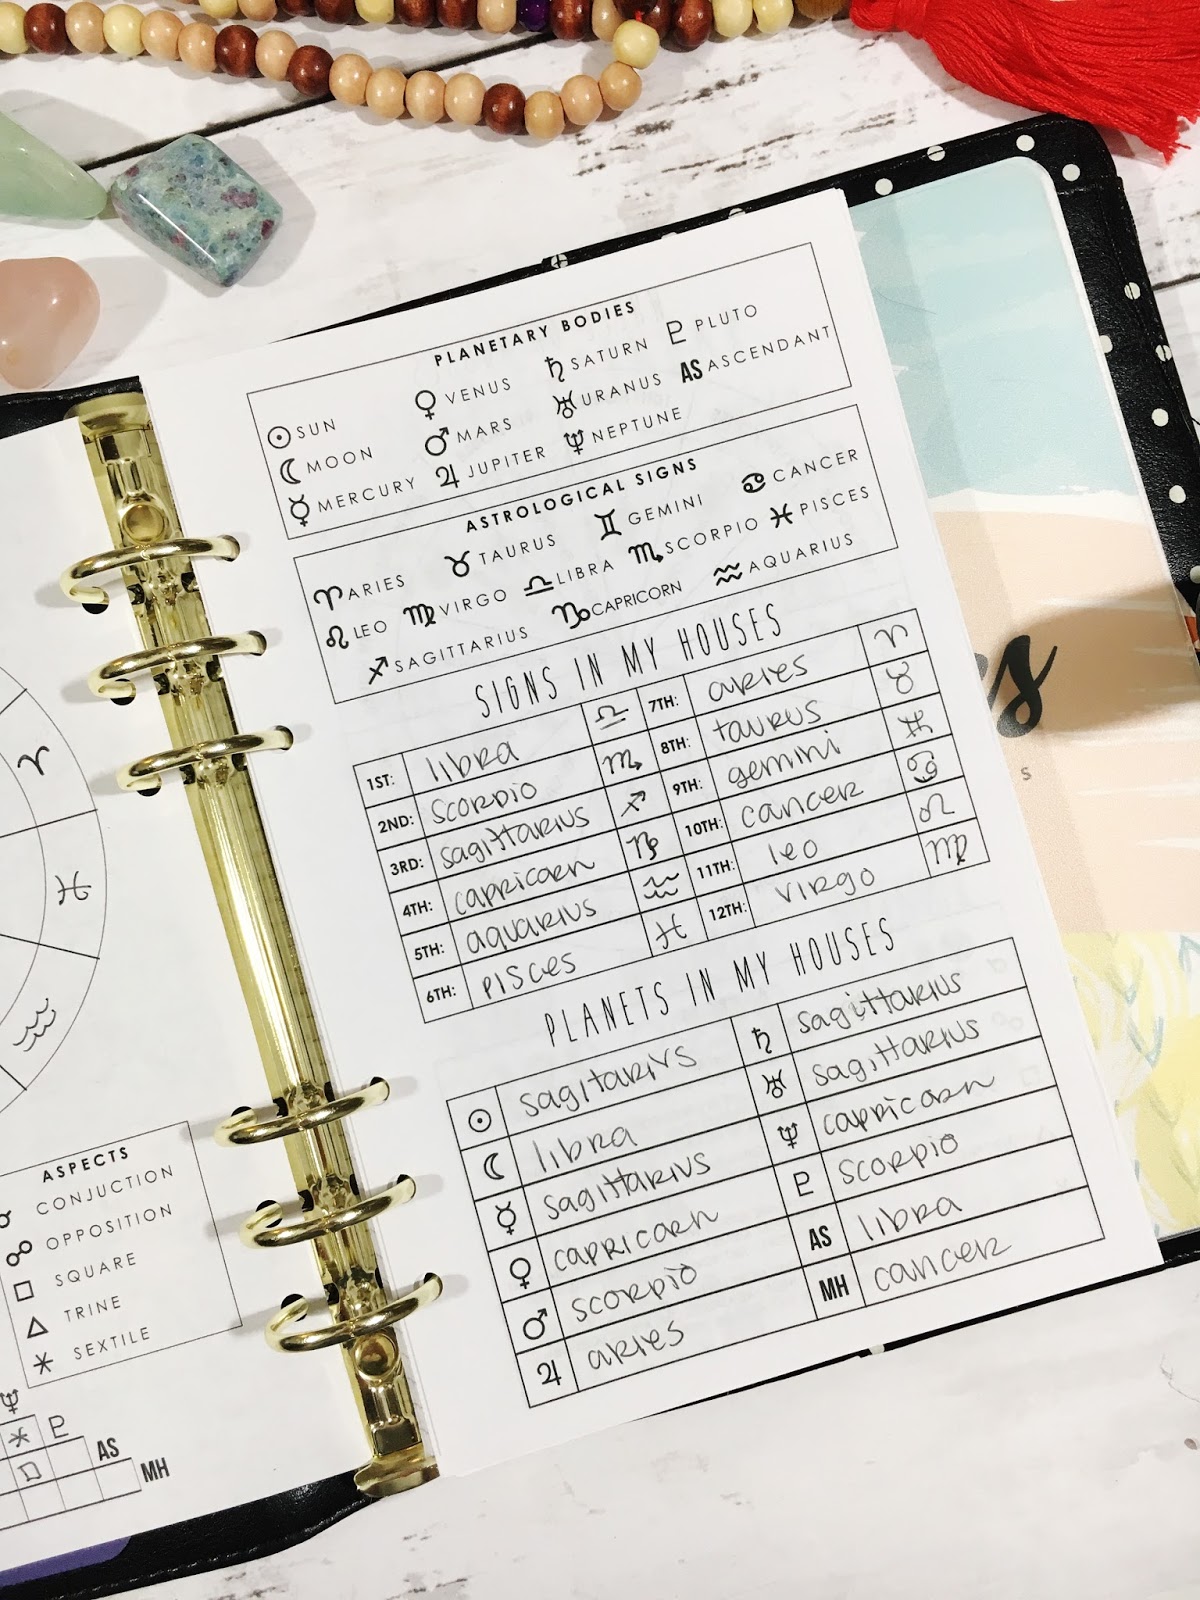
So for example - I have Aries on the seventh house cusp + Jupiter in the 7th house, therefore Jupiter shows how the sign of Aries plays in my house of Marriage & Relationships.   The 12 houses are:
  1. Self
  2. Possessions
  3. Communication
  4. Home
  5. Creativity
  6. Service & Health
  7. Marriage & Relationships
  8. Death & Regeneration
  9. Mental Exploration
  10. Career
  11. Community & Goals
  12. Inner or Hidden Self
If you imagine your birth chart as a clock, the first house falls below the 9 o'clock position.  Then you work counter clockwise around.  The 12 house then falls in the 10 o'clock position.  These houses are the main sections of your life.  The planets that fall in these houses or specifically rule these houses have an impact on those areas of your life.
Reading a Birth Chart

Planetary Relationships

The relationships of the planets to each other is another key part of reading your natal chart.  These are degrees of separation between the planets.  These relationships allow for more fined tuned understanding of the planets and show us where positive or negative or ease or difficulty expressed in these relationships.  This is also an important layer of your chart, just like only reading your sun sign gives you a limited view, ignoring these aspects gives you a limited view of how your planets interact.  

*****

Now, this obviously isn't all there is to know about natal charts.  I'm just a newb sharing what I've learned so far, in the easiest way possible.  So you may be wondering how you should put this into action for yourself.  I suggest starting with your Sun, Moon and Rising signs as well as the characteristics of each of your houses.  For example - my house of Communication (the third house) has Sagittarius on the cusp, so I'm talkative (check) and love to learn (check).  My moon sign is Libra which speaks to how I have a desire for a calm and balanced life.  Libra as a moon sign also apparently leans towards an extreme dislike of manual labor and I truly hate yard work...so there's got to be some validity here.
Creating a Natal Chart
Learn these guys and how the relate to you, first.  The first step here is to gain a better understanding of yourself.  I've seen that working with your natal chart can help you discover the small tidbits of yourself you can't put into words or, even better, the tidbits of yourself that seem contradictory. These small sections will help you get a good snapshot of who you are.  If you assemble this and think 'hey, this is cool!' you may be pointed into the next steps to take to work with more parts of your natal chart.

You don't have to do it all at once.


My current trajectory with my natal chart is to work the rising new moon energies into the house it is currently rising in.  For example, in May the new moon rose in Gemini.  Gemini is my house of Mental Exploration.  Gemini is also about communication.  So my work that month was in listening & learning and working with the Throat Chakra.  However you feel called to work with this chart is how you should work with it.  I plan to continue this work in the foreseeable future and then work in the aspects and planetary relationships when I am ready.

I've put together a little workbook for you to assemble all this knowledge & get to know yourself better through your natal chart.  If you sign up for the newsletter above you not only get the monthly newsletter but you'll also get New & Full moon emails!  We'll work together during the moon phases to manifest our goals & release what isn't serving us.  Most of the time we'll work with a chakra that corresponds to the sign the moon is rising in.  You can follow along with your own natal chart or just work with our collective goals for the month.
Lunar Newsletter

Subscribe to our mailing list to download the eBook.

* indicates required

Once you subscribe above, check your email for the confirmation.  Then, in a few minutes you should receive a second email with your workbook!

This little workbook is sized perfectly to fit into an A5 planner.  These guys can print back to front (refer to your printer's instructions for duplex printing) on a standard letter size page.  Trim down the center & then punch it into your binder.  Then get to know yourself!

I hope this loooooonnnnggg post has helped you learn more about reading your natal chart.  Like I mentioned, this is not a comprehensive guide...just something to dip your toes in!  Just like me!  If you haven't joined the Five Sixteenths Blog | Live Creatively group on Facebook...c'mon over there too!

Shop Recommended Products on Amazon

Looking for the Tarot deck used in the post?  It's the After Tarot & you can find it here.  Planner is from Simple Stories, find it here.

Are you interested in your natal chart?  Do you read your horoscopes?

xoxo, Moe
7.19.2017

Eight Ways I Currently Use Essential Oils Daily

If you haven't been hanging around on the blog too long, you might not know that Essential Oils have become my number one jam recently.  Currently, my main focus is using them to enhance mindfulness and help with my spiritual journey.  But I've found that I'm using them in a ton of different ways that that.  Practical ways at that!  I'm using essential oils in everyday ways too. These potent little guys fit right into your everyday routine - and can even replace some products you use consistently!  Here are the six ways I use essential oils regularly:
how to use essential oils daily
this post contains affiliate links, please read my full disclosure here.

Add a drop (or two!) to club soda/sparkling water

I just did this last night & that's what prompted this post.  I'm seriously considering giving up LaCroix + getting a Soda Stream to make my own sparkling water!  Self sufficient hydration up in here!  Did you know that there are only certain oils that you can ingest?  One - not all lemon or peppermint, etc oils are created equally & not all are safe to ingest.  The generic lemon oil you may pick up at the drugstore to make your cleaning products with or diffuse through your house might not be approved to take internally.  This is why I get my oils through doTERRA, as certain oils they offer - Lime, Grapefruit, Oregeno, Peppermint, etc - are safe to cook with & ingest.  I personally would not suggest staring to do this everyday depending on the oils you used, but its a great alternative to processed carbonated drinks.  Keep in mind that citrus oils can break down plastics.  I always use a glass container to drink from.

Diffuse to promote sleep

I always, always, always, diffuses something overnight to promote relaxation and sleep.  Currently I am diffusing a blend of Wild Orange, Lavender, & Vetiver.  I've been known to mix the Breathe blend from doTERRA and Lavender, Cedarwood and Lavender, Frankincense and Lavender, pretty much anything and Lavender since it's know to be relaxing.  Before I started to work with doTERRA oils I despised the smell of lavender.  The oils from doTERRA are very pure and its the only Lavender anything I've repurchased.


Immune support

The On Guard blend really, really shortens my colds.  Diffusing the blend when I need a bit of immune support gives me some peace of mind!  I remember when I first started working with essential oils I'd gotten a cold.  I thought 'what could it hurt?' and it really soothed my throat, opened my airways, and shortened my cold.  There is a whole line of On Guard products I'm dying to try.


Spiritual healing & alignment

Here's the big one.  I work with essential oils mainly in my spiritual practice.  My spiritual practice isn't something that is really defined by a book, it's rather intuitive.  This is my favorite way to work with essential oils because I can really hone in on what my spirit & body need.  For example, this last month (July 2017) I worked with my Solar Plexus chakra to nurture & support myself.  The main oil I chose to work with was Wild Orange.  I used my intuition to create different blends with Wild Orange as the base to uplift & to nurture.  If you haven't joined the Live Creative Facebook group, you really should get over there!  I share so many essential oil & crystal pairings.  Click here to join.


Mood enhancing roller ball

This goes a long with the spiritual use of oils.  I try to work with a certain oil + supporting oils over a month to really connect with the oil.  I've created a few roller bottles that are specific to the moods I'd like to encourage.  Balance is a blend created by doTERRA that I really connect with.  It grounds me, balances me, and brings me calm.  Using Wild Orange + Bergamot is a great way to brighten & uplift.  

Dishwasher tabs

I honestly was sick of buying the tabs for so much money!  So I decided to make my own with washing soda, baking soda, kosher salt, & lemon essential oil.  Clean dishes is a win.  Honestly, what other cleaning concoctions can I make?


Air & Fabric Deodorizer 

The purify blend is perfect for this!  Seriously.  Trash sit a little too long? Diffuse Purify.  Jacket just a teeny bit stinky? Spray some diluted Purify right on there.  Car a little too fast food friendly?  Get your Purify out.  So easy.


Blemish treatment + skin care 

I've been using Tea Tree oil for a long time to treat any blemishes on my face. But there are quite a few oils that can work great for the skin - Frankincense & Myrrh to name some.  Each time I have a break out I put a dab of Tea Tree oil right on the blemish!

So those are the 8 way I use essential oils daily.  I've found that I can fit these guys right into my regular routine with little effort!  Its so funny how I've found so many uses and I didn't even know it until I compiled this list!  Originally I'd only considered 5 or 6 uses...I came up with a few more as I was writing!


Grab the Free Ebook!

* indicates required


This is a completely personal regimen of mine - some individuals that use essential oils do not ingest them, some only diffuse them.  I would suggest speaking to your doctor if you have any concerns.  This article is not intended to diagnose or treat any ailment.  Please let me know if I might be able to answer any questions about essential oils for you!

Let me know how you use essential oils - doTERRA brand or otherwise - over in the Five Sixteenths Blog | Live Creative Facebook group.  I'd love to know which oils you connect with! You can read more about essential oils on the blog here.

How do you use essential oils?  Any tips, recipes, tricks?
xoxo, Moe

Ready to get started on your Essential Oil Journey?  Click here to learn more about doTERRA!

7.14.2017

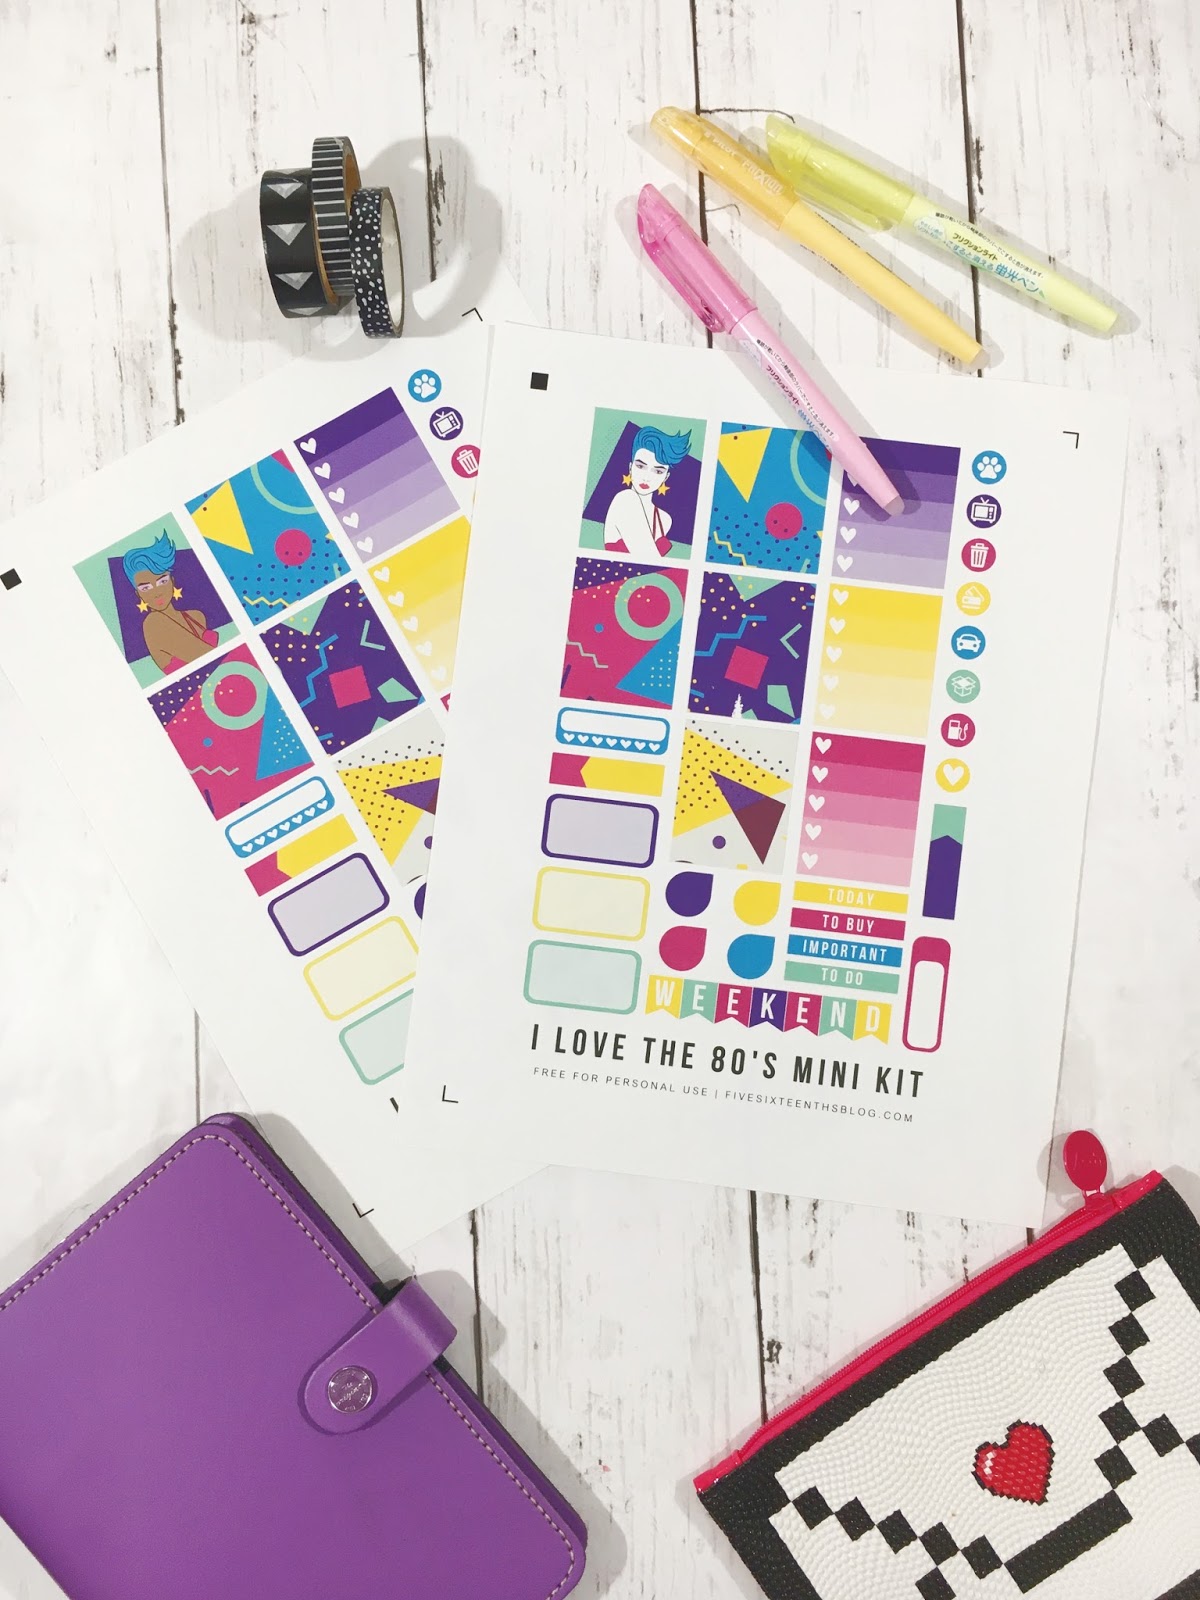
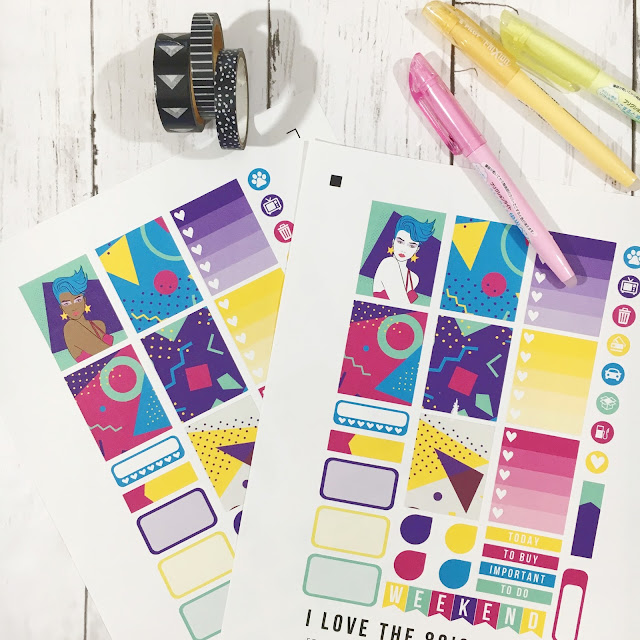
Free Sticker Friday // I Love the 80's Mini Kit

When I was younger my sister, brother, & I used to watch Saved by the Bell nearly every morning during breakfast.  I mean Kelly Kapowski is still a style icon of mine and literally the reason I love LuLaRoe because of the amazing 80's inspired patterns.  I mean, I still tie my Carly dresses into knots...I'm so down with that.  I'm not sure if the 80's are making a comeback, but I'm bringing it back with my clothes and with this mini kit.  I was born in the late 80's and was only 3 when the decade was over.
Free Weekly Planner Stickers
I still have nostalgia for a lot of retro things - like give me an avacodo colored kitchen from the 70's any day of the week and I'll also take an 80's poofy prom dress please.  Being a person that loves a really good thrift store, retro holds a big piece of my heart.

DOWNLOAD I LOVE THE 80'S KIT HERE


In this download you'll find PNG files to cut with your Cricut Explore, studio files to cut with your Silhouette Cameo or Portrait, as well as a PDF to cut by hand (though this tool is pretty neat).  There are also two skin tones to choose from - both 80's ladies have blue hair, pink shirt, and amazing purple eyeshadow.  Remember to size the files to 5.5 x 8 inches in Cricut Design Space.
Planner Stickers for Cricut Explore
Remember, all printable files on the blog are for personal use only.  Do not claim any part of the design as your own.  Do not sell the digital file or sell the printed product.  Do not print and distribute in mass quantities.  As always, thank you for playing nice.

If you're planning an 80's themed party or just want to throw it back a few decades, this kit is perfect.  I like to use these smaller kits in my Memory Planner since I combine a bunch of different kits, leftovers, and decorative stickers together.  But this is also perfect to use in something like the Mini Happy Planner.  Make sure you check out my YouTube channel for fun plan with me videos!

Shop Related Products on Amazon!

If you want a quick lesson on how to cut the stickers posted on the blog (and the Cricut Ready Planner Sticker Group) with your Cricut Explore, check out this video.  You can also learn to design your own stickers - check this playlist for tips!

Do you have a decade of style you love?  How do you throw it back?

xoxo, Moe

7.12.2017

Cultural Appropriation in my Communities

I am a part of three major communities - the blogging community, the witchy/woowoo/tarot community, and the planner community.  Each of these communities has it's own version of cultural appropriation...and it really bugs me.
Hear me out now..I don't think I'm over reacting.  I don't like to add disclaimers, but I'm adding one : If you don't agree with me or don't find problem in this, okay.  That's great, please go about your day. (/sarcasm)  But if it even irks you in the slightest, I ask you to take action.  I also ask for grace as I am doing my best to explain this feeling in this blog post.

First off, in the last few years certain things have been brought to the forefront of our attention.  If you've noticed that everyone is talking about Cultural Appropriation its because, well, they are.  CA is not something new..it's been around for ages.  I am also not an expert, I am merely examining my privilege and sharing experiences.  In each of these communities I get really put off by the use of terms originating from other cultures so.......willy nilly.

Most notably the use of words originating Native American or First American & African American culture.  No, I will not join your tribe.  No, we're not going to have a blogging powwow.  No, I'm not a spiritual gansta.  Less often I've seen the word ghetto or other terms from AAVE (African American Vernacular English) used wholeheartedly to describe something they shouldn't be used to describe.  You're glorifying a culture while simultaneously marginalizing it.  YOU'RE not a part of that culture, so you don't need to be using those words.  It is for this reason I chose to call my energy clearing kit DIY an Energy Clearing Kit DIY and not a smudging kit - those are not my words. I can not use them.  I even touch on that in the actual blog post.

The second thing I've seen quite often is the use of imagery that originates from another culture because it's pretty.  Dream catchers are pretty.  Sugar skulls are pretty.  Feathers, tipi , headdresses, etc, etc are pretty.  But the aren't yours.  Again, glorifying an aspect of a culture while not supporting it....is not a good thing to do.

In the witchy/woowoo/tarot community I've seen Spirit Animal, tribe, & smudging used too much.  There are things that I struggle with - am I allowed to use the term Chakra?  Does that fall under cultural appropriation (CA), or not? If its not my word I should not use it.  Just because it is popular doesn't mean it is right.  There are generic terms for many things and there is no reason to use a sugar skull for decor.

Cultural appropriation is a very, very real deal.  When we use terms or images because they are hip, trendy, cool, fun, pretty, etc while simultaneously marginalizing the group that they come from - that's not appreciating the culture, that is appropriating it.  If you have to sacrifice the alliteration & trendiness of your tag line for respect, then you know...you should do that.  Its not a sacrifice for you to respect others.

I'm not perfect on this.  But like any person who wishes to grow the community in which they live, I must change.  I must keep up with it, be aware of my words, and use them intentionally.  And speak up when I see it.

Thank you for taking the time to read this post.  I hope that you've gained insight into cultural appropriation and may be able to notice it in your communities.  I hope that you will speak up & also change your ways to respect others.

Please let me know how you feel on this subject down in the comments or over in the Five Sixteenths Blog | Live Creatively Facebook group.

I couldn't find the original article/blog post I read that really inspired this post, but I consulted the following article while writing this ::  6 Ways You Harm Me When You Appropriate Black Culture – And How to Appreciate It Instead.  It is a good read and breaks down how black culture is commercialized and sold to the white population - it's cool & trendy while its commercialization doesn't support the original culture.  Please take time to read it. 

xoxo, Moe

7.10.2017

Make it Monday // Branded Blog Image Templates Using PicMonkey

A while ago, PicMonkey introduced Templates to their photo editing options.  These are great for making graphic projects like cards, invites, social media posts.  But, I think the greatest thing you can use this feature for is to create branded blog images!  Pair the template feature with Hub + some stock photos and you've got yourself a consistent look in no time.
this post contains affiliate links, please read my full disclosure here.

Start by choosing a template to work with.  You may want to choose from the Long Pin tag or the Pinterest tag.  To show the template tags (these act like categories) look on the left hand side.  You may have to select Show More Tags to see other options.
Choosing a template that is longer than it is wide is the best way to ensure peak performance on Pinterest.  I used to be a horizontal girl, and it wasn't until recently - like last week! - that I decided to take the leap into vertical images for my blog.  One of the key points to remember when adding images to your blog, though, is to use maximum real estate in the body of your blog post - make your image the width of your body content (learn how to find the width of your blog post here).  PicMonkey limits the width of each of the Pinterest templates to 600px.  If that is too small, you may need to try something like a 6 x 9 inch template, filtering by size.  Additionally, subscribing for the Premium or Supremium account will get you access to many, many more templates (and fonts, and what not!)
Once you've chosen your template, its time to add your image.  Stock photos are a great resource for this if you don't have photos you already take for your blog.  Here's a list of a few stock photo sites I love as well as some tips for using stock photos on your blog.  Today, I'll be using some of the free stock photos I offered here.
Add your image by selecting the butterfly icon on the left hand column, then click on the Your Own button, and selecting My Computer.  You can also use images from Facebook, OneDrive, Flickr, & DropBox.  A little note here - make sure you have permission to use the images you choose commercially.  Free stock photo sites are plentiful, so don't steal any images from google!
Size them, stack them, do whatever you need to do to get the layout you need.  You can also create a collage in PicMonkey first (tutorial here) then upload that collage through the same process.

One of the new features I love is the layers pane.  This places your elements in front of or behind each other to achieve the look you're going for.  Send your pictures behind your text using the down arrow on the pane.  You can also use the Overlay pane to flip the images horizontally or vertically depending on the design you're going for.  I chose to use one image, flipped vertically for this example. 
If you've made a style guide for your blog already, get that info out.  A style guide is a way to keep your blog cohesive, it is in line with your branding.  You'll most likely have 2-3 fonts & colors that you'll use consistently through your blog design, images, and other materials.  Here's another blog post on pairing fonts.
Use these colors & fonts to create a cohesive look to your image.  PicMonkey allows you to access fonts already on your computer as well though their library is pretty extensive too.  If you're designing your blog header in something like PicMonkey you can stick with the fonts they have.  You can even choose fonts that are close enough to the fonts on your template and get away with it.  For example League Gothic is a lot like Bebas Nueue, Didactic Gothic is close to Centruy Gothic, etc.

Change the sizing of the text as needed,  Pay attention to how it looks here - you don't have to be a design pro to understand when something looks yikes!, meh, good, or great.  If it looks off, change it...don't just settle for meh!
Once you have the image the way you like it, select the Save button with the little monkey by it on the top of the screen.  This will save your image to the Hub.  The Hub is PicMonkey's cloud storage system.  This way you can edit the template (or photos) over & over again.  This is GREAT for creating branded blog images!  You can go back to your template, with your custom colors, and your custom fonts again, and again, and again, and again!  In order to access hub you'll need a Premium or Supremium plan - it's totally worth it for the access you get to fonts, overlays, storage, etc.  I currently have the Premium plan that only allows 50 hub images.  If you're just creating templates there's really no need to save the image you create every time so you may not even use up the 50 images.  If you create a lot of brand images, the Supremium plan will allow you to categorize your images through Hub.  I suggest upgrading!  You can start a free trial too! Sign up here!

To save the image to your computer, click the Export button at the top.  This will save the image locally to your computer or you can choose either DropBox or OneDrive.  Next, upload the image to your blog post, size it properly, and you're ready to share!  When you're ready to add an image to your next blog post, simply open the image from Hub, Save it as a copy, and edit away! Easy peasy...no complicated software to work with.


I've recently created a FREE ebook called Five Ways to Revamp your Blog Today!  This 10 page book will give you great tips on reviving old posts, automating your process, and keeping you on the right foot!  You can download it by signing up for the newsletter above or by clicking here!

I hope this tutorial inspired you to try PicMonkey for your blog branding.  Its always hard when you're new to something to get a grasp on the process.  PicMonkey makes it super easy to create perfect Pinterest images with out shoveling out hundreds of dollars on design software.

Check out even more of the tutorials on the blog using PicMonkey here!

Happy blogging!

How do you use PicMonkey? Let me know in the comments below or over on the Five Sixteenths Blog | Live Creatively Facebook group!

xoxo, Moe