6.30.2017

Free Sticker Friday // Beach & Pool Day Printable Stickers

Hooray for warm weather!  I can't wait to be able to sit by any body of water I can find and enjoy the sunshine.  Right now, I'm sitting on my porch a lot, soaking up some rays.  I may fill up my kiddie pool, though, and soak in the yard.  It's a sight to see, believe me.  When you don't want to be bothered but you want to have a soak....a kiddie pool in your yard is perfect!
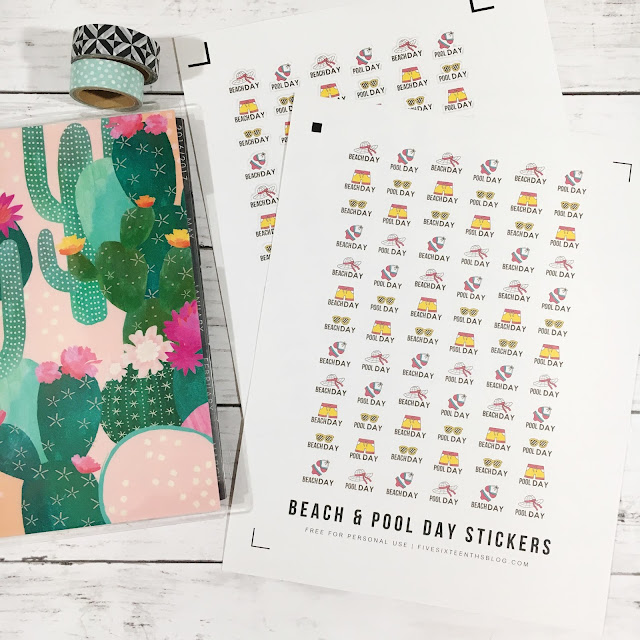
Printable Beach Day Stickers
this post contains affiliate links, please read my full disclosure here.

If you need some stickers to mark down your beach and pool days, I've got you covered.  These are great for when you & your family head out or even perfect for when the kiddos may make a trip to the pool themselves or with friends.  The assorted clip art of this set is too cute and perfect for a fun summer layout.  (Count down to vacation time with this printable and be sure to use this Tropical Getaway Kit when you head out for some vacation timet!)

The download includes a PNG to cut with your Cricut Explore, a PDF to cut by hand (or with this tool), and a studio file to cut with your Silhouette Portrait or Cameo!  Remember to size the image to 5.5 x 8 inches in Cricut Design Space once you upload it!

DOWNLOAD THE SUMMER STICKERS HERE


Remember that all printables here on the blog are for personal use only.  Do not claim any part of the file as your own.  Do not sell the digital or finished product.  Do not print and disseminate in mass quantities.  Thank you for always playing nice.
Printable Pool Day Stickers
I hope you're having a great start to your summer!  Remember to wear sunscreen, a life vest if needed, and just all around be careful!

Join the Cricut Ready Stickers group on Facebook for more FREE sticker to cut with your Cricut Explore!
Happy planning!

xoxo, Moe

6.28.2017

The Sticker Cluster // My New Favorite Planner Decor Trend

I've been using my Mini Happy Planner for quite a while now and love the set up.  Prior to this I struggled with finding the perfect planner layout instead of focusing on using a planner.  At the end of 2015 I switched to a vertical layout in my personal sized planner.  I also continued to use multiple planners - including my Memory Planner - up until quite recently.  But the Mini Happy Planner just gets me.  It just works for me. 
Creating a Sticker Cluster
this post contains affiliate links, please see my full disclosure here.
After I stopped forcing my plans into careful boxes I was free to be creative!  That's what I love about the Mini Happy Planner - there are so many creative ways to use this little guy.  Plus, it fits perfectly in a purse for on the go.  The classic size is just too big for that.

So today I want to talk about the Sticker Cluster.  What the heck is a Sticker Cluster?  Well, it is a purposeful grouping of complimentary stickers (or other decor - die cuts, washi, etc) on a planner page intended to create an area of interest.  These clusters of creativity can be productive, inspirational, or just pretty!  In either of these situations these guys are very useful - if you find it uplifts you, it is useful!  I find that in my Mini Happy Planner, these sticker clusters look great on the lower right hand page.

Sticker Cluster Base
MAMBI Happy Planner Sticker Books
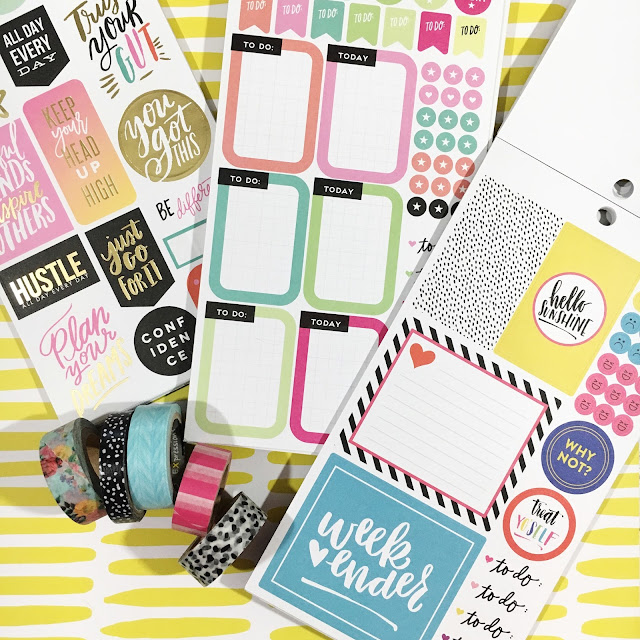
Begin by pairing full box stickers & washi tape in complementary patterns.  Combine a bright floral with black & white stripes, bold & busy patterns with simple ones.  Add deco stickers if they're included in your weekly kit.  If not, the Happy Planner sticker books have a few decorative stickers included. Keep in mind the overall color palette of your weekly set up as well.

The Productive Sticker Cluster
Functional Planner Stickers Mini Happy Planner
Creating a productive sticker cluster means leaving a functional space to write tasks.  Layering a lined box sticker over a bit of washi tape + a motivational header gives the perfect space for prioritizing you to-do's.
The Inspirational Sticker Cluster
Inspirational Planner Stickers
Inspirational Sticker Cluster
Inspiration comes in many shapes & sizes, just like the shapes and sizes of the quote stickers in a ton of the MAMBI Happy Planner sticker books (and other weekly sticker kits!).  I like to do these clusters two ways - using a full box quote sticker or layering multiple, smaller quote stickers.  Both of these styles empower me through the week.  Why yes, I can do it!!

The Pretty Sticker Cluster
Creative Planning in a Mini Happy Planner
Using a lot of deco from your kits or even just layers of patterned boxes & washi is a great way to add some prettiness to your planner page.  This serves to be a little inspiring - especially if you use an inspirational quote - but mostly it's just to be something pretty to look at.  I love these because they just make me happy all week while I'm getting my hustle on.


*****

Another key to these clusters is balance.  You want to evenly distribute the visual weight of the elements across the page.  Think about the layouts that inspire you and the visual balance that you may feel when looking at them.  Check out a few of my Mini Happy Planner Plan with Me videos to get a better idea of what visual balance is.

This visual balance can be created by putting smaller clusters around the pages, leaving white space, & using complementary colors, textures, and patterns.  These are all elements of art and design - and one can have a good eye for these things without formal training!  This is another reason why I love creative and decorative planning - expression through functional surface design.  Man, if you're a creative person and you haven't gotten into creative planning or journaling, I think you're really missing out on a productive stress reliever and creative outlet.

I hope this little trend inspires you to get creative with your planning.  We all need something beautiful to look at, the inspiration is just a side effect!  If you'd like to catch some Mini Happy Planner Plan with Me action, check out my PWM playlist on YouTube.  Two of the images above have corresponding videos!

Shop Related Products on Amazon!

You can save money on the MAMBI sticker packs I used in this post by shopping at Blitsy!  Blitsy has to be my #1 place for saving money on planner supplies!

Do you have a current favorite planner trend?  How do you creatively plan each week?

xoxo, Moe

6.26.2017

Make it Monday // DIY Howlite & Lava Stone Diffuser Bracelet

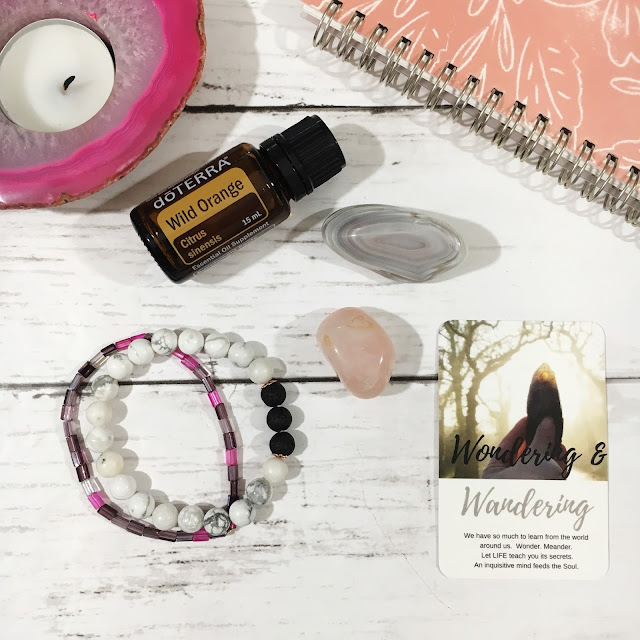
Howlite is a great stone for calming anger, anxiety, & the overactive mind.  It is a stone that seems to aid in balancing many emotions, which makes it perfect for a diffuser bracelet.  In addition to the Howlite stones being calming, Lava stones are also grounding and balancing.  These porous stones work perfectly with Essential oils.
DIY Essential Oil Diffuser Bracelet
this post contains affiliate links, please read my full disclosure here
.
Today I want to share another diffuser jewelry DIY with you - check out the first necklace DIY here.  I love bringing my oils with me everywhere - and jewelry is the best way to do it!  You can breathe in the calming (or invigorating) scent all day.  This diffuser bracelet is very hip but very bohemian and the pop of rose gold metal is very trendy!

Shop Supplies on Amazon!


supplies :: howlite beads, lava stone beads, elastic, super glue, charms (optional)
how to make a beaded bracelet
Cut a length of elastic and thread half of the howlite beads onto the strand.  Add a bead cap, then thread on the 3 lava stone beads.  Finish with another bead cap and the rest of your howlite beads.  The amount of howlite beads may vary depending on your wrist size.

Once the bracelet is big enough to fit around your wrist, tie a knot in the elastic and drop a dot of super glue to keep the knot in place.  This elastic can be kind of slippery so the knots don't hold well by themselves.
If you'd like to add some charms to your bracelet or a tassel, add a jump ring and attach it

Add a few drops of your favorite single essential oils or essential oil blends to the lave stone beads & calm your mind while you work or play!  You may want to make a few bracelets so that your oils don't mix and create unpleasant scents.
Essential Oil Diffuser Bracelet
I keep a bottle of the Balance essential oil blend on my desk at work.  Half the time I've already run out of the house with out my diffuser jewelry so this little stash is perfect.  Uncapping the bottle and breathing in the scent allows me to calm an center myself in just a few breaths.  Scent is a powerful way to make connections - so when you use Balance to consistently calm & center yourself, it becomes easier to do so as you associate that scent with that feeling.
Nurturing Essential Oil
For this lunar cycle, I'm personally focusing on nurture & structure - so the Wild Orange scent is very nurturing and supportive.  I'm also working with Botswana Agate (for security) & Rose quartz (for love).  All of these work beautifully together!
Diffusing Essential Oils with Jewelry
This is currently my favorite nurturing blend - Wild Orange is very uplifting and nurturing, Bergamot is citrusy & bright, while Myrrh balances out the brightness of both citrus oils.  You can find a few more of my favorite blends in this post, too.  I purchase all of my essential oils through Doterra, let me know if you'd like to learn more about the oils!  Find the specific oil blend recipe in the NEW Five Sixteenths Facebook group!  Click here to join!

Essential oils have become a huge part of my spirituality and everyday wellness!  I can't wait to share more with you!

 Do you use essential oils?  Any tips you have for using them daily?

xoxo, Moe

*any advice given in this post is not intended to diagnose or treat any ailment.  Please consult a licensed practitioner for advice.  All information on essential oils is taken from the Doterra website & my personal research.

Ready to get started on your Essential Oil Journey?  Click here to learn more about doTERRA!

6.23.2017

Tarot Diaries // Weekly Planning with the Tarot

Each week I do a weekly reading for myself to understand the theme and energies I may work with in the next week.  While I don't believe that the Tarot is a predictive tool, this spread does help me understand what to plan for in the next week and what I should be working towards for my higher good.  To me, Tarot is a self development tool.  It is a tool that helps us align our selves with the things we must do & be in this life in order to live our best life.
Weekly Planning Tarot Spreadthis post contains affiliate links, please read my full disclosure here.

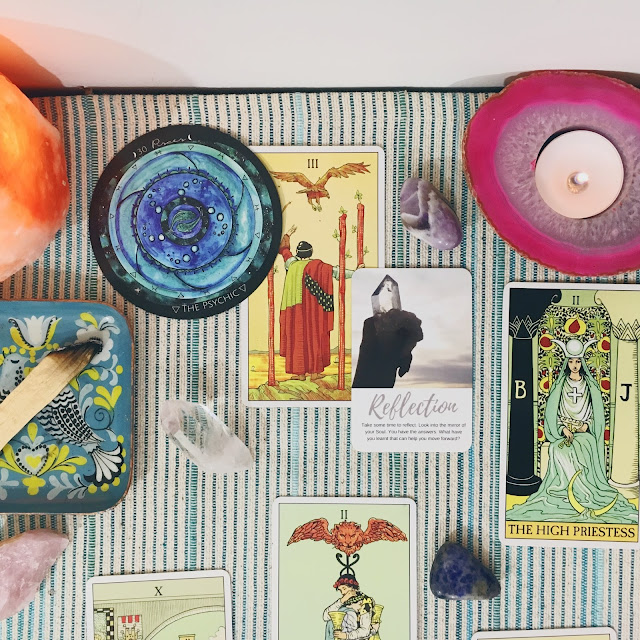
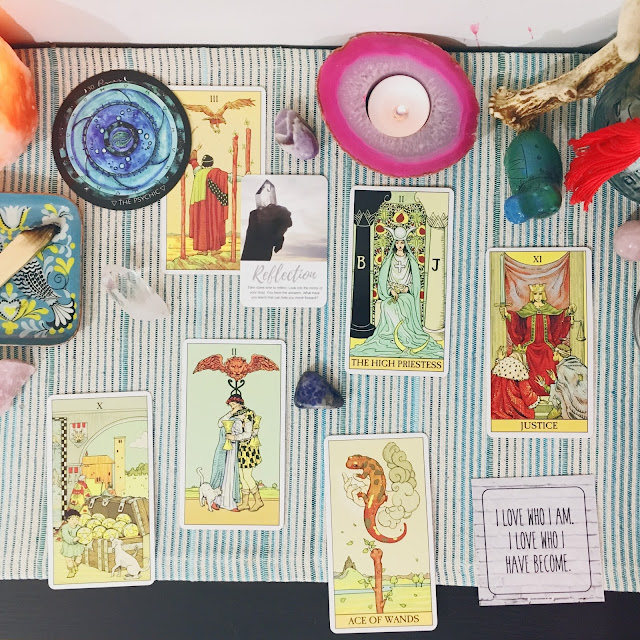
Doing a weekly spread lets me know what may be at play so I can plan my week accordingly.  I do a lot with my blog, YouTube channel, and my day job so anticipating what energies may be at play or what my focus may be during the week allows me to plan.  For example - I'll see what I need to focus on in the next week.  The cards I use here are the After Tarot, the Sacred Wild Soul Soul Searching Deck, and the Spirit De La Lune Deck.  I also use these positive affirmation cards for my mantra for the week.

In the spread above, the beginning of the week will be about reinvesting.  So I should do some work to get things done - reinvest in business, work, etc as demonstrated by the suit of pentacles.  I take this as working on my blog, YouTube, etc because that's always a big focus of mine.  Then the middle of the week I should slow down and focus on relationships.  Put the business things away and focus on friendships, partnerships, working with others to build strong bonds.  Maybe I should be more open when it comes how I interact with others and how they interact with me.  At the end of the week - today, when there is the New Moon - I should focus on myself, focus on my intuition.  Dedicate time to this relationship and this balance.  That is what the two is about after all.  And finally, this weekend I should be looking for truth, finding what is fair and balanced.  Be open to changing what I'm doing to achieve this balance.

As you can see none of that is really predictive as we move through the week.  It is what I should work on or focus on during the days of the week.  These positions can be further enhanced by my daily pull too.  Here's a breakdown of each position.
Weekly Tarot Spread
card 1
Theme for the week
For this position I usually draw a Tarot card as well as two oracle cards.  I use the Soul Searching Oracle and the Spirit de la Lune deck to discover the main theme of the week ahead.  This is the thing that everything will come back to this week.  Perhaps it is what you should do or what you should let others do, none the less it is the over arching subject that will work through the coming week.

card 2
Beginning of the week
This card, like the next 3 cards, has a pretty obvious position here.  The expectant energy or theme of the beginning of the week. For me this card goes from Monday to Tuesday but if you're starting your week differently this can apply to the first two days of your week.

card 3
Middle of the week
Again, pretty obvious.  Since this is the pinnacle of the week this energy is important.  It may play into the energy of the next card as you finish out your week.

card 4
End of the week
This position is for the end of the 5 day week.  I use this spread because I'd like to know what energies are at play through my work week with a different card for the weekend.
Weekly Planning with the Tarot
card 5
Weekend
For this position, the card draw represents the energy or theme of the weekend - Friday night, Saturday, & Sunday.  For me, my work week ends on Friday at 4pm....but I go on for the next few days working on my blog, YouTube, etc so this card lets me know how productive I may be those days.  Seeing the energy helps me prepare my to do list.

card 6
Lesson to be learned/Outcome
After working through all of these cards for the week, this position is the outcome.  What will you learn working towards the main theme of the week?  I often reflect on this card at the end of the week to incorporate this reading with the daily pull I do.  This card represents what you will learn this week but it also helps you anticipate how to learn this through the week.

Tarot isn't a fortune telling tool for me, even though this reading seems predictive.  It is more of how can I be the best this week?  It helps me see what themes may show up this week and how I can emulate and prepare for the energies of the week.  I incorporate my daily pull with this reading as well.  How can my daily pull work with the energy at that time of the week?
Weekly Planning with the Tarot
I log my weekly readings & my daily pulls (plus new moon, full moon, and monthly spreads) in my Moon Planner.  I love this guy because there's a lunar calendar and each week has a blank page perfect for these weekly readings.  This planner has a ton of resources if you work with the lunar cycles - and even if you don't, it's pretty dope as a Tarot journal anyway!!

Shop Related Products on Amazon!

I hope you pick up a deck of Tarot cards and use them as a self development tooL.  I really want you to be able to use these guys easily so I've put together this Tarot study guide as a reference.  It will help you break down the deck into manageable chunks to help you create your own personal, and intuitive connections to the cards.  Pick it up here.  And if you want a peak into my little sacred space, you can see a little bit of it in this post.

xoxo, Moe

6.20.2017

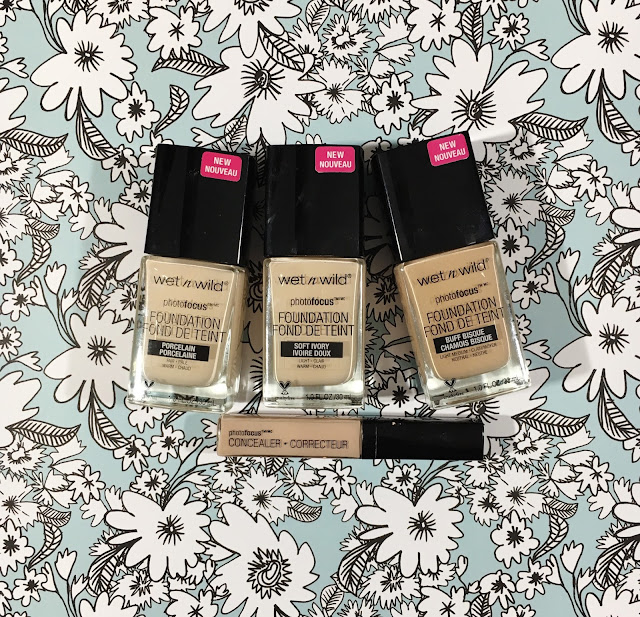
Beauty Review // Wet n Wild Photo Focus Foundation + Concealer

If you didn't know, Wet n Wild is one of my all time favorite brands from the drugstore.  Nearly every time there is a limited edition product from this brand I scoop it up.  I've curbed my makeup spending significantly over the last year or so - but honestly that is because I've found other interests!  None the less, Wet n Wild's new Photo Focus line has caught my eye.
Wet n Wild Photo Focus Foundation Review
I've had these products for quite a while and have to say I really do love this product.  You can't beat a great foundation under $10!

From the Website
Your skin, only better. Our new high-performing, skin-perfecting foundation underwent major road testing under seven different photo lighting conditions to deliver flawless camera-ready makeup every time. Specially made with a matte, light-diffusing complex to give your skin #nofilter perfection.

High-performing, breakthrough formula
Featuring light-adjusting complex to help prevent white cast in photos
Tested under 7 light conditions with and without the use of flash

taken from the Wet n Wild website here.

First Impressions & Application
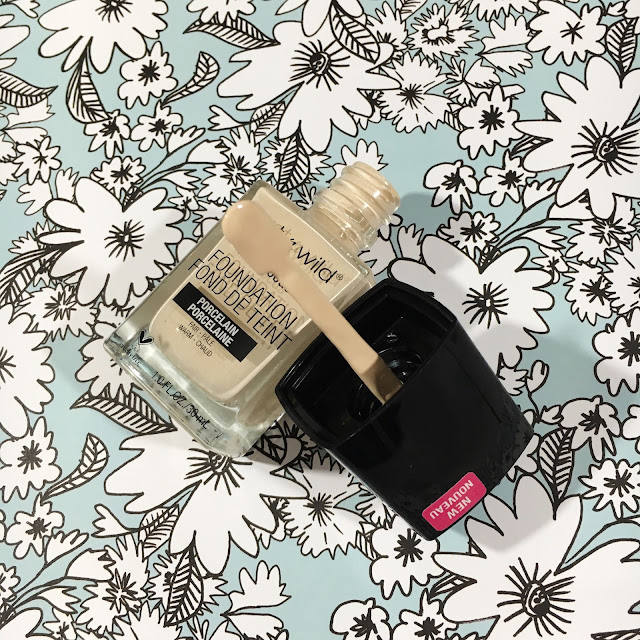
When I first opened the bottle I was a little surprised by the little spatula type deal that is attached to the cap.  At first it reminded me of the way the Maybelline Dream Wonder Fluid Touch foundation bottle is made.  The product is a little thicker than the Dream Wonder foundation, from what I remember.  Using the spatula was not the first instinct I had, for sanitary reasons, so I poured the  product onto a make up palette.  The consistency of this foundation isn't too thick, though thicker than the Dream Wonder foundation and the Fit Me foundation by Maybeline.

I applied this with my Real Techniques Beauty Sponge and love this application.  The sponge does soak up quite a bit more of this foundation that I expected.  I'd say it soaks it up a little bit more than something like a Revlon Color Stay or even the Wet n Wild Coverall foundation.  The Photo Focus foundation seems to apply similarly to the Dream Wonder - it applies thinly, feels like there may be a little bit of oil (not in a bad way!) in the product.  The foundation applies easily and blends seamlessly.  I was impressed with the coverage which is medium, yet buildable.  It also doesn't apply too cakey.
Wet n Wild Photo Focus Foundation Review
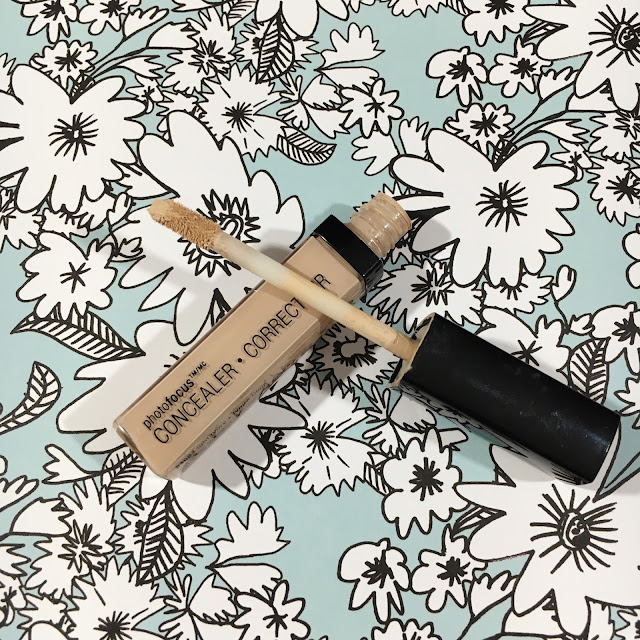
The concealer is nothing to write home about, pretty average at best.  It applies evenly, has a light to medium coverage (good for brightening), and is really creamy so it blends well.  My first impression is that it is average but I prefer the Coverall Concealer from Wet n Wild.  

I also want to mention a lot of people said that the foundation smelled like paint.  It was the very first thing they noticed when working with the product.  When I first started wearing the foundation I did not notice the strong scent.  However, it did become noticeable over time!  

Wear Time
I work a typical 8 hour work day.  I would say that this foundation, with powder (my favorite powder here), lasts up to 9-10 hours.  It actually beats the heat too.  I wore this foundation for this photo shoot and it stood up to the heat and a few outfit changes!  It even looked great for dinner afterwards.

This foundation has become my go to for long wearing, easy application.  Not to mention the price is amazing!  With oily skin, it seems only the higher priced drug store products have a good chance of staying on me.  I don't notice that this breaks down or separates.
Wet n Wild Photo Focus Concealer Review
As for the concealer - again, pretty average.  Lasted a good while, even through the heat.  All concealers crease on me at some point.  This one was just as good as any other.  The thickness of the product didn't feel heavy or move around on me.

Overall Impressions and Recommendations
If you have oil skin, I 100% recommend this product.  It does have a little bit of a weird, paint like smell so if you're sensitive to smells application may be hard for you.  Since it wears pretty well and the price is super affordable, I plan to go back to the foundation in the future!
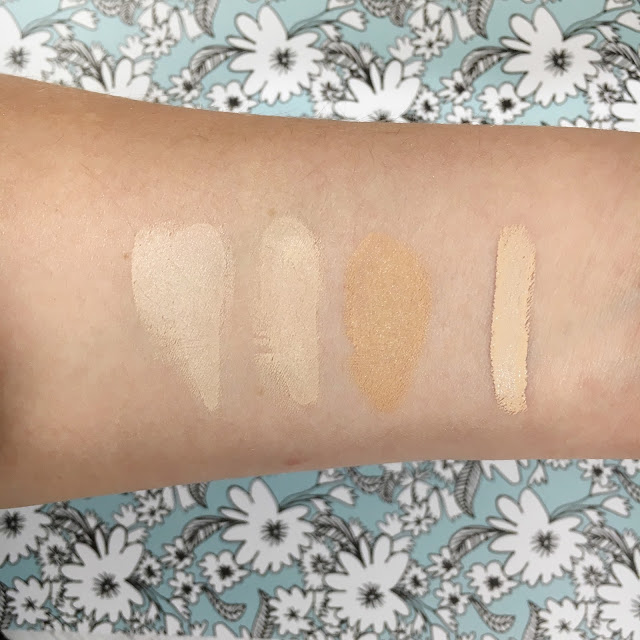
Wet n Wild Photo Focus Foundation Swatches
As for color range, the website says the shades go pretty deep but not too light.  There are 20 shades in all from porcelain to mahogany.   I'm actually surprised by the depth of the color range as I did not find shades too deep out in the stores.  I did check various Walgreen's - there is one by my work that carries very deep shades of all foundations - and still didn't see the darkest shades.  But if you can find these guys out in the wild, $6 for a foundation is affordable enough to grab two and mix your perfect shade.  This is exactly what I do.  It also mixes well with the Maybelline Fit Me Matte foundation.

All in all, I give this foundation a thumbs up.  Good coverage, long lasting, affordable, + a wide range of shades is all impressive.  As for the concealer - you probably have another one that is your favorite but this one is not too bad.  Nothing to get super excited about.

Have you found any drugstore favorites recently?  Anything super exciting?

xoxo, Moe

6.19.2017

Make it Monday // Mini Happy Planner Cover with Cricut Explore

Summer is nearly here!! Who's excited for the Summer solstice?  This girl is! I seriously can not wait to spend more mornings, days, & evenings on my porch.  Plus I can't wait for cool dips in the water & delicious summer time drinks.  (Lemonade is my favorite so you know I've got two of my favorite recipes here.)
DIY Mini Happy Planner Cover
this post contains affiliate links, please see my full disclosure here.

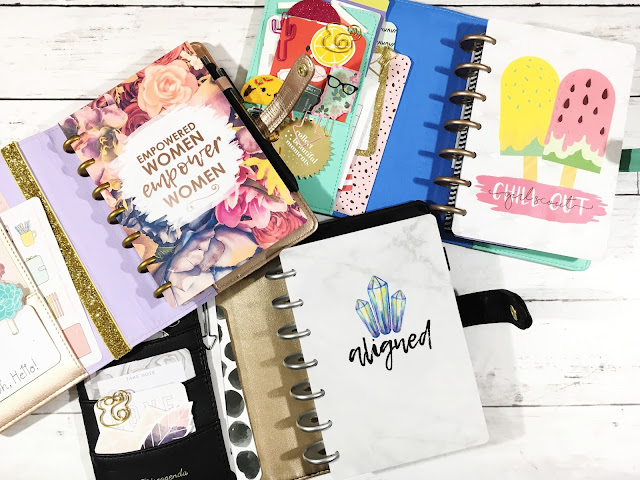
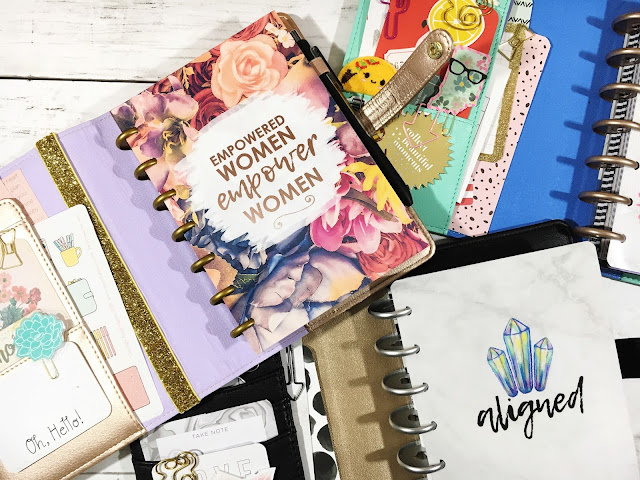
If you're a creative planner girl, I'm sure you love to style your planners for different seasons, holidays, and themes.  Styling my planner as my mood or as the seasons change is a relaxing an creative process for me.  Gathering up some of my die cuts, scrapbook paper, paper clips, and Project Life supplies and creating a cohesive vignette is a simple way to burn some creative energy!  Until now, I've only had the Mini Happy Planner covers that are already in existence.  But using InkScape and my Cricut Explore I've now got 3 summer themed planner covers - and I want to share them with you!

Shop Supplies on Amazon!


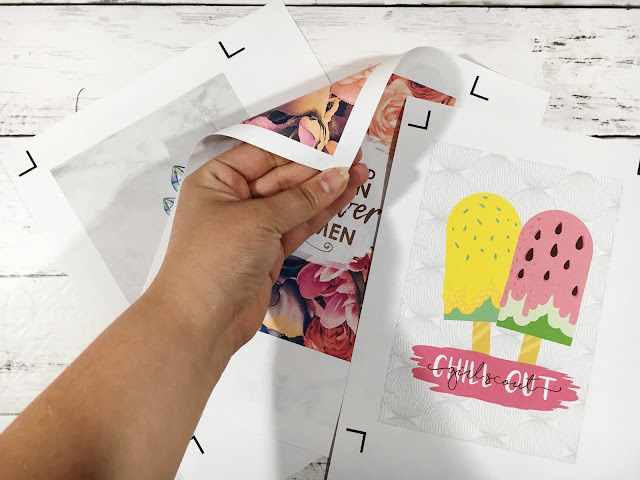
This is a print then cut project so you'll need to upload the cover of your choice to Cricut Design Space and size the height to 7.5 inches.  Select Go, and print the cover on to your chosen printer paper.  I use 32lb paper because it's a little bit sturdier but not as thick as cardstock.
Cricut Explore Mini Happy Planner Cover
Open the corresponding back file on your computer and print this image on the back of the cover page.  Be sure you're using the highest print quality for a vibrant print!  If you're unsure how to print back to front on your printer, you may want to do a google search for your specific printer.  For my printer, I place the printed page face up and the second image is printed on the reverse side.
Mini Happy Planner Cover DIY
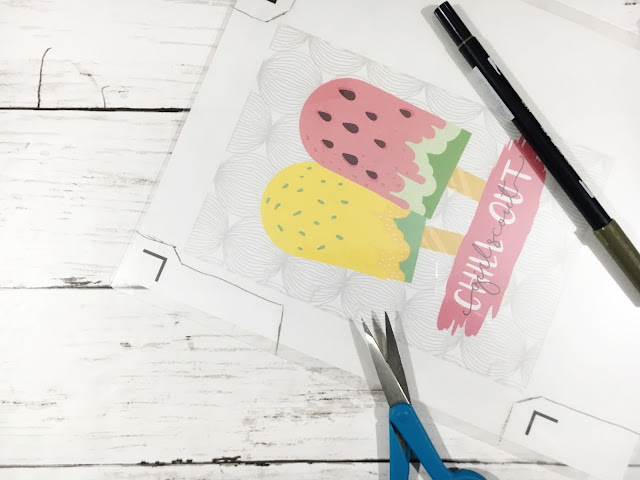
Next, laminate the printed page similarly to this tutorial, lining up and cutting out notches so that the registration marks aren't covered by the lamination.  I've found that cutting far, far, far from the registration marks gives the most success!
Mini Happy Planner Cricut Explore Project
Place the laminated page onto the Cricut mat.  Set the dial to Poster Board + then cut the project following the prompts on your computer screen.  You may find that one pass under this setting is not enough, simply press the flashing Cricut button again after the first cut is completed.  This will run the mat through the cutting process again to ensure the cover is completely cut from the page.  I've found that 3 passes is just right.  You can create a custom material setting - but I'm lazy!
DIY Dashboard with Cricut Explore
The best part about having the corresponding back pattern is that the cover looks great from both angles!  And you can use it as a dashboard for sticky notes or just look at how professional your creation is!

DOWNLOAD MINI HAPPY PLANNER COVER FILES HERE


Remember, all files downloaded from the blog are for personal use only.  Do not distribute the files or the finished product.  Do not claim any part of this file as your own.  Do not print and disseminate in mass quantities.  If you'd like to share this project with others, please link to or Pin this post.  As always, thank you for playing nice.
DIY Mini Happy Planner Cvoer
Now pop your cover onto your Mini Happy Planner!  I love the variety of Deluxe Covers for the Mini Happy Planners (there is a HOLOGRAPHIC! one for the classic size, did you know?!?!?!?!) and have found that the personal size Disc Agenda Covers from Love Doki fit the Mini Happy Planner perfectly!  My favorite is the constellations one!
Mini Happy Planner Cover Printable
When you make this project please, please tag me in your photos on Instagram.  You can also join my Cricut Ready Stickers group on Facebook for printable stickers and project shares!

Do you change your planner accessories seasonally?  What do you use to style your planners?

xoxo, Moe

6.14.2017

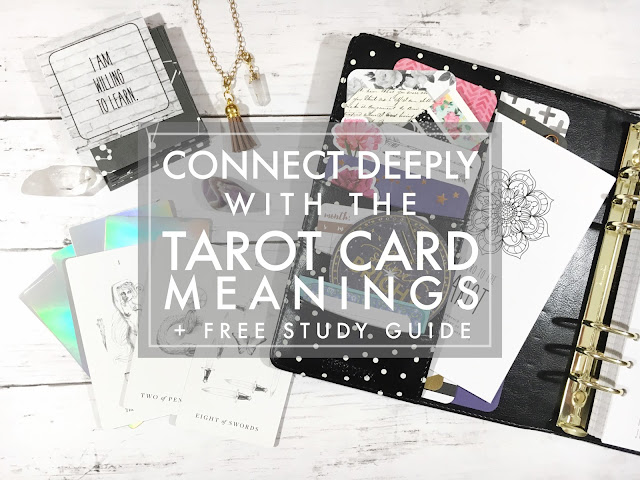
4 Tips for Deeply Connecting to the Tarot Cards Meanings

If you haven't noticed - either from the blog or from my Instagram - I've started to learn to read Tarot cards.  This has been a great journalling, mediation, and self improvement tool for me.  I highly recommend a little Tarot exploration if you're looking for some meaning in your life or you want to connect with your higher self.  In my quest for mindfulness this year, reading Tarot has helped me be more self aware and has helped me become more spiritual.
Free Tarot Study Guide
this post contains affiliate links, please read my full disclosure here.

Learning to read Tarot can be developed like any skill.  Study & practice is only part of the journey.  Equally as important is your personal relationship with the cards and the personal meanings that resonate with you.  There is a delicate balance between these two parts, and I don't think you can do one with out the other.  I've created a study guide, found at the end of this post, to break the deck down for you so that grasping the common meanings is easier.  But interacting with the Tarot will build that deep, intuitive connection.  Here are some tips for working with the cards in order to understand what they have to reveal:


Learn with a Pictorial Deck

I've found the best decks to learn with are decks where every card is illustrated in detail.  If you use a deck based off of the Tarot De Marseilles you'll find that only the Major Arcana cards are fully illustrated which might make it hard to connect with the meanings of the cards.  For example - the Sun has a grand illustration while the 4 of wands is simply four sticks.  The latter part of that example doesn't illustrate the celebration, harmony, and victory that the 4 of wands represents.  It is easier to see that interpretation when the card is fully illustrated.
Tarot Decks to learn with
There are three decks I love for the imagery - the Original Rider Waite deck, the Wild Unknown Tarot, and the After Tarot.  The other deck pictured here is the Luminous Spirit Tarot deck.  Since there are commonly assigned meanings to each card, each card is illustrated reflecting that meaning.  This is visual stimulation to help associate meanings and eventually you will be able to see the images in your minds eye.  This can help if you're reading with a different deck or a non-illustrated deck (or even playing cards!) as you can pull from your memory bank.  But the best part about these illustrations is that you can begin to create personal connections with the cards and have the images resonate with you in a personal way.


Do a Daily Pull + Journal, Journal, Journal

In order to gain this personal connection it is important to work with the Tarot daily (or as frequently as possible).  This is as simple as a daily card pull.  I've posted about my Mindful Morning Routine before - but each morning I set aside time for meditation & my daily pull for guidance.  Journalling is another key part to connect with the tarot cards.  So pulling a card a day and journaling the message your receive from the card will help you make that personal connection and form your own data bank of meanings.  The best way to develop a skill is to practice as often as possible!
This is where your little white books and other Tarot resources come into play - like the study guide in this post.  These resources are there to help you but you should eventually come to rely on your intuition and trust your own knowledge.  Journalling daily will give you a data bank of personal meanings.  You'll also grow through your studies, developing a deeper understanding of each card.  Pulling a 3 of Pentacles right now in your journey may have a different meaning when pulling it in 6 months.  Journalling will help with this process.  You'll have a record to look back on and reflect!

Weekly Readings

To gain a better understanding of how the cards work together it is important to work with more than one card.  You can do pairings of two cards or even bigger spreads if you like, but working with more than one card will help you create connections and see how the cards of the Tarot play together.  A weekly reading is a great way to build these connections between the cards and build a relationship with the cards.  I pull a theme card for the week, a card for the beginning, middle, & end of the week, then a card for the weekend, and a card for my lesson of the week.  Expecting these energies through your week will better prepare you for any challenges and then when you run into the anxiety of the 9 of Swords on Wednesday you can form a more personal connection to keep with you each time you draw this card in the future.  Make sure you're keeping your Tarot journal so you can reflect on the cards as you move through your studies!
Weekly Tarot Spread Luminous Spirit Tarot
Weekly readings can show you what themes are coming up for you most often.  You can also learn to relate your daily pulls with the cards of your weekly spreads.  How do the two energies play out?  What will their interactions be?  Journalling will help you build these connections.  Writing things down helps you remember information & creating meaningful connections will solidify what the cards reveal to you.

Interact with Like Minded People

If you don't have anyone local to connect with, Facebook groups are great for finding like minded people.  I find that there are tons of helpful tips, deck reviews, and card challenges.  One of my favorite posts in these groups is card pairings where the group is asked their interpretations of two cards together.  This is a great way to practice your skills but also resonate with new meanings.  You can find kindred spirits in these groups and encouragement in your journey.  There are also a ton of online Tarot Communities, but often they are locked behind paid memberships.  These can be great for more specific classes and to support an individual you respect, but you can find similar communites for free on places like Facebook. 

These groups will challenge your intuition with critical thinking, questions, and experiences.  You'll learn tips for when you're stuck and you'll be able to share your tips with others.

***

Learning the Tarot card meanings and developing a relationship with the cards takes times. This study guide breaks the deck down into easy to remember chunks so that you can begin to build your own associations.  You'll find the meaning of all the suits plus the meaning of the numbers in the deck.  Find keywords to associate with each card, learn to read the court cards with ease, and learn they key ways to interpret spreads.
Deeply Connect with the Tarot
This guide prints as a small 9 page booklet (print double sided using your printer's double sided print settings) & can be bound like this or with staples.  It is small enough to fit into your journal or notebook to keep the guide handy.  Sign up for the email list below then double check you email inbox - first email confirms subscription, second email (check your spam or promotions tab) will be your FREE ebook!

Lunar Newsletter

Subscribe Below for your FREE eBook!

* indicates required


Contents :

- What is the Tarot? : Brief history of the deck, game, and Tarot today
- Composition of the Tarot Deck : Overview of the Major Arcana, Minor Arcana, Pips & Court cards
- The Suits : Keywords and description of each of the 4 suits
- Major Arcana + Numerology : How to relate the Major Arcana to the Pip cards with numerology & keywords for the remaining Major Arcana
- Understanding the Pips : Keywords & description for each numbered card of each suit
- Understanding the Court Cards : Brief description of each Court card and how it relates to each suit
- Questions & Spreads : Questions to ask + easy 3 card beginner spread
- Tips for Reading Cards : Key points to remember in order to create a complete reading

Plus there is a full size (8.5 x 11 inch) PDF to print or read on your iPad or tablet.  I love using my iPad mini for ebooks & PDF courses like this.
Here's an example of the relationships you can create by focusing on this study guide : The suit of Wands represent dreams & manifestations, and the number four represents stability and often stagnation.  So you you can begin to associate the 4 of wands with achievement while working towards your dreams, but also the need to push forward.  Since the four is such a low number, we have more work to do and must push forward.  You can then relate the 4 to the 4 of Cups - the suit of Cups represents emotion and the 4 of Cups may represent a stagnation or an ignoring of new opportunities.  Both of these meanings are enhanced by the imagery on the cards.  This imagery allows you to dive deeper into the meanings to connect personally to each card.
Learn Tarot Easily
I hope this little study guide helps you to connect with the cards and see the cards not as an intimidating deck, but as pieces of a whole.  The deck is much easier to understand when you break it down and work with the pieces.

Shop Related Products on Amazon!

How do you study the cards?  How do you form connections?

ps - polkadot planner is a Carpe Diem planner, print your own positive affirmation cards here, learn to make a diffuser necklace here, find out some of my favorite essential oil + crystal pairings here.

Interested in more Tarot posts? Click here.

xoxo, Moe

6.12.2017

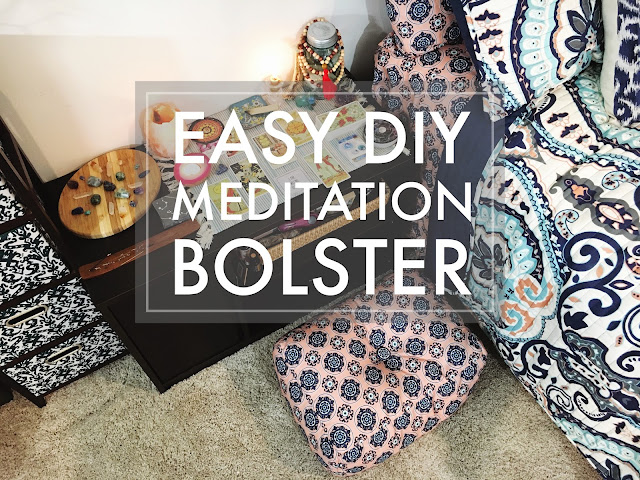
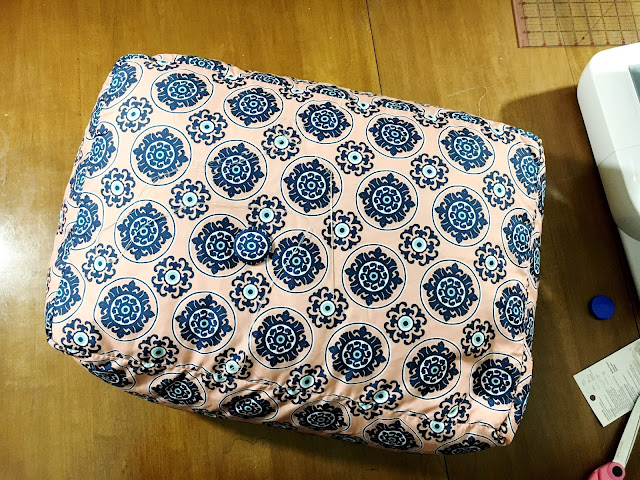
Make it Monday // Easy DIY Meditation Bolster Sewing Project

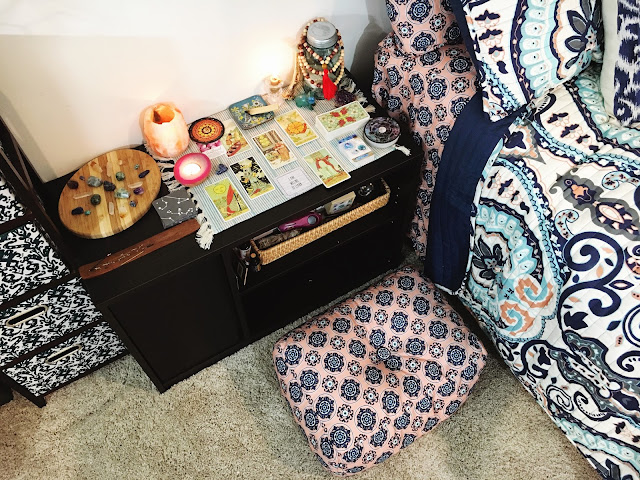
I'm in the middle of redoing the spare room downstairs with some bohemian inspired bedding I got for a super great deal from our local Meijer.  One of the key parts of the spare room downstairs is my sacred space!  This is where I go to meditate, journal, and all around connect with myself.  I love that this space of mine is separate from my actual bedroom because that means it is a place I can go to.  It is a place I can show up to when I need to. 
Easy DIY Meditation Bolsterthis post contains affiliate links, please read my full disclosure here.

Today I want to share with you how to make a comfortable meditation bolster.  This project was easy...yet annoying.  You'll totally love the results...but you may not ever want to make a pillow again.  Before I made this guy, I was using a small pillow.  Once I realized that pillow wasn't high enough and just wasn't supportive enough I went on to use one of the chairs from my craft table.  In the end, neither of these options had the right height or support for my booty.  So I thought to myself 'hey, you can make a bolster!'  and that's what I did.
How to Sew an Easy pillow
Shop Supplies on Amazon!

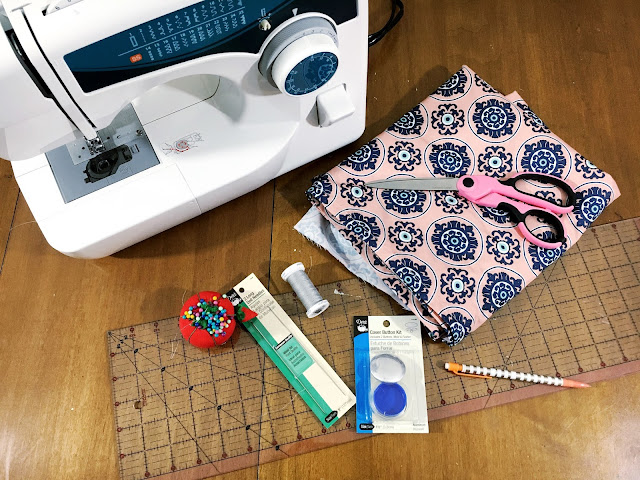
supplies // fabric (I used an extra sheet set to match the new bedding), sewing machine, matching thread, ruler/measuring tape, pins, bean bag chair beans, 1.5 inch button cover kit, doll needle

I started with 6 fabric peices - 2 14 x 20 inch pieces, 2 14 x 9 inch pieces, and 2 20 x 9 inch pieces.  This pillow will be stored in the bottom shelf of my meditation altar so I took these measurements to ensure it fits.  Feel free to make your pillow a different size, but this guy is the perfect height to elevate your bum enough so your legs don't fall asleep during mediation!

Pin the right sides of the 4 squat pieces together and sew up the short sides to create a long strip of fabric.  The seam allowance here is set to be .5 inches.  In hindsight, I would have used just a long, single piece of fabric as the sides of the bolster rather than sewing these 4 pieces together.  I also suggest using a zig zag stitch for strength.  I'm using some cheapo fabric so the zig zag stitch gives the seams a little more substance.  Leave an opening to add the beans
Turn Corner on Sewing a Pillow
Pin the top and bottom pieces (the 20 x 15 pieces) to the top and bottom of the tube you've created - make sure you're pinning everything right sides together.  This is the tricky part & where the single long strip might have been better.  As you're sewing around and reach the corners be sure to pull the extra fabric out so that you're not sewing over the corners too much.

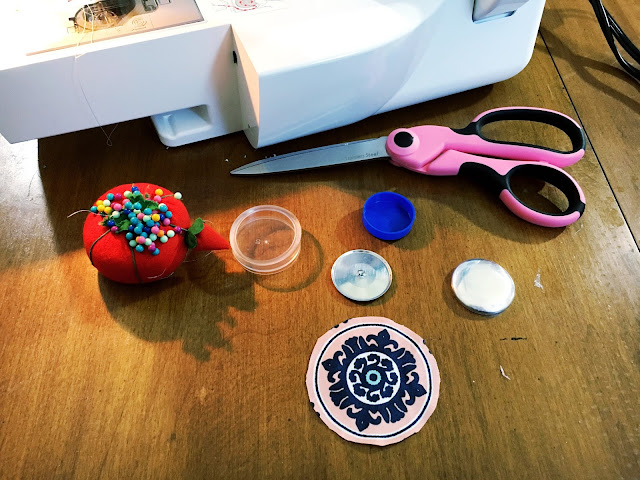
Turn the pillow inside out so the right side is now facing outward & fill it with beans.  This is going to be the messy & most annoying part.  The end result is so worth it though.  I used a paper funnel and measuring cup to funnel the beans into the pillow.  Once you get the pillow good and full, test it out.  If it feels overstuffed just shake out a nice chunk of the beans.  Hand or machine stitch the little opening closed.How to Make a Covered ButtonTo finish the bolster, add a coordinating covered button.  You can pick up these covered button kits at your local sewing shop so this isn't something special you'll have to seek out.  Simply follow the directions on the back of the package.  Cut a circle to the required shape, place it over the form, push the button into the form.  Fold the extra fabric over, place the button backing on top, and push it down to secure.  Bam! Button.Add a Button to a BolsterDIY Mediation Pillow
Using the long doll needle and doubled over thread - you can even use two strands, doubled, for extra strength - attach the buttons to both sides.  Poke the needle through the center of once side to the center of the other side of the bolster.  This may take a few tries. Once you reach the other side, slip a button through then pass the needle back through to the first side.  Add the second button, pull taught, and secure with a few knots.

And you're done!  See, easy peasy. Though slightly annoying.

Using this bolster now relieves the pain on my hips, allows the blood to circulate, and gives me the right height to see my altar.  It also fits perfectly into the space under my altar table.  The altar table itself is a TV stand from either Walmart or Meijer, I can't remember. (Oh! Walmart is also a part of ebates!  Be sure to sign up here if you haven't started to use ebates yet!).  It has shelving space plus a little door with some shelve too - perfect for hiding away journals, etc.
Sacred Mediation SpaceSacred Meditation Space
I am in love with this little space.  Be sure to check back soon to see the whole room put together + some other decor DIY's!  If you'd like to check out some of the other rooms in my house I've got a living room tour + a craft room tour over on my YouTube channel.  You can check out the bedroom tour here on the blog.  Need more DIY decor inspiration? Click here!

Do you have a sacred space?  Where do you go to connect with yourself?

6.09.2017

Free Sticker Friday // Floral Geometric Washi Tape

One thing I've really tried to get behind in the planner community is the bullet journal.  There is so much inspiration over on Instagram but I just can't seem to settle on the perfect layout.  I know the whole point is to be flexible....but I just can't do flexibility when it comes to planning.  When there are too many options I get overwhelmed!  I've tried a layout in a grid journal, in a lined journal, and now one these dot grid half letter size inserts.  I like the way this monthly layout looks.....but I don't know if I'll keep up with it.  Seems too much to layout all at once.  But maybe if I go ahead and do a month at a time I won't feel so overwhelmed.
this post contains affiliate links, please see my full disclosure here.
I found some clearance bullet journal supplies from Teresa Collins at my local Joanne so I thought I'd play around with a spread for the month.  It's a perfect way to use my planner stamps!  The script letter stamps were from Joanne's too - they have a new 'dollar bin' style area where things are $1-$4.  These stamps were $1.99 & I used the coupon I had on them!  I always think it's so funny to use a coupon on something that is super cheap to start with.  But hey, gotta save where you can!  (OH! And Joanne's is on Ebates - sign up here to save even more moolah when shopping online!)

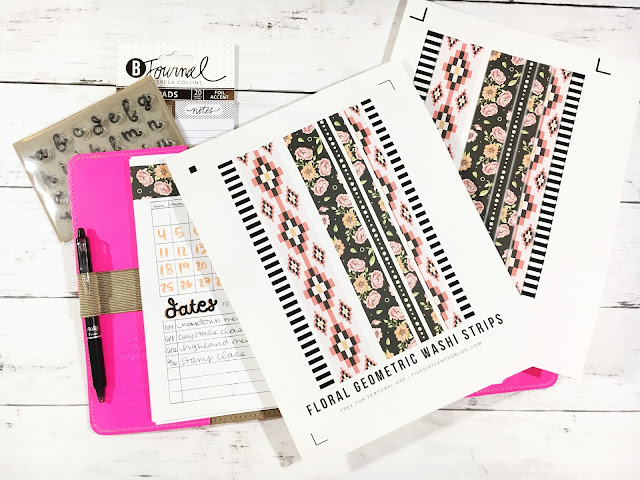
The point of today's post though is free, printable washi tape!! I love floral washi tape.  One of the best things about floral washi tape is how beautifully it can be paired with geometric prints.  In this printable set you get varying widths of washi strips at a length of 8 inches wide.  It should fit various places in various planners - but you can see it comes just shy of the height of a half letter size page.

 DOWNLOAD FLORAL GEOMETRCI WASHI TAPE HERE

Included in the download is a PDF to cut by hand (though this tool is pretty awesome), a PNG to cut with your Cricut Explore (be sure to size to 8 inches wide in Design Space) and a .Studio file to cut with your Silhouette Portrait or Cameo.  Remember that all files shared on the blog are for personal use only.  Do not claim any part of the design - printed or digital - as your own.  Do not sell the work - printed or digital - at all.  Do not print and distribute in mass quantities.  If you've like to share or Pin this freebie, please link to or Pin the post and not the file.  As always, thank you for playing nice. 
The best part about washi strips is that you don't have to buy a whole dang roll!  Just print when you need it and use it how you like.  I like to use these like I would regular washi - tear it off and use it to hold in pieces of paper.

I hope you're having a great week - can you believe that we're already in June? Like...where has the time gone???  Happy Summer everyone!

Shop Related Products on Amazon!
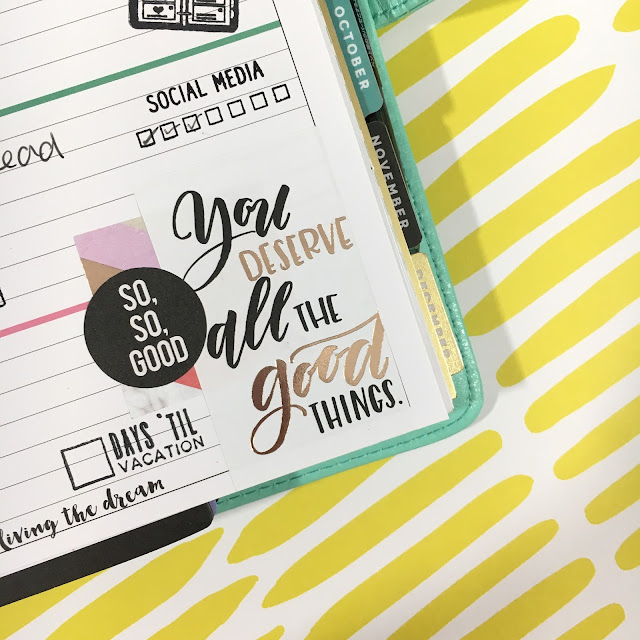
ps. If you're looking for even more free stickers, check back every Friday - or click here.  And if you haven't joined the Cricut Ready Stickers Facebook group...what the heck are you waiting for?!?!

Have you tried the bullet journal trend?  How to you bullet journal?

xoxo, Moe