9.30.2016

Free Sticker Friday // Halloween Countdown Stickers

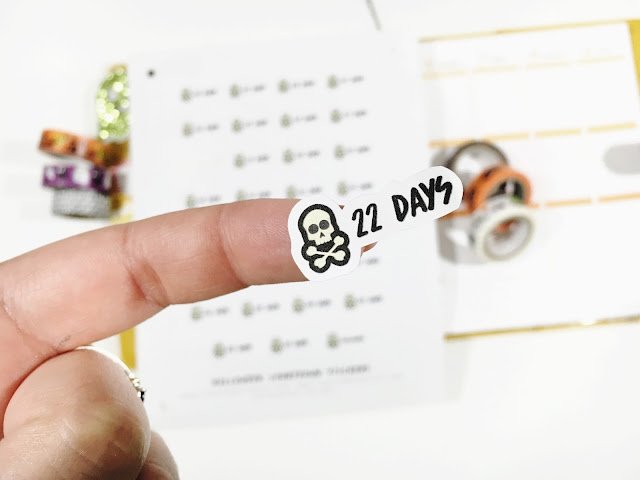
It is that time of the week again - free sticker time!  And honestly I feel like I just shared the fall countdown stickers.  Only more proof that time is flying by.  Today's free stickers are a Halloween countdown and they are sized a little bit smaller than the last ones.  I feel like I made the last ones just a bit too big.
(this post contains affiliate links, please read my full disclosure here.)

DOWNLOAD HALLOWEEN COUNTDOWN STICKERS HERE


In the download there are 3 file types - a PNG to use with your Cricut Explore (size the width to 5.5 inches, keeping the proportions locked), a Studio file to use with your Silhouette machine, and a PDF to trim by hand or using this gyro tool.
As always, the files provided on the blog are for personal use only.  Please do not sell the files or the finished product.  Do not claim these files as you own.  Do not print and distribute in mass quantities.  If you would like to share these stickers, please share or Pin the blog post NOT the files themselves.  Again, thank you for playing nice.

Happy Haunting!

xoxo, Moe

9.27.2016

Trend Tuesday // Coffee Talk

Each morning I make myself a cup of coffee. I make it at home because Starbucks is too far and not on my way to work, and because I've finally found my favorite coffee.  The coffee I like to drink isn't special at all - it is the Meijer store brand Espresso Roast and I just love it.  If you're a coffee lover you've probably got a collection of mugs growing.  Our collection has far outgrown our little coffee bar and I'm not sure where to put them.  I still need more though, so I browsed Amazon for some fun mugs
(this post contains affiliate links, please read my full disclosure here.)
one // two // three // four // five // six

All of these make me really happy!  They are so cute - especially the Volkswagen!  The holidays are coming up - I know that I have about a zillion birthdays coming up and then there is Christmas.  These mugs would make great gifts.  It is never too early to start holiday shopping (I have!).

Check out my first mug round up here (spoilers, there is a repeat!).

Happy Coffee drinking :)

xoxo, Moe

9.26.2016

Make it Monday // DIY Personal Size Halloween Countdown Inserts

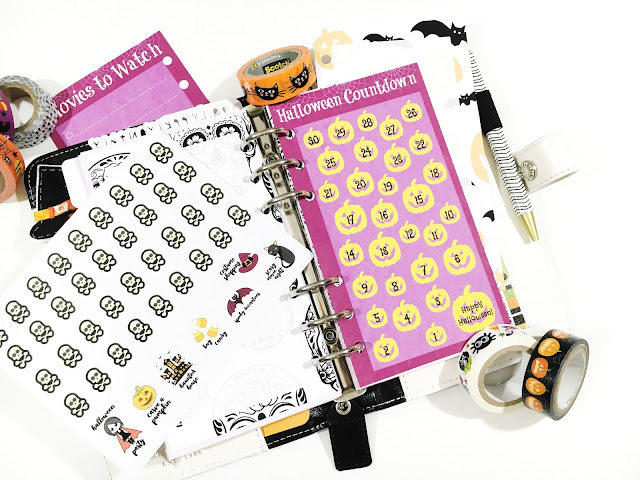
Last year around Christmas time I shared a little DIY Christmas Countdown insert for your personal planner.  Today I want to share with you a similar DIY but to countdown to Halloween instead!  On Friday I will have some countdown stickers - but they may be too big for personal size planners.....so I knew I had to keep everyone covered for this countdown!  We'll be doing something similar in this tutorial as with every tutorial where I use PicMonkey to make planner inserts - like here, here, here, and here.  The biggest thing I want to feature in this tutorial is something new with PicMonkey - Hub. Hub is an exlusive for Roayle members and a great way to store projects your working on, make copies, and create templates.  This is perfect if you'd like to create a new or different planner insert because you don't have to start from scratch every single time!  Let's get started
(this post contains affiliate links, please read my full disclosure here.)

From the home screen, open a blank 8 x 10 canvas.  Use the crop feature to size the image to a proportion that will work with your personal planner - iPhone 6 is a good choice, it is not exact but the proportions come out pretty close.  Deselect Scale photo to give you the best quality to work with.  Click Apply. Choose a canvas color, I chose a purple color.
From the Overlays tab (the one that has a butterfly icon) overlay a Halloween border and a rectangular box.  Be sure to move the box so that it is resting on the right side of the page leaving room on the left side for the hole punches.  Make your best judgement with alignment since there are no grid lines.
Adjust the transparency of the rectangle and the Halloween border.  Add 31 pumpkin overlays - or any other item you'd like (bats, candy corn, ghosts).  Once you are satisfied with the arrangement flatten all layers together using the Combine all image elements button in the lower middle menu bar.  This will flatted all elements together so that you don't move them while continuing to add to the design.
Add the text you would like - I used the font Coolock Black to add the label Halloween Countdown at the top and the font Flavors to add the numbers over the pumpkins.  The 31st day on this countdown is Halloween so start with the number 30 then count backwards.  Coolock Block is a Royale font and I highly encourage you to upgrade from the free subscription to a paid one.  The Royale subscription gives you access to a ton more fonts and overlays and most importantly, the new Hub feature.  Did I mention hub lets you go from desktop to mobile?  Storing your creations for you to use again and again?  For only $4.99/mo or $39.99/year, the subscription is sooo worth it.  Find out more here.  Save this to the Hub by clicking the Add to Hub button in the top menu.  Name your creation, and save.
Using the undo button in the bottom menu, undo everything you just did (yikes!) to get back to the base layer.  Move the rectangle over to the other side leaving room for punching this insert on the right hand side now.  You can use this to make anything you'd like - I made a movies to watch list.
Once your satisfied, click on Update in Hub in the top menu.  You should see a pop up that asks if you want to Update (overwrite the original design) or Make a copy (save your new design as a copy).  Chose Make a copy and you'll see the copy show up in your Hub.  Use the tail end of this tutorial to create a document using your new inserts for printing.
Now you have a fun printable countdown (and one for a friend since printing this guy back to front will yield you two  inserts!).  I've also created some stickers for you to place over each day as you count down.  And if you'd like to skip the tutorial all together, download the countdown inserts below as well.


This download includes the PDF inserts, a PNG file for cutting the stickers with your Cricut Explore (size the width to 5.5 inches, keep the proportions locked), a Silhouette Studio file for cutting the stickers with your Silhouette, and a PDF for cutting the stickers by hand or using a gyro tool as found here.
As with all printables on the blog these are for personal use only.  You can not sell the digital image or the final product.  You can not distribute these in mass quantities.  Do not claim this project, design, or file as you own.  If you would like to share this project on you Pinterest or social media, please share the link to the post, do not Pin the file download only.  As always, thank you for playing nice.

And if you'd like some more Halloween inspired notes pages to print out - the sugar skulls and pumpkins & bats - find that post here.

Have fun counting down!

xoxo, Moe

9.23.2016

Free Sticker Friday // Pizza Night Stickers

Guess what!?!?!  It is finally time - I have a a free printable sticker set that is made for both Cricut users & Silhouette users!  I've started to create some stickers for both machines.  Plus a PDF if you've just got your own two hands.
(this post contains affiliate links, please read my full disclosure here.)

This week is Pizza night stickers.  I made these both because I love pizza and because I remember going to get pizza or eating pizza at home with my family.  So this would be great to mark family nights, too.


DOWNLOAD PIZZA NIGHT STICKERS HERE


As with all printables on the blog, these are for personal use only.  Do not sell the design or the finished product, do not claim these as your own.  Do not print and disseminate this in mass quantities.  If you would like to link to these stickers, please pin or link to the post not the download itself.
To use these with your Cricut Explore, upload the PNG, erase the branding strip, and size the width to 5.5 keeping the proportions locked.  To use with your Silhouette Machine, open the studio file and set the red line to your settings for kiss cut, and the blue line to your settings for cutting all the way through your sticker paper.  If you're going to cut these by hand, try this tool.  I hear good things! Hope you enjoy!

If you'd like to find more Cricut Ready printables, click here.  For all Free Sticker Friday posts, click here.  To find all free printables on the blog, click here.

Next week will be just for the silhouette & a PDF.  I haven't worked through all of the stickers I designed in Silhouette studio yet...but I will!

xoxo, Moe

9.21.2016

Inside My Listing Journal // Free Printable Ephemera Pieces

If you watched my Listing Journal flip through & tool box video then you'll know that currently I'm obsessed with ephemera.  These little packs of die cuts and cute things can become expensive...but for the most part they are worth it!
this post contains affiliate links, please read my full disclosure here.
I've been loving these little guys to add a bit of flair and add to the story of the page I'm working on in my Listing Journal.  I haven't been sticking to one collection of ephemera, I've been loving mixing and matching the different sets I have to create a unique look.  But, gathering up a bunch of sets can get expensive (like I mentioned above!) so I decided to make some of my own...and share them with you today!
I used some images from FreePik.com, imported them into my current favorite design software, Inkscape, and created an offset around each image for easier cutting using my Cricut Explore.  I love my Cricut Explore for paper crafting and this project is perfect!  

DOWNLOAD DIGITAL EPHEMERA PACK HERE


I've created a set for you to download from the link above that includes two PNG files, a PDF file and a Silhouette file.  If you have a Cricut Explore (or Cricut Explore One or Cricut Explore Air) one of the PNG files has a 'key' with all the images included in the ephemera pack so you can store your ephemera together and still know whats in the little pack.  I store mine in those little plastic zipper bags you can find in the jewelry section of the craft store and these little 'keys' (often found on the back of the packaging of commercial ephemera packs) help me know exactly what is in the little baggy.  To cut with your Cricut Explore, simply size the width to 5.5 inches.  To cut with your Silhouette open the Studio file and adjust your cut settings to be at a depth for cutting card stock.
Remember, all printable files on the blog are for personal use only.  You many not sell the final product or the design.  You may not print and distribute these in mass.  If you would like to share this file with others, please link or pin this post and not the digital files.  As always, thanks for playing nice.
I used some of this ephemera pack in my lists about my favorite movies and my favorite stories.  I think this pack goes together well and I especially love the vintage radios.  (That is a nod to Zach who loves vintage radios - we have approximately a zillion of them in our home!)

I'll be sharing my lists over the next few days (when I remember) over on my Instagram.  So go follow me there.

Have you started a listing project?  What are some of your favorite ephemera packs?

xoxo, Moe 

9.19.2016

Make it Monday // DIY Cactus Art Print

Sometimes I hoard supplies.  If you watched my office tour, you'll probably have seen that.  Sometimes I hoard supplies for like ages - pretty sure this project I'm sharing today is made with supplies I've had since college.  So that means I've had the supplies for this for 5 years.  Not all the supplies, but the main ones.  
Today I want to share with you a really fun DIY using erasers to make stamps.  I've always wanted to carve up these little erasers that I've had for 5 years but I never found inspiration to do so.  Then I saw a cactus on Pinterest and suddenly the light bulb went off.  Here's how to do it:
(this post contains affliliate links, please read my full disclosure here.)

supplies // white rubber eraser, linoleum cutter, box cutter/knive, pencil, pen, stamp ink, cardstock, thin tipped marker

The type of eraser used for this product is important.  You'll need a really good rubbery eraser - not the pink ones, not the brown ones that crumble easy, but an eraser that will stand up to being carves.  I used this brand but as it is super crazy expensive on Amazon, I suggest looking in the art/drawing supply section of your craft store to find this sort of eraser.  This is key because not all erasers are made the same.
Start with a sketch of how you'd like the cactus to look.  I realized that pretty much this cactus is just a repeating shape in varying sizes.  Practice drawing the shape you'd like a few times until you get the hang of it.  The shape is pretty much a U shape fattened at the curve and narrowed at the tips connected by another, smaller arc.
Using the box cutter, carefully chop the erasers into two parts.  Don't cut them directly in half - make sure you have four different sized eraser parts when it is all said and done.  
On each bit of eraser, draw the fattened U shapes in varying sizes using the pencil.  Don't be afraid to change the shape up, after all you are drawing with pencil on an eraser so you can rub the marks off!
Once the shapes have been drawn, use the linoleum cutting tool to trace and carve out the images.  You want to carve away the negative space.  So carve around the outside of the shape you've made.  Use the size 1 blade for detail and the size 3 blade to remove bigger chunks of eraser.  Use the size 1 blade to make little divots to represent the cactus needles.  Be careful, this tool is very sharp so be careful not to stab or cut yourself.

After carving out the designs, use the box cutter again to carefully narrow down the shape.  Don't cut too much off...cut just enough off so you will be able to better guess where you are stamping the image. Again, be careful here!
When you are satisfied with your stamps, choose your ink and do a test stamp.  I found that my Memento Dye Ink did not work as well as the Chalk Ink I had.  But play around with your inks to see what works best for you.  Do a few test stamps to see how you'd like your cacti to look and figure out the best pressure to use with each stamp.  Then move on to stamping on the paper of your choice. 

I chose to stamp on some off white card stock after drawing little pots with a black fine tipped marker.
These are great for framing, for sharing, for use as a pocket scrapbooking element, etc.  If you have a bigger eraser you can carve a bigger stamp but these are perfect for 3 x 4 and 4 x 6 inch size prints.  I love these guys and really want to use these in a spread in my Memory Planner!

Hope you enjoyed this little DIY!

xoxo, Moe

9.16.2016

Free Sticker Friday // Camping Time Stickers

The weather is cooling down, the leaves are turning...that means it is time for camping, s'mores, and bonfires.  I always associate cooler weather with camping because you can actually stand to be outside!  Its not 100 degrees, sweating your butt off....its just nice weather where you can enjoy your friends, family, fun times, and good food.  This week's free printable is camping themed and designed for the Silhouette software.

DOWNLOAD CAMPING TIME STICKERS HERE

As always, each free printable on this blog is designed for personal use only.  Please to do not sell the end product or the design.  Do not claim these images as your own, do not disseminate the final product in mass quantities. If you would like to Pin or link to this freebie, please Pin or link to this blog post and not the file itself.  Thank you for playing nice!

xoxo, Moe

9.13.2016

Trend Tuesday // Dollar Tree Home Essentials

Saving money is an important thing to me.  I like to spend money but I like to spend it wisely!  The Dollar Tree has become essential store for me & my budget.  Finding affordable solutions for various areas of the home is sometimes hard to do.  I know the Dollar Tree hasn't always been my first choice for anything but recently I've found affordable and attractive decor & storage solutions as well as quality everyday essentials.  Not to mention you find something new nearly every time you walk in!  Here are my home essentials from the Dollar Tree.
(this post contains affiliate links, please read my full disclosure here.)

Kitchen Utensils
I break a lot of things in the kitchen.  I can't tell you how many times I've broken a glass just by looking at it.  So I buy a lot of my kitchen essentials from the Dollar Tree.  The main thing I purchase from the Dollar Tree are wooden spoons and various other serving style utensils.  Wooden spoons aren't supposed to go in the dishwasher (this is why I try not to have wooden handled knives as well).  I was everything in the dishwasher.  If it isn't dishwasher safe, I don't buy it.  So I purchase a lot of my serving utensils from the Dollar Tree because I'm only out a few bucks when they eventually crap out on me, I break the, or they just don't make it through the dishwasher one last time.  The Dollar Tree has a great array of kitchen utensils to choose from (some even name brand like Betty Crocker!)

In this post about creating various cleaning caddies with Dollar Tree products, I used some super cute plastic bins.  I also mention how those caddies help me with the 3 Waves Cleaning Method here.I love the Dollar Tree for the various storage solutions they offer.  If you want the best selection of storage containers in store, I've found the best time to go is at the beginning of the year.   If you're looking for a specific color I'd suggest looking during a holiday that color would be more common.  For example - pastel durring Spring/Easter, brown during Fall/Thanksgiving, purple during Halloween, red during Christmas, etc. They do offer an array of colors in general but shopping for storage solutions seasonally will give you the best chance to match any existing colors you my already have going on in the space you need storage for.

Fall is nearly here and Halloween will be around the corner.  Dollar Tree is my favorite place to go for some essential crafting supplies.  While sometimes the supplies may not be as full - like a bundle of flowers, for example - I love picking up smaller filler pieces and wreath bases.  These more affordable starting points and accents are great to add more to a project you may have started from the craft store.  I love to purchase things like wreaths to use as a base to make a fuller wreathe because I'm paying $1 for a base rather than upwards of $3-$5 to start my project.  Their Fall selection of decor is warm & inviting while the Halloween offerings are creatively frightening.  If you haven't checked out the Dollar Tree blog for creative inspiration you should check that out as well.  They've got quite a few fund projects to try using their seasonal products!

The bulk buying option also means you'll always have what you need on hand.  While that may not be the best for kitchen utensils, it is great for gifts & decor as you get more bang for your buck!

Do you frequent the Dollar Tree?  What are your money saving must haves?

xoxo, Moe

9.12.2016

Make it Monday // DIY Custom Clip In Happy Planner Tabs

One of my favorite things about the Happy Planner is that you can pull the pages out and add pages in.  Because you can add things in, this planner is great for customizing!  I already have a few DIY posts on customizing your Happy Planner - make a few bookmarks & make a planner cover - so I'm adding another to the bunch.
make clip in tabs happy planner

(this post contains affiliate links, please read my full disclosure here.)

If you're signed up for Blitsy (a flash sale type of site for craft supplies) you'll know that the MAMBI Happy Planners plus the accessories are on their a lot (check out the whole lot of planners here). You can get what you need at a discounted price.  But sometimes I'm all about making things with what I have!  So this DIY will be helpful if you clip in a lot of things and maybe don't want to buy the Snap In Tabs or if you don't want to buy them to start with but have a few things on hand.  Here's how to do it...

supplies :: Cricut Explore cutting machine, SVG cut file, double sided removable tape, 3 mill laminating pouches, laminating machine, scrapbook paper, bone folder

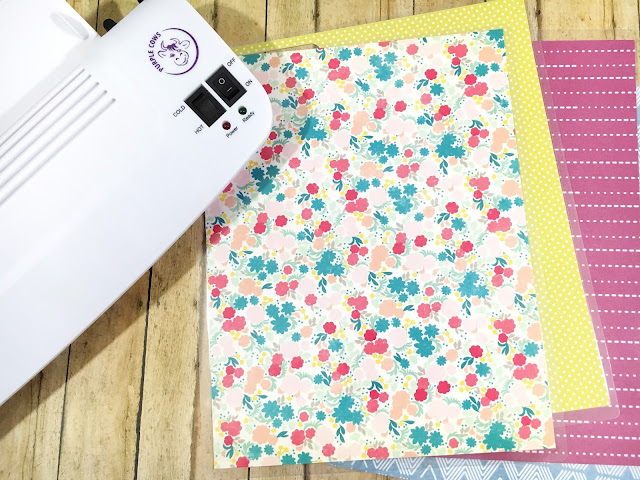
Prepare the materials for cutting by laminating the scrapbook paper.  Double sided papers may be best for this but single sided will work as well.
Happy Planner Cricut Explore DIY
Upload the SVG to Cricut Design Space, if needed size the SVG to 1.25 inches wide (keeping the proportions locked) and select Go.  Under project copies enter 15.  15 clips can fit on a 8.5 x 11 inch canvas, the size of a transparency sheet or laminating pouch.  Select Go.  Set the dial on the Cricut Explore to Poster Board +, load your material, push the flashing Cricut button on the machine.
If the Poster Board + setting doesn't cut deep enough, you may need to create a custom setting.  Learn more about creating a custom setting in this post.  I've realized that as my blade gets dull, I need to increase the pressure.  My custom settings for this type of project is: Pressure at 340, Multicut at 3x, and Blade at regular.  This setting tends to work for any project where I am cutting through laminated scrapbook paper.
Custom Happy Planner Tabs
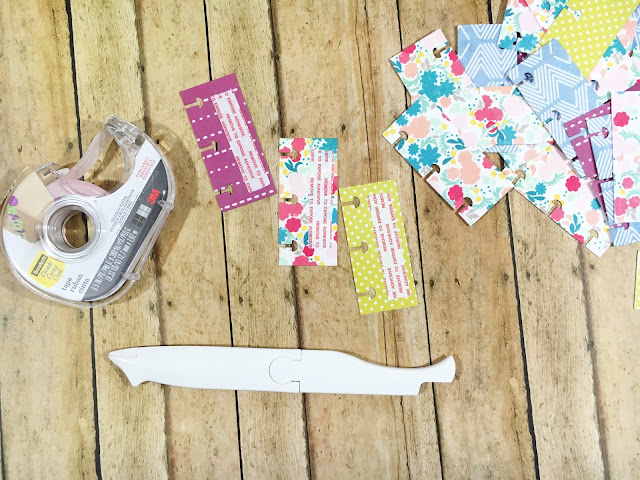
Using the double sided tape, place the sticky side down on one smooth edge of the clip.  Use your bone folder to encourage the adhesive to stick.  Leave the backing on the tape so you can use these as you need them.
The repositionable tape is helpful in case you want to remove the photo, document, or journaling card in the future.  I won't do too much damage to the item attached to the clip.  I love finding new ways to use materials I already have on had!  This is perfect for adding in anything you'd like to use in your memory planner, adding in important documents you need to remember, adding in journal cards or adding in class schedules.  Any way you slice it, these guys are 100% helpful!

DOWNLOAD THE SVG CUT FILE HERE


Remember, all freebies on the blog are for personal use only.  Do not use this in any commercial capacity - do not make and sell them, do not disseminate in mass quantities.  As always, thank you for planing nice!

Find the Summer into Fall journal card here & the September month journal card here.

What do you use your Happy Planner for?  Anything unique?

xoxo, Moe

If you like the content you see here on the blog, please consider becoming a patron!  Joining the Patreon Family as a financial contributor means you get access to exclusive content only for you!

9.09.2016

Free Sticker Friday // Cricut Ready Date Night Stickers

These stickers are just in time for your Friday night plans - if you've got time to print them before you head out! These cute pear stickers are super flipping cute - I mean you and your date are the perfect pair....right?
this post contains affiliate links, please read my full disclosure here.

If you're not familiar with what's happening here, this week for Free Sticker Friday are stickers created to be cut with the Cricut Explore.  This is a PNG image with a transparent background - simply upload to Design Space, erase the branding strip, size width to 5.5, and hit Go!  You can cut this using the Silhouette Cameo or Portrait as well, you'll just have to create the trace in the program.  I have started to work on stickers designed for both the Cricut and the Silhouette so keep a look out for those in the near future!


As will all printables on the blog, this is for personal use only.  Do not sell the file or the end product, do not claim any part of this as your own.  Do not disseminate the end product in mass quantities.  If you would like to share, link, or Pin this please link to the blog post and not the sticker file itself.  Please play nice, and thanks for all the support!

**Now updated with a PDF file for download as well!**

Find all Free Sticker Friday posts here.  Happy Planning!

xoxo, Moe

9.05.2016

Make it Monday // Crazy Easy (Chicken) Fried Rice

There are an assorted few recipes here on the blog.  I am 100% not a cook at all....but since being with Zach, his add a bit of this and see what happens kind of cooking has rubbed off on me.  This is one of those types of recipes.  Fried rice is one of the easiest things to make and I totally think it should be in your recipe Rolodex.  I'm sure you have some of these things in your stock right now, and if not you can omit a few things or run out and grab a few things.  I'm going to share with you my base recipe with a dash of fun added in (like the chicken).  Honestly I made this with instant rice before we had a rice cooker and it still tasted great.  This is easy and affordable, so here we go.
this post contains affiliate links, please read my full disclosure here.

ingredients // 2 cups uncooked rice (instant is fine, I used Jasmine rice), 2 cups frozen mixed veggies, 2 eggs, 2 tsp oil (I used sesame but olive oil will work too), soy sauce to taste

optional // 1 lb chicken cubed, 1 tsp ginger paste (or fresh ginger), 2 chilies chopped, fresh green onions chopped, 1/2 yellow onion diced, sesame seeds

The base recipe excludes all the optional parts of this recipe (obviously) so you can skip over those parts in the.  

Prepare the rice according to the directions.  I made this with instant rice for years, it has only been recently that I'be been using the rice cooker.  If you don't have a rice cooker, you need one.  I put this step first because if you have the rice cooker you can let the rice cook while you prepare the chicken.

Cube the chicken and saute in oil with onions, ginger, and chilies.  Cook thoroughly and move to a separate dish.

Once rice is cooked, add to hot pan (add more oil before if needed).  Add in soy sauce - this is a personal preference thing, but don't worry you can add more in at the end too.  Stir in frozen veggies.  Allow to cook for a few minutes, stirring occasionally.

Move rice from center of the pan to create area to cook the eggs.  Break two eggs into the pan.  Allow to cook lightly then break yolks.  Stir the eggs in the center of the pan until they start to cook (think scrambled egg consistency).  Once cooked, fold into remaining rice.
Add in chicken.  At this point taste the rice, add in more soy sauce if needed.  Continue to cook until thoroughly heated.  Add in green onions right before serving, stir.

Add a dash of sesame seeds as a garnish.

Depending on how gluttonous you are, this recipe probably serves 4.
Soooooo, like I said if you just cook the rice, saute it in oil, add in soy sauce, add veggies, add egg (even that is optional) and cook it all up, you'll have some delicious & super easy fried rice.  If you have an egg that is about to expire or you have some leftover rice - even white rice from the take out place - you can have some yummy fried rice.  Better yet if you have leftover white rice from the take out place, make rice pancakes.

Like I said, I'm no professional but this rice is the bomb.com.  Perfect for a girl on her own, a college gal, family of two, or potluck (just maybe double it!) - just make this recipe, ok?

Do you have a favorite, easy recipe?  Any ones you'd like to share?

xoxo, Moe

9.02.2016

Free Sticker Friday // Printable Glitter Headers

Guys, I know I squeezed in some free stickers already this week...but that really didn't fall into my free sticker schedule...so here are some more!  I'm using these glitter headers in my memory planner this week and I'm trying to get what all the hype about them is.  I mean I like glitter and all but I'm not sure I'm 100% on the glitter header train (that sounds very, very strange) but I'm all about jumping on the #plannerbandwagon.  You never know unless you try!
So if you're interested in downloading these guys you'll be able to download the Silhouette Studio file.  There are a bunch of colors - not just the fall ones you see in my Memory Planner spread.  Perhaps I'll get to making a Cricut Version...but I'm not 100% sure how well it will print!

DOWNLOAD GLITTER HEADERS HERE


Remember, all files offered on the blog are for Personal Use Only.  Do not sell the file or anything created from the file.  Do not disseminate the final product in mass quantities.  Do not claim the file as you own.  If you would like to link to this free printable please link or Pin this post and not the digital files.  Thanks for playing nice.

xoxo, Moe