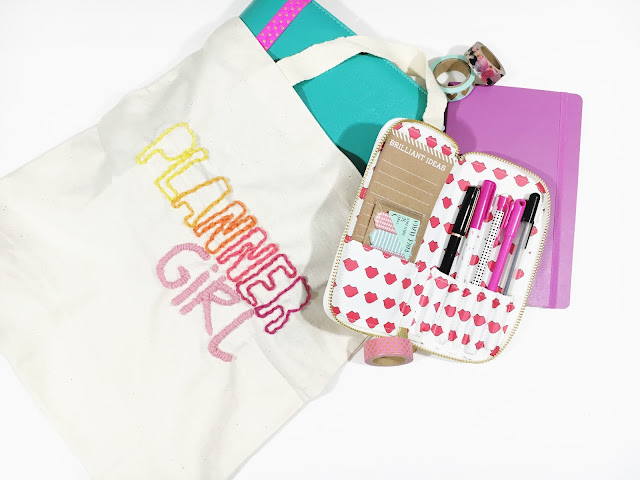
If you have a chance I would run to your nearest Target and see if you can find some of their old Handmade Modern craft supplies on clearance. On Saturday, I was strolling through my Target (the one that is 30 min south of me!) and stumbled upon a bunch of clearance craft stuff from the Handmade modern line - including a set of two tote bags and some mini balls of yarn. I immediately snatched it up to create a fun stitched tote bag!
this post contains affiliate links, please read my full disclosure here.
I liked the premade groupings of yarn because the created an obmre effect and also because I didn't need to buy full skiens of yarn to use 1/4 of a yard! If you can't find these Handmade Modern kits see if you can find any kids yarn craft kits at your craft store. Like the 'learn to knit' or 'learn to crochet' type of kits. Often you'll only spend about $10 on a little kit but get enough yarn to make what you need.
supplies // canvas tote, pencil, stencil image, stencil (paper, sticker paper, card stock, etc), metal yarn needle, yarn scraps, Cricut Explore or craft knife
For this DIY I also created a stencil you can use! I've created PNG and a PDF for download here - if you have a Cricut Explore (or any other cutting machine capable of cutting a PNG image) you'll love this DIY. If you need to trim the stencil by hand, just skip this little part here.
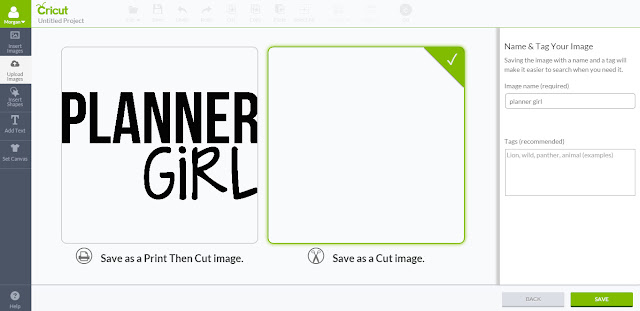
Upload the PNG to Cricut Design space by opening a new canvas, selecting Upload Images, and choosing the file from your computer. Save it as a cut file since we won't needing to print then cut for this project.
Add the image to the canvas and size it properly - for my tote the size was about 8 inches. Then click Go. I used sticker paper to create my stencil but card stock, stencil material, spare poster board or the like can be used to create the stencil. Load the mat with the chosen media into the cutting machine. Set the dial to cut the media loaded - for the sticker paper I have, variations of the paper setting will kiss cut the sticker paper. Wait for your Cricut Explore to do the work for you!
Place the stencil on the tote bag and use the pencil to trace around the letters. I found putting something hard in the tote bag will make tracing easy. Remove the stencil and begin to stitch the saying onto the tote.
The best stitch to use for the block letters that spell PLANNER is a backstitch. This creates a nice line of loops to outline the letters. For the thinner letters something like a stem stitch works well. I did not use an embroidery hoop, but that will help keep your work straight!
And now you're done! A super cute tote to carry whatever you need! You don't have to stitch this phrase, you can use the Cricut Design Space to create your own saying in your own fonts. If you don't have access to a cutting machine like a Cricut Explore, the online design machine that is PicMonkey can totally help you out!
I love my Cricut Explore for quick projects like this. When I have an idea the simplicity of Design Space allows me to quickly bring my idea to life. The cut settings are easy to use - no removing blades and changing depths - simply rotate the dial or choose from various materials in the custom menu. There is very little guess work involved and projects can go from idea to realization in no time!
If you want to create your own phrase to stencil here is a post on suggestions for combining fonts, but keep in mind how difficult it might be to stitch certain fonts. And here is a list of all the PicMonkey DIYs on the blog for some design inspiration!
xoxo, Moe


No comments:
Post a Comment
Hi there, thanks so much for taking the time to comment. I love &value each & every one! If you have a question, I will respond as soon as I can. Don't be afraid to shoot me an email! If you have a blog, I will pop on by :)