2.27.2015

On Greed // Finding All Parts of Me Again

First off, I've been really loving doing this little series on the sins I struggle with (all I really wanted to do was write a post about vanity and then all the other sins spoke to me). I felt like the other sins spoke to me and needed to be addressed.  Secondly, I don't consider myself a religious person and am using these sins as they relate to understanding myself as a moral human being.  While this is deserving of another post that I will not write, one can be both moral and atheist at the same time.  However, this is not the place I want to go with this post - today I want to talk about greed and how it has affected me and my blog and my life.

Now, I wouldn't say that I've had a lust for money or riches or anything close to the most literal interpretation of greed - which is a inordinate desire to possess wealth, goods, or objects with intention to keep it for oneself (thank you Wikipedia) - however, I have had a bout with something that really impeded my ability to share and create things freely with out the desire for recognition or compensation. And that really affected all of my businesses.  I began to feel like I deserved something that wasn't really owed to me.  This is why I closed up my shop and then decided to offer free things on the blog because I wanted to create with out the desire to be compensated....does that make sense?  I was getting too caught up in what would sell and really missing the creative aspect I had when I really wanted to open my shop.

Here's my short shop story - The summer before my sophomore year of college my boyfriend at the time was like 'sure, open an etsy shop' so I did.  Then we broke up and I changed my major to art.  I loved being creative and listing things in my shop.  However, I was making little sales - pretty sure I spent more in etsy fees than I made.  I had a lot of passion for it at this time, did a few craft shows, kinda lost my passion junior year and really just wanted the easy money I thought etsy could be.  Senior year, same sort of thing....still selling nothing on the side, finally gave my crocheted hats to a friend who was selling them for me at a fundraiser thing for $5 a hat - far less that they were worth and far less than I though I'd deserved - since no one really wanted them anyway.  Super senior year (yes, that happened) same thing, trying to sell things, kinda got back into it, finally met a goal of 10 sales by the end of the year - which was a lot of work between like October and December when all the sales happened.  Fast forward, I'd graduated college, was taking a ceramics class just to be creative, did a few fairs, sold nothing......tried to launch collections in my shop which failed, still had a whole bunch of handmade stuff left over (I still do - some is listed in my handmade shop that have very few sales).  I really wanted to make money from my ceramic wares that I still think are pretty awesome, beautiful, and deserving of good homes.  After all of that seemed to get me no where, I started doing blog designs which seemed to be the way to go.  I was making a bit of $$ off of it and considered it to be pretty successful.  Moved to Michigan/Indiana, rebranded the shop, started doing blog designs and some stuff in Zazzle.  More graphic design oriented and while I liked exploring and learning and designing I also realized that blog design was full of pressure.  I was making money - there was a demand and I was kind of good at it - but the though always crossed my mind 'what if I fucked up someone's blog?'  Then we opened the vintage shop, which of all the shops was the most fun to do.  It was something that Zach & I could do together and if I ever find myself unemployed again I am so all over that.  But since I was trying not to put all my eggs in one basket I was getting sort of bogged down with all of it - blog designs, vintage shop, zazzle, handmade shop, blogging, etc.  Then because I was feeling like a failure at all of this I struggled to find a full time job, which I eventually landed.  And that is where it all went down hill.  I got negative feedback on our vintage shop and that was the time I decided I needed to close all doors to things I was actively doing - the blog designs and the vintage - because I just couldn't provide the quality of service I needed too.  I was putting things off because the greed got the best of me.  I wanted the profit with none of the hard work.  That's how I see it now.  I stopped doing things for me and started doing the things that would make the most.  And I realized, this wasn't my full time job - I had one of those - and I should get back to what was really me.

That was big hunk of text huh?

I started to feel like I deserved sales and that I just had to find what was selling, even when my passion for it was over.  That is why I ended up changing my blog over.  In my about me blurb at the top there I say I believe I should try something new everyday and I want to keep to that motto.  I want to explore what I like and when it no longer makes me happy, I want to change it.  Is that bad?  I don't think so and I actually am really inspired by Elise's blog and her Make29 and here Make&Give30 where she's doing projects for herself yet still able to profit - both in income and in personal growth - by being willing to explore (hey, funny how this word is working it's way in here right?) what she'd like to do.

So, like I said earlier, I stopped trying to create things to sell and started to create things I loved.  But the part of me that really liked sharing what I'd made was feeling that this was a really selfish thing to do so I started offering a lot of things for free.

After I discovered my mojo again I totally was all over a million new things - Project Life, Planners, Beauty and Makeup, Blogging, YouTube - and I really wanted to put myself out there again but with little pressure.  I stopped trying to be that blogger I stopped trying to get the recognition of everyone and focused on created a blog I'd like to read.  I stopped trying to force myself to make money from blogging - I always felt so much pressure when there were sponsors or required posts and I felt like these posts were my worst content.  I was struggling to be one with the bigger bloggers when I couldn't naturally integrate these things into my blog with out feeling like something was off.  These posts weren't my greatest content.

I've decided it is time to open up shop again and this time it's digital downloads.  I can create and I don't have to worry about the leftover things that don't sell.  I've loved selling things on Zazzle because it's pretty passive.  I create, you customize and buy it if you want.  I don't have to please everyone and I can still feel profitable and creative with out the stress.

Overall, I've overcome greed by focusing on my needs - which seems to be contradictory, you think?  I am focusing on being the best me I can be and the best me I can present to the world - the best me I'm proud and that may not be someone who is able to make bank from their blog.  I want to be inspiring and I want to try, I don't want to be greedy and not explore what I could in this life.

**Sidenote - I didn't intend for this to be a series nor did I intend for this series to turn into something that goes a long with my word of the year which is explore, but it has.  Maybe just because it has been on my mind lately and I really want to live up to the word.  You can read more about my word here.

Do struggle with something like this?  Something that seems to be like greed, affecting a part of you that you don't like?

xoxo, Moe

ps. You can read my post on Vanity here and my post on Jealousy here

2.26.2015

Free Journal Cards March 2015

2015 sure is flying by because March is already here.  There is still snow on the ground and who really knows if we'll get more!?!?! Where is Spring?  Isn't the first day of Spring like March 20th?  I'm going to need that to hurry up and get here.  A lot went down the last few weeks in February so hopefully I'm back to catching up on the blog here, on the YouTube channel, and on my newly opened Etsy shop!  Any way, here are the cards for March.
I was really torn between doing the traditional St Patrick's Day theme or something more my style and I chose to go with the latter.  I wanted spring inspired cards!  Maybe it's my way of praying to the god of Spring that it comes swiftly!

If you want to download the PDF, click here.  Remember that these are free for personal use only.  Do not redistribute them, claim them as your own, or sell them.  Please only pin this post and not the PDF itself.  Thanks for playing nice!

xoxo, Moe

2.24.2015

Beauty Review // Jordana Modern Matte Lipsticks

Mattes have been super trendy recently and, believe me when I say this - I've really wanted to try them all.  Usually when I put on a lipstick - not a liquid lipstick or the like but actual lip stick - I tend to blot my lips to make them matte.  I don't really like the shininess of a lipstick but if it's gloss or something else that is supposed to be glossy I don't blot it off.  Anyway, I wanted to do a review of these matte lipsticks first because they are the most affordable of all these new matte lipsticks.  So let's jump into the review.
this review is of a product I purchased myself, read my disclosure policy here.
From the Website
Modern Matte Lipsticks are a Winning Combination of High Payoff Pigments and Special Ingredients that Comfortably Extend the Wear.  Expertly Selected Shades Have an All-Day Wear Without the Typical ‘Dry Lip’ Finish that Feathers and Cracks.  Talc and Paraben-Free.

taken from the Jordana website here.
First Impressions & Application
These lipsticks (for $2.49 on the Jordana website here) come in a plastic packaging with the color of the lipstick encompassing the entire bottom of the lipstick tube.  The lid is completely clear acrylic and the actual product sits in a silver casing.  The lipstick itself does not extend past the silver casing like the Wet n Wild lipsticks do.  Meaning you can roll the product all the way down into it's tube and not worry about knocking the side of the lipstick against the lid.
These lip colors are extremely pigmented.  They offer crazy color pay off for the price.  They do tend to tug on the lips (or on the skin in a swatch) - some do so more than others.  As they warm up to your skin they become a little bit smoother to apply.  Because of the texture they do tend to skip around your lip however you are able to get a complete coat on your lips with care.  These can stick to dry areas on your lips and look unflattering but a balm or exfoliating your lips can be done to counteract that.
From left to right: Matte Pretty, Matte Classy, Matte Style, Matte It Girl, Matte Dare
Wear Time
Because of the matte formula these are long wearing.  I got 5 hours wear before eating so I would say you'd get even longer wear if you were out for shopping!  I drank coffee all morning as well and still had it on my lips.  These lipsticks do wear evenly around the lips on me and I actually found the quite comfortable.  Initially it seemed that these would become to dry on my lips but the lip product created a barrier of sorts and the lipstick actually felt comfortable for the length of the wear.  It didn't dry up and peel away, it felt a bit tacky - not like annoying or lipglossy, but I could feel it on my lips.  Like I said it was like a comfortable barrier.  Not too moisturizing like a lip balm but it didn't allow for my lips to feel dry.  It was rather weird but appreciated.
From left to right: Matte Pretty, Matte Classy, Matte Style, Matte It Girl, Matte Dare

Overall Impressions & Recommendations
I'm not sure if this lipstick is my favorite formulation from the drugstore but it isn't bad.  It's definitely worth the price and the color range makes up for struggle in application.  If you're looking for a creamy matte, this isn't it.  If you're looking for something super hydrating, this isn't it.  If your looking for an affordable, non drying, truly matte lipstick in quite a few shades to experiment with - this is your lipstick.  I'm a little meh on whether you should pick these up over somethings like a Wet n Wild lipstick or even the Milani lipsticks.  I think it's one of those things where if you just can not find the shad you're looking for except in the Jordana Modern Mattes or you've lost all your make up and only have $20 to get everything, then these are perfect to pick up.  If you pass over them you're not missing much...but boy there are a lot of colors.


I'm sorry I can't truly make up my mind on whether you should get them or not!  They are pretty good if you pick them up, but if you don't you won't hate yourself...is that ok for a final answer?

xoxo, Moe

2.23.2015

Make it Monday // DIY Removeable Lined Writing Guide

You guys, I tried.  I tried not to do another planner DIY....but I just had to.  I just got in my Lilac Medium Kikki K and I just had to start DIYing the heck out of it.  The classiness of it & the kawaii -ish color of it really inspired me this week.  I made some new, super classy inserts for the shop (to be listed soon) inspired by this aaannnddd I knew I wanted to try my hand at a cute, kawaii inspired writing guide!  Enter my best friend PicMonkey and there was a match made in heaven!
this post contains affiliate links for PicMonkey, these links support what you read here on the blog, read my full disclosure here

Let's just do this thing.
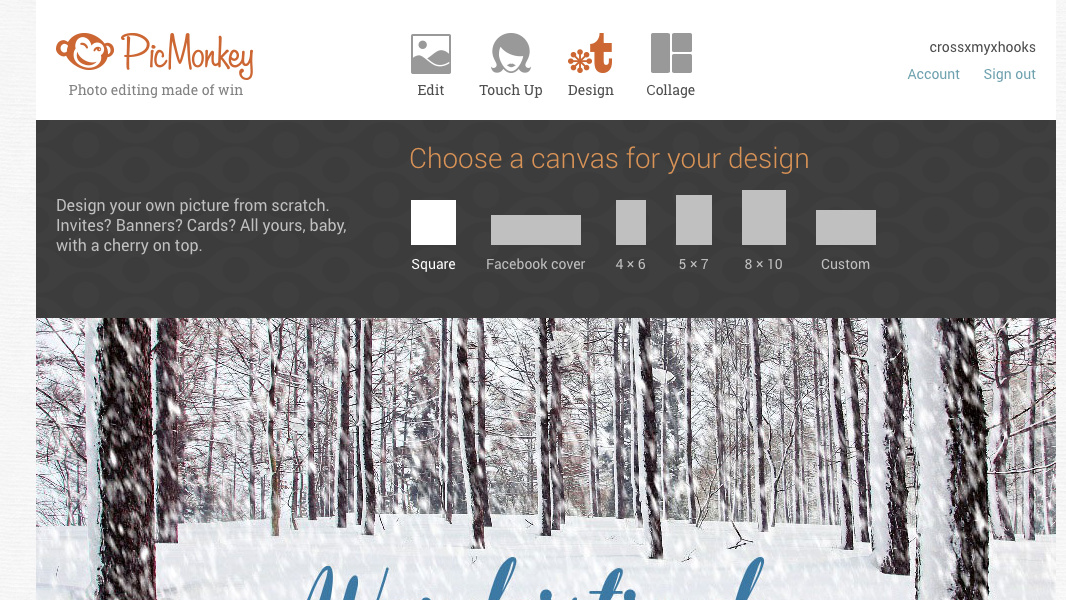
First, go over to the PicMonkey site and from the design page select the 5x7 option - I made this for my medium Kikki K (equivalent to personal sized Filofax) so the 5x7 option is the best for this.  You'll get a little bit of top overhang and have to trim the sides but it's the easiest option since 4x6 is just a teensy bit too small.
On the blank canvas lay down your writing guide.  I used the font Francois One because it has a thicker weight to make darker, easy to see lines.  You'll be placing this behind your planner inserts to ensure your handwriting is straight so you want to be able to see it.  Use the underscore key to lay down a few lines across the canvas.  Make a block of the lines and adjust the size until you're happy with the width of the writing guide.  A tip here: leave your PicMonkey canvas open so if you need to edit it after you print it you can simply adjust it and not have to recreate it all over again.
Now to make the bear face - use the heart option to create a nose.  One thing I love about PicMonkey is a slightly new feature where you can create the outline of the shapes you use.  Use the squished little heart as the actual nose, change the color to black.  Use the more traditional heart to create the outline around the nose by setting color 1 to black and color 2 to transparent.  Now you have just the outline of the shape!  Create the eyes with two ovals - this makes it a little cuter than regular circles, just so you know.  Center the face to the best of your ability.  Since there are no design guides, eyeballing this is ok.

You can use any of the free overlays offered through PicMonkey to create your writing guide - how cool would a mustache writing guide be?? But you can always sign up for the Royale feature where you get a ton more options for fonts, overlays, effects, etc here.  Royale is $4.99/mo or $33/year (choose that one, super steal!)
Save your creation to your computer but don't close PicMonkey in case you need to edit something later!  I used Picasa to print my 5x7 print back to front - I had to do some experiments with Picasa to do this but you could print two pages however you wish, trim them, glue them back to back, then laminate.  Use one of your pages from your planner as a guide to trim down your image.  The 5x7 size leaves a little bit for a tab at the top so you can easily find it in your planner.
Laminating the writing guide is the important part.  I did get a laminator for Christmas (thank you grandma!!) but I wanted to let you know that the peel and stick lamination works fine too.  If you have single side laminating sheets, simply fold them in half to laminate both sides.  No need for fancy things here!  Punch your holes and cut little slits to make it easily removable from your rings (or use this tutorial if you're making a guide for a spiral bound planner).
There you have it! Now you have a really cool writing guide so that your handwriting is straight.   The dark black helps you to see your lines behind your inserts. You could also use this as a dashboard or a dry/wet erase board in your planner.  Versatility everyone!

Of course, if you want the printable of the bear with out having to make it yourself, I've got you covered!  Click here for the 5x7 image.  Remember, this image is free for personal use.  Do not sell, reproduce, or alter in any way to sell or reproduce.  Play nice please and thank you.

How do you DIY your planner?  Do you try to have perfectly straight handwriting?

xoxo, Moe

2.20.2015

Our State Pride // State Photo Art from Minted's Art Market Place

If you've been reading here for a while you may have noticed that I have a love for our home states and state shaped things.  A big part of my about me section is that I am a Virginian currently residing in Indiana - and I'm damn proud to be from The Old Dominion! Zach was born in Michigan - and is damn proud of it too - so it is important to me to keep close the memories and things associated with where we come from.  We are both proud of our states, and I'm super proud to call the south home!

While others may be obsessed with monograms, I'm obsessed with state related things...seriously.  You may remember this gift guide from before the holidays - but did you know that I got a Virginia shaped cutting board for Christmas and am on the hunt for a Michigan shaped one?  Probably not!  Do you remember ages ago when I tried to have my blog header feature both Michigan and Virginia?  Probably not because after like a week or two I scratched the design.....  Seriously, we love our home states! So if ever there is an option for custom state shaped art....I'm all over it.
this post was created in partnership with Minted.com, please read my full disclosure here.
Michigan // Virginia

Recently, Minted contacted me to do a review on their Art Marketplace and I instantly fell for the Custom Sate Photo Art.  Which reminds me, we need to get new family photos to include the dog!  This is certainly a unique option that I have yet to see anywhere else online.  I'm picturing a creative gallery wall of the small 8" x 8" prints with various photos from our trips to different states.  And at $29 for the standard print - well that's an affordable way to build a custom gallery wall!  I did play around a bit on the site and actually inserted some pictures into the Michigan state from our trip to the Coast Guard Festival a few years ago.  That was one of my favorite little trips we ever took while we were at our little Michigan pit stop.  It was fun to go to the beach and see all the ships!

I am trying to make it a priority to travel more as a family (dog included) and these little collages would be the perfect, tangible way to remember some of our earlier trips.  Memory keeping is becoming really important to me because I want to make sure there are tangible reminders of where we come from and where we've been.

Not only do they have Custom State Photo Art but there are tons of art prints - too many to choose from in my opinion.  However, if you've been digging on the gold foil trend recently they have quite a few to pick from and again, I'm digging the state shapes!  There are maps, bridges, states, etc that would look great next to the photo collages.  These little prints would be an awesome way to remember out travels, too.
World Map found here
Additionally the size guide above is featured at the bottom of each print listing to give you an idea of scale.  This is amazing because I am so bad at imagining sizes and how they would relate to other prints.  For example, I think that 10" x 8" would make an amazing size but really, this map of the world print would make a statement at the 24" x 18" size, or bigger.  Plus you could use it to track all the places you've been or like to go.

Boy do I have travel on the brain.

Overall I'm impressed with the Art Marketplace and with all the artists and designers featured!  There truly is something for everyone on this site.  Of course, if you're down for something different, Minted is know for their invitations and stationery.  The Minted blog - Julep - is an amazing place for inspiration as well.

I am so inspired by these prints and collages to see what I can do to keep our travel memories tangible and not just saved on a drive somewhere.

How do you keep your travel memories tangible?  Do you have insane state pride like I do?

ps.  This post was done in partner with Minted.  I was compensated for my time with a Minted credit, however all opinions and thoughts are my own.  Read my full disclosure policy here.

2.18.2015

6 Ways to Save Money on High End Cosmetics

I'm in the middle of a no-buy-turned-low-buy right now so I haven't treated myself to nice, high end makeup in quite a while but over the holidays I saved a bit on a Mac splurge and recently I've signed up for Glambot (more about that below) so I thought I'd do a little round up of ways to save money on high end makeup products!  Some of these you may know about but I also have so surprising tricks you may not have thought of:
this post includes affiliate links - these links help support what you read on the blog, please read my full disclosure here.
Ebates
I've mentioned Ebates before on my blog when it comes to saving money but when it comes to high end cosmetics, I've just discovered a trick.  It is an easy site to use - you go to Ebates.com first (make sure you have an account, so sign up here) then from their website, find the site you'd like to shop on.  You earn a percentage back on your online shopping by going to ebates first & finding your shop.  Once you click the shop you'd like to buy from, that is it.  Ebates tracks you purchase amount and issues you a credit to your account.  Believe me, it's not a scam.  I love it because there's no minimum pay out.  If you have an amount when payout time comes, you get that amount.

Here is a trick though - when I was planning on purchasing MAC's Lightscapade Skin Finish I reaaaalllllyyyy wanted to save a few pennies on it (even just a few!) but could not find the MAC store on the Ebates website.  I originally swatched some MAC products at Nordstrom so I found the Nordstrom online store through Ebates search and shopped MAC from there!  This is a great way to take advantage of any department store sales and any cash back deals going on with Ebates.  I can't believe I didn't think of this little trick earlier and I plan on doing this any other time I'm looking for something high end!  You can also install Ebates to your browser's tool bar and then it will alert you when you can get cash back.  That is great if you forget to go to Ebates like I do sometimes.

Choose a store & stick to it
I shop at Ulta almost exclusively for high end stuff - firstly because it's the only exclusive makeup place close to me and because I love their points system.  I build up my points by getting services at the salon - I always need a hair cut and an eyebrow wax, so I go there to build up my points.  I also shop their holiday collections and sets to get more for my moolah and am able to try different things.  If you go their and do your regular drugstore style couponing (though I really do love my CVS coupons!) you can get your drugstore essentials done and add to your points.  I try to cash in my points at the end of the year because I'll have quite a bit and get quite a bit knocked off my purchase.

Ulta also sends out 20% off coupons once or twice a year and sometimes they included high end/prestige makeup.  These are the best.  You get 20% off your whole purchase and that can be really helpful.  And if you have you points built up you can get even more off.  It's all about patience & timing to save!

This is a website I just found out about recently but it is a site where you can buy fully sanitized, gently used make up.  I know that kind of turns people off but the site has strict sanitation regulations as well as regulations on what you can sell back to them.  That's right, you can make money from your gently used high end makeup!  From what I understand, the site sanitizes the products in a way that they are sealed/etc like new.

They are always offering sales and deals as well.  I can't tell you how many times I've found a Glambot email with a deal creeping into my inbox.  I love it!  The prices are great and the site tells you how much of a product is left.  It is great if you're looking to try something out but don't want to pay full price.  They have tons of brands - Nars, Urban Decay, MAC, Laura Mercier - and have tons of different products - lipstick, blush, eyeshadow, etc - so it's a great shop to browse.  But, don't leave anything in your cart too long or you'll loose it!  It's almost like a flash sale site because of the unique nature of the items they sell.  There may only be one so you should snatch it up.  They also have a great referral program too!

You may already know about Hautelook - a site that sells name brand products in a flash sale style.  Usually, Hautelook has a group of products on their site for a week or so and you can purchase high end makeup/skincare for a really good price.  I've bought nearly all my The Balm cosmetics off of Hautelook.  But Hautelook is also a part of Nordstrom rack which also has an online site.

I do like to go into the Nordstrom Rack stores and browse their selection from time to time.  I did pick up some Lorac Cosmetics there before.  This is a store you should check back on often!

TJ Maxx, Ross, Marshalls
These stores were just added to my discount arsenal after I found a GlamGlow face mask, Kat Von D lipstick, and an Estee Lauder travel case!  These stores are hit & miss but soooo worth it to stop in often.  I do have a TJ Maxx near me & a Ross will be coming soon, so I can't wait to see what else I can scope out.

I think that Ross generally has good, bulk drugstore make up - I've picked up some Physician's Formula products 3 to a pack for about $7.  But TJ Maxx and Marshalls have the really good stuff.  They get in the high end stuff.  The things I've found were from a line that got new packaging - the Kat Von D lipsticks - and the Estee Lauder compacts were from a travel collection in 2013.  So it's not the brand new releases but if you're looking to try a brand you may find something helpful there.

I hope this little round up gave you some ideas on where you can find some awesome deals on high end makeup!  I looovvvee a deal and these are great ways to try new things with out breaking the bank.  My favorite little trick is the Ebates trick....I plan on using that in the future.  Sephora and Ulta sites are on there so you can get a percentage back & build up your points!  Man, I love rewards systems!!

How do you save money on your high end purchases?  Any products you've gotten at a super great deal?

xoxo, Moe

2.17.2015

Top Three Paper Crafting Favorites

I've been doing a lot of paper crafts recently - cutting up folders and designing inserts for various planners - and I've found my top three favorite paper crafting things.  I am so happy to have all three of these in my life (is that weird?) and two of them are super new and super convenient to have.

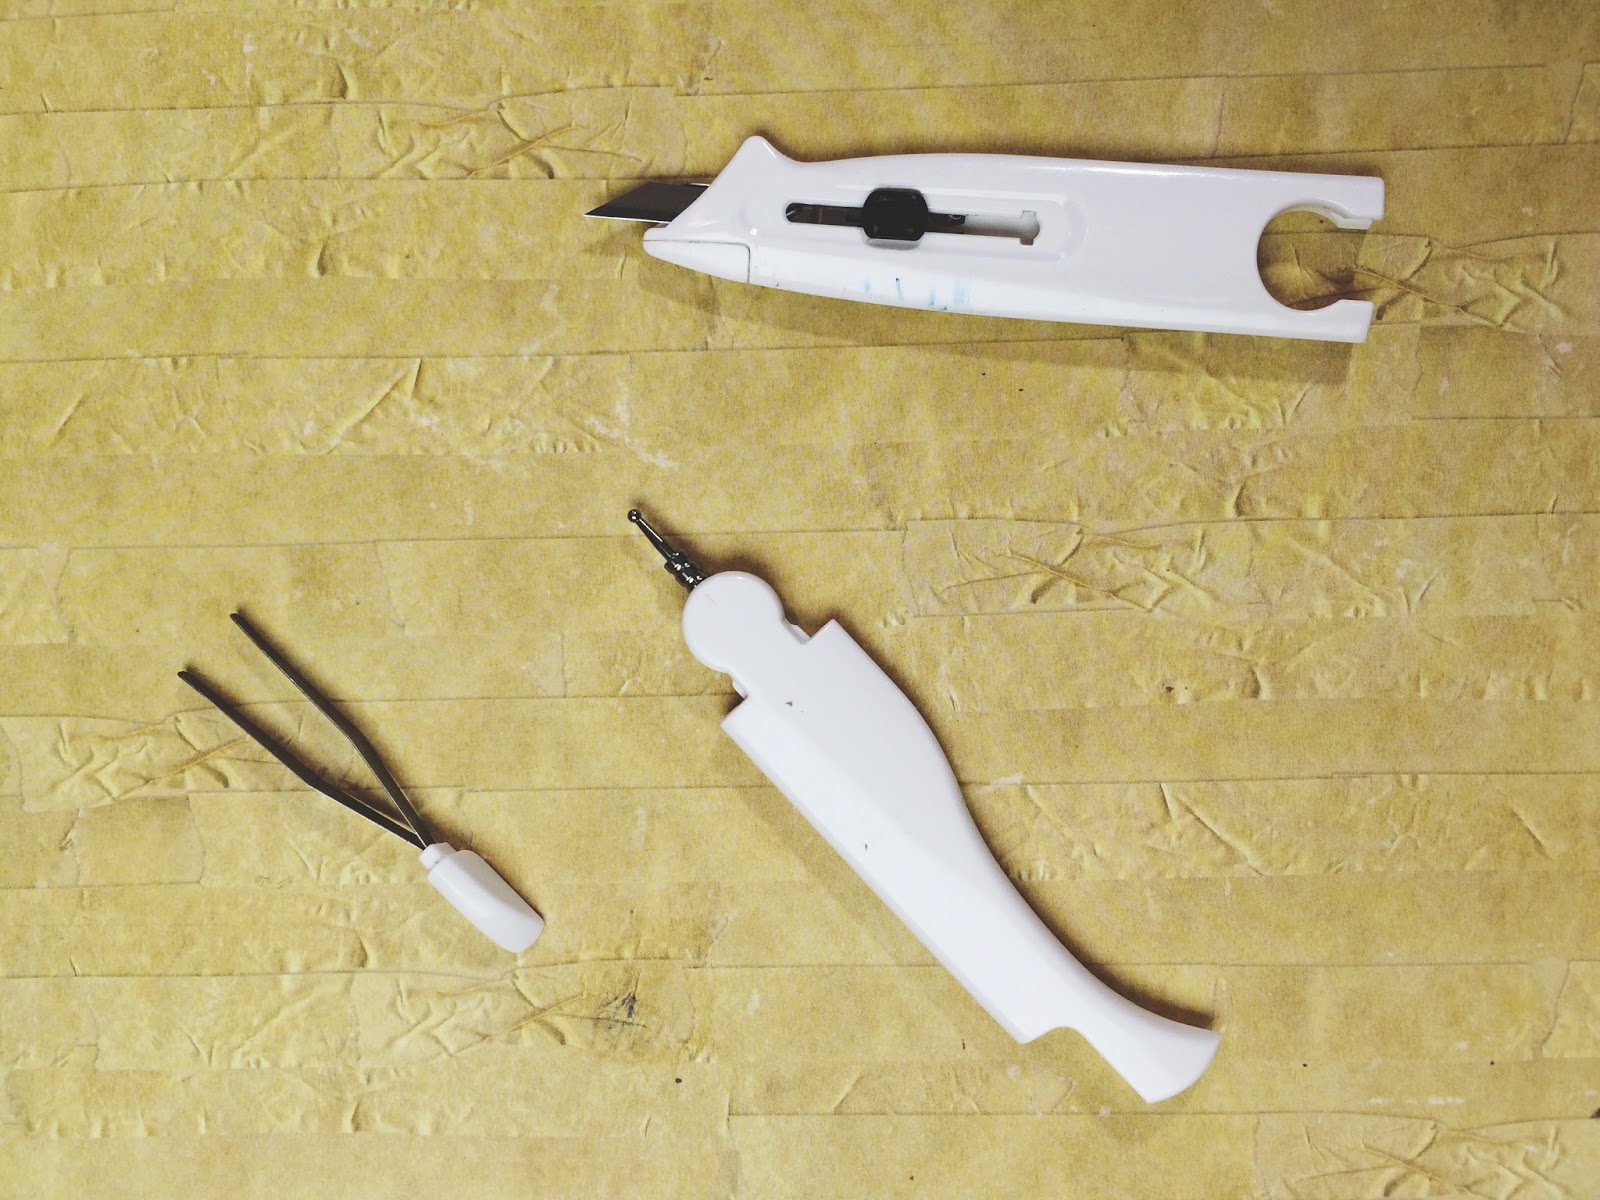
I actually got this little guy from Hobby Lobby on clearance and I can't believe I never snatched this up before.  It has a set of tweezers, a dual ended scoring tool, a small craft knife, and not to mention all the amazing powers of a bone folder.  I've been using this recently non-friggin-stop.  It is so convenient that I just can not stand it!  The blue in the picture is from use....some blue dye from some paper transferred to the plastic.  But this guy is super useful.

I have quite a few paper cutters all serving different purposes.  I have a larger one that I used to cut down large sheets of paper or through anything that is really thick. Then I have a smaller one good for quick projects and the like.  When I was searching for paper cutters I made sure to buy a brand that seemed like it would be around for a bit so the replacement blades would be readily available.  I used some of my 40% - 50% off coupons to get a good deal on these as well way back when I picked them up.

This is something I never knew existed until I got into Project Life and now I use them for everything.  Any time something needs to be attached to something else, these guys are too the rescue.  I love that there are different types you can get - reposition-able or permanent adhesives and different widths - because they can be used for virtually any project.  I've recently been using them to make little folders for my Filofax but they are great for any attaching you need to do.  Way better than messy glue or even glue sticks.

These three things have been the items I've been reaching for every time I sit down to craft.  I find that the bone folder is so versatile and am so happy I picked it up!

What crafty things are you loving right now??

xoxo, Moe

**Edited to add - Just found out that Craftsy is offering some free eGuides for various hobbies and I found this download for Paper Crafting!  Hurry and check it out while they are free! (Bonus: some of the guides have class discounts, too!)


*affiliate links included , read my disclosure here

2.13.2015

New Notepads in the Stationery Shop

Do you remember that time I opened a stationery shop?  You remember that time when I would design my butt off making invitation suites, stickers, and more?  Remember when I kind of let that slip?  Yeah, I do too.

Well, today is the day that changes.  I've added four new 5.5" x 6" minimalist notepad designs based off of this DIY.  So if you dare to have a peak, pop over here.  Below are the four new additions:

I have been loving simple black and white lately.  I am totally all over these and their simplicity - and there should be many, many more to come.  They are pretty big, being 5.5" x 6" so they can take up residence on your desk or in your stationery pile and they are probably a good fit to punch into your personal sized ring bound planners like a Filofax or Kikki K!  Ooooooooooh....when my Kikki K comes in I'm so going to see how these look in there!  Ideas are swimming!

What are you favorite kinds of list pads?  Any ideas for more?

xoxo, Moe 

2.10.2015

Beauty Review // Maybelline Fit Me Comparison (Dewy vs Matte)

Today I wanted to do a quick comparison between two of the offerings in the Maybelline Fit Me line - the Matte & Poreless line and the Dewy & Smooth line, today we'll be talking just about the foundations.  I plan on doing a comparison between the powders as well.  You can see here on the Maybelline website that the Dewy & Smooth is a repackaging of the original fit me line.  I have the old/original packaging so that is what you will see in this review/comparison.  So let's just get into it.

From the website
Fit Me® foundation has a new look for its same great hydrating formula!  Hydrates, smoothes skin texture and matches natural tone for a luminous, seamless finish.
For Normal to Dry Skin. SPF 18.  Fit Me!® Dewy + Smooth foundation for dry skin from Maybelline New York goes beyond skin tone matching to fit the unique texture issues of normal to dry skin for the ultimate natural skin fit.  While some foundations can exaggerate dry, rough patches, only Fit Me Dewy + Smooth hydrating and moisturizing foundation contains our genius hydra-smoothing concentrate so dry areas become incredibly smooth with a perfect dewy finish.
taken from the Maybelline Website here
Tone + texture-fitting foundation for the ultimate natural fit.  Mattifies, erases pores and matches natural tone.  For Normal to Oily Skin.  Fit Me!® Matte + Poreless from Maybelline New York goes beyond skin tone matching to fit the unique texture issues of normal to oily skin for the ultimate natural skin fit.
While some foundations can exaggerate pores and oily skin, only our pore-minimizing foundation contains our genius blurring micro-powders that erase pores and absorb oil for a naturally matte and poreless-looking finish.
taken from the Maybelline website here 


First Impression & Application
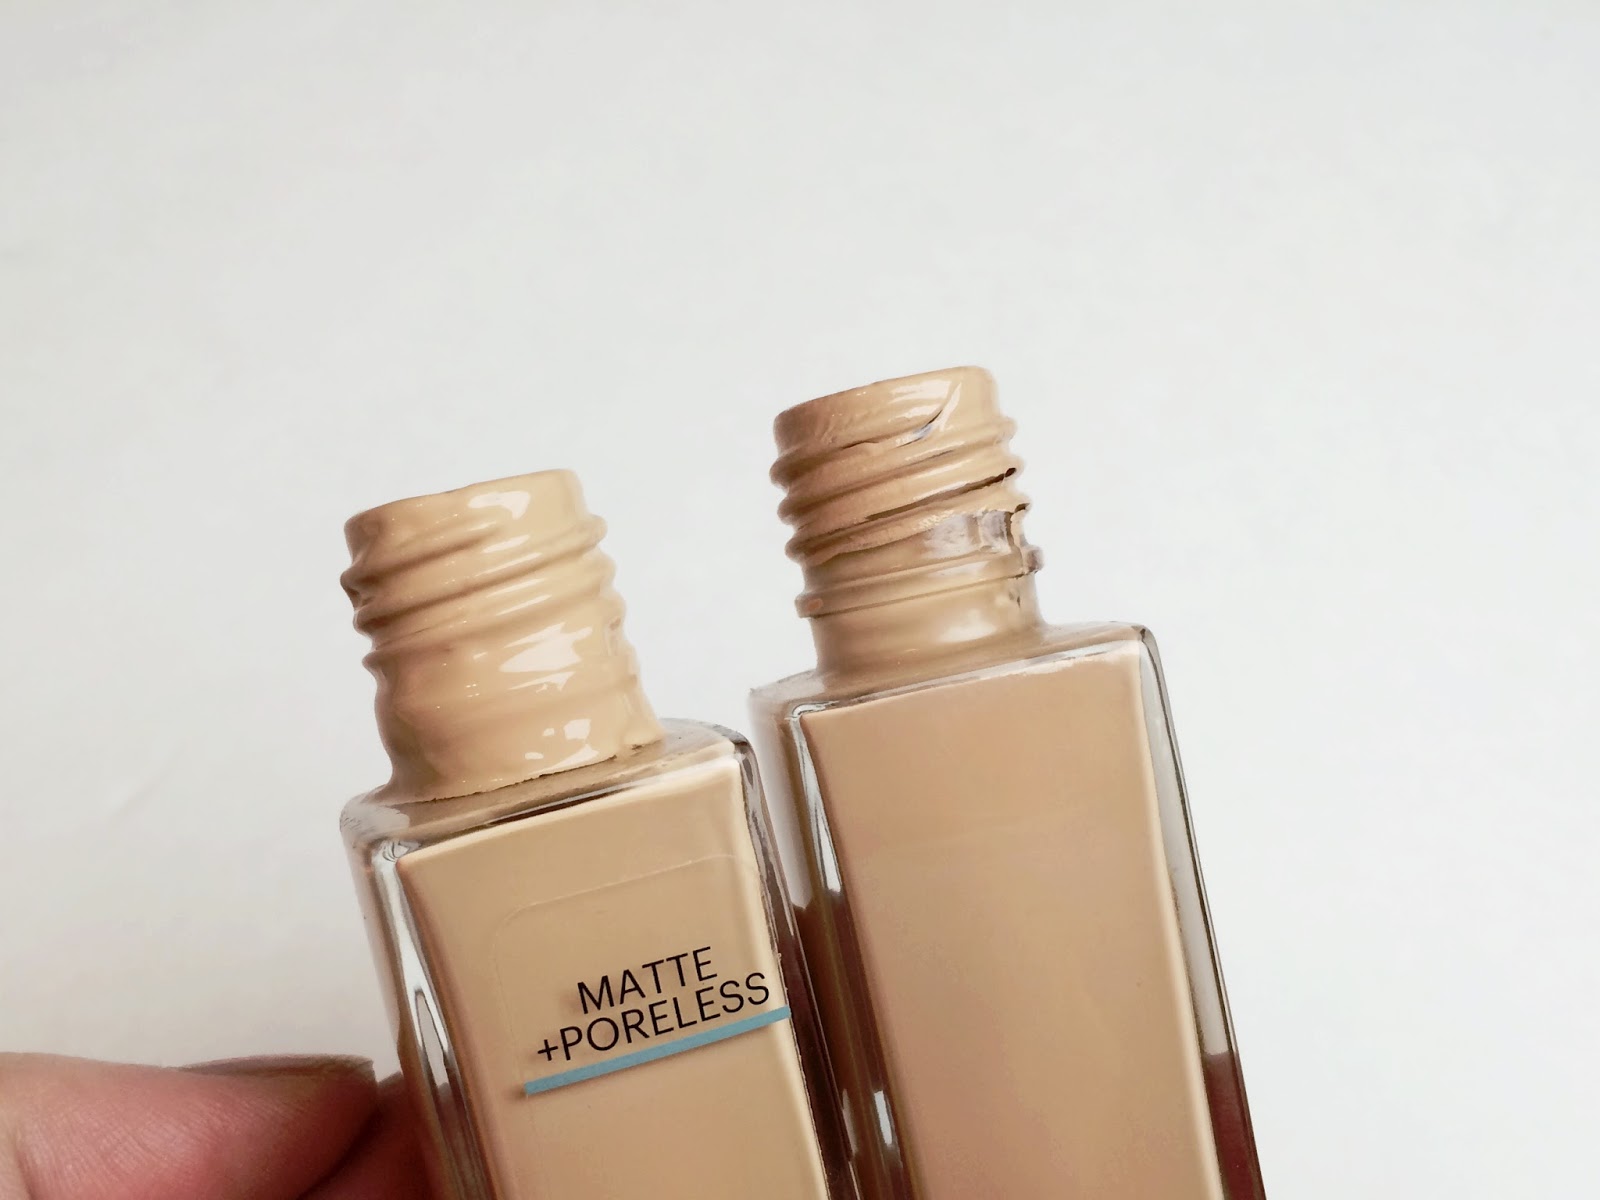
Each of these foundations come in a pumpless, square glass bottle with a black cap.  The repackaging of the original fit me foundation (found here) doesn't deviate too much from the original look - there is an addition of the words Fit Me to the black cap and the front design is a bit different.  The Matte & Poreless version has a teal accents.
The consistency of each foundation is different.  The Matte & Poreless is very, very runny.  It is a cross between the consistency of the Maybelline Dream Wonder Foundation (review here) and the Maybelline Super Stay Make Up - I feel that it is really, really runny but no too runny to blend away to nothing.  The neck of the bottle gets covered with the product no matter what I try to do.

The consistency of the original formula, repackaged as Dewy & Smooth is thicker, but not as thick as the Super Stay Make up.  It seems to give a decent amount of coverage with the sponge, but as I'll get to later, by the 4 hour mark the foundation is gone.

I apply each of these foundations with my a beauty blender style sponge.  For me, I feel that the sponge gives more coverage and less streaks.  Even though these aren't the same consistency they are still runny - just one more than the other - and streaks are a problem with a brush.

Wear time
The original formula lasts only about 4 hours on my skin.  I remember when I first got this foundation I was super impressed with it but it soon fell to the fails pile (as seen in this post).  My skin just seems to eat this foundation, quite literally.  It does slip around or get super greasy...it just disappears.  I couldn't even do a check in on it because my first check on it at work, around the 4 hour mark, left me stunned in the bathroom.  Everything was gone.
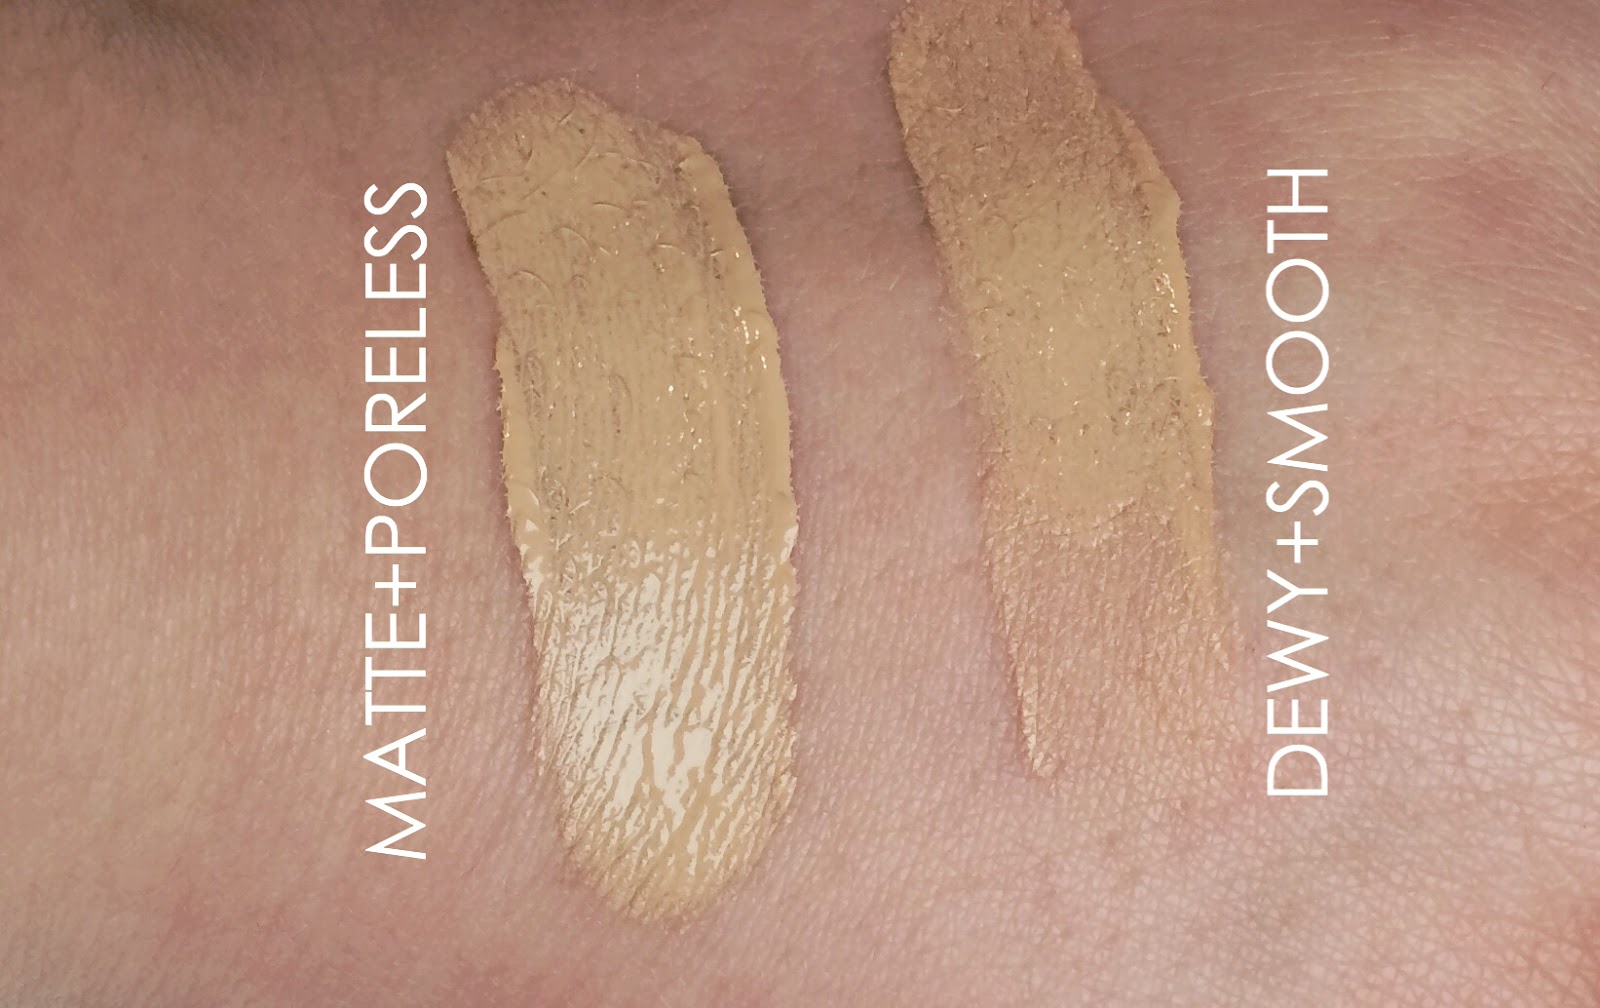
Super weird! The Dewy & Smooth is recognizably thicker than the Matte & Poreless, I hope this image picks up on that.

The Matte & Poreless, however, is the gem for me from this line.  It stays a good 7-8 hours on me.  Enough to get through my work day and then a little touch up after work and I'm sitting down to film for my channel.  I have oily skin and big pores, so the claims of the foundation really got me.  I'm not so sure about the matte claim because it doesn't stay matte all day but it does last all day, and that is the biggest thing for me.  The powder does help with the matte look though.  I would say I am matte at about the four hour mark and then after I do notice some oil but nothing too bad that I wouldn't expect.  

Overall Impressions & Recommendations
For me, the Dewy & Smooth/original formula is a no go.  I feel like if you had extra super dry skin this might be ok.  If you don't have an oil problem at all, this might work for you.  I've never had a foundation just be gone off my skin before so I was super disappointed in this foundation.

However, I am so very glad I picked up the Matte & Porless version - though I think I'll have to get another shade because 120 is too off from my skin tone - because it was impressive, especially after the original formula was a complete fail.  I like it in the way I like the Dream Wonder Foundation, too.  It has sort of an oily feel too it that makes it super runny but with really good coverage.  I don't know if the oil vs oil thing has to do with the staying power either....  Additionally, I do feel that the application of the foundation is indeed matte.  It doesn't mattify down to be unworkable but it does set matte in a way that doesn't look cakey.  I feel that I do have to be light with the powder lest I do get a bit of cake face going on.  However, a good douse of your setting spray can take care of that.

Overall, for my skin type, the Matte & Poreless foundation is the bomb.  It has grown to be one of my favorite foundations and I would recommend it if you have normal to oily skin.  If you just prefer that matte look, I'd totally go with this one.

I hope this review & comparison was helpful.  I do plan on doing a powder comparison too because I want to show the differences between them.  You can see all my foundation reviews here.

What foundations have you tried that surprised you - both in a good or a bad way?

xoxo, Moe

2.09.2015

Our Weekend + Instagram Dump

The weekend is when I tend to get all my blog things in a row - mainly because I have time to actually sit down and do it and also because I procrastinate then get a big bout of let's do this on Saturday & Sunday afternoon.  However, this weekend was different.
from the remodel we're doing on the upstairs

Zach & I laid in bed allllll daaaay loooonnng on Saturday, and we almost did it all day long on Sunday, too.  It was nice to do nothing but breath next to the person you love sometimes.  We cuddled the puppy, we talked, we watched some Sparticus on Netflix, we napped and all around just enjoyed everything you can enjoy about staying in bed all day with the one you love.
life is hard for a puppy when two humans are taking up all the bed

I've been getting away from life posts recently and I just wanted to throw this little one in here as a reminder to myself that not everything has to follow a plan, not everything has to be done.  While I would love for this blog to be a wonderfully curated place where I post planned content in a regular fashion and reap the benefits of a for profit blog - I'm often reminded to get my head out of my computer and get snuggled under a blanket.

We really need to spend time with each other and while it's fun going to museums and going on other trips sometimes it is nice to stay home and enjoy each other's company.

So it might be a little quieter than usual on the blog this week - though I'm trying my hardest to get up three posts this week, that's what I strive for every week.

Hope you enjoyed your weekend!

xoxo, Moe
ps. follow me on Instagram here!

2.06.2015

Four Simple Goals February 2015

What is up February!?! Can you believe we are already into the second month of the year......ARE. YOU. KIDDING. ME??  Life goes by too fast, I'm realizing that now that I'm older.  To keep it going here are my four goals for February 2015:

Finish 2014 Project Life Album - Yep, the last 4 months of the year still aren't in physical form.  I still have loads of Christmas photos on my phone and I just really, really, really need to get the album done.  Not to mention I need to start on my 2015 album!!

List 3 Planner Pages in the Esty Shop - I think last time I listed this type of goal I later decided that it wasn't for me.  However, I've figured out a better way to do my printable planner inserts and really want to start my shop back up.  I've struggle recently with this and that's why I decided to start offering so many printables on my blog.  Every time I think about the shop I get stressed, but I still want to make.  So I thought offering free things here would make me less grinch like - sometimes I feel really greedy when thinking about what I could sell out of the things I make.  I tend to think if I can make it I should sell it.  But there's a lot of things that go in with selling your handmade stuff and after shutting down our vintage shop I feel like physical items just aren't in the cards for me right now.  I say that as I have plans for making some physical planners to sell in the shop eventually!

Progress on the Upstairs - I hope we can get to painting this month.  That is my goal.  It is so hard to work all day then come home and work on the house.  I'd rather sleep or blog or cuddle or anything else!

Have a date night - I really want to do a nicely planned date night.  Not just hey, let's go get dinner kind of deal but a really nice, planned out date.  Ideas are appreciated!


What are your goals for the month?  Anything exciting you want to tackle?

xoxo, Moe

2.04.2015

On Being Jealous // Jealousy, Comparison, & Acceptance

If vanity is my favorite sin, jealousy is the one I struggle with.  I've had a post like this sort of typed up and hanging in my drafts folder for a while now - since August of 2013 to be exact!  I've always wanted to talk about jealousy here on my blog because if there is one thing I struggle with it's jealousy.  It's something that I totally have under control - something I remind myself is really silly.  But it's also something that I have been made aware of now that there are such things as blogs, Facebook, & Instagram.  I'm pretty sure it's something I've been plagued with my whole life but it's also something that I've kept under control.  I don't know that I've ever seen someone who is jealous, what does a person who is jealous look like?  How is this emotion expressed? I don't know what it looks like to express jealousy because it's always been something silent to me.

I don't know when I first encountered a bad bit of jealousy but I think it stemmed from blogging, Instagram, and the all around perfect life we often see from the viewing side of these platforms.  As a blogger and an instagramer I know I'm sharing only the most perfect images of my life.  I'm staging shots - how do I get my coffee, bracelet, bag, aaaaannnnddd feet in this one square canvas?  I look like an idiot posing for 37 shots of myself in front of a coffee shop full of people before I ultimately decide it's not worthy of a post.  So why do I feel like everyone else's life is so much better than mine when I'm the viewer on Instagram?

It doesn't stop there either.  Facebook gives me a really bad case of jealousy because I see some of my really, really great artist friends making something of themselves while I haven't touched clay in probably 3 years.  The latter part of that sentence is my fault entirely but I can't help but feel like I'm a failure because of the choices I've made sometimes.  (None the less I should sign up for a pottery class or something since we still haven't set up the garage yet.)  I see so many of these people in their awesome apartments, creating their awesome creations, and I'm here creating different things.  And that is the point - the things I love making are different, awesome, amazing, and there's no need to compare.  Because, as you may know, comparison is the thief of joy.

When I feel jealous I try to rationalize and remind myself that what I post on these platforms is exactly what others post - only the most beautiful shots of their perfect lives in between cleaning up after the kids, getting over a fight with their partner, struggling to feel successful in their 9-5, scrubbing the dish that's been left in the sink a little too long, and looking at the overflowing trash can and deciding to take it out tomorrow.  These people lead real lives just like I do and just like you do.  You know those weird things you do, other people do weird shit too and it's not posted on Instagram.  Not everyone is living the same life & everyone gets to do what they want with theirs.

I've always channeled my jealousy in to making things happen for myself, into genuine happiness for others, & into sharing things with others.  I've always been proud of the fact that I love to share my success with others in a way that makes them a success too - like a DIY, or a little secret I've learned.  I see it as an attempt, I guess, to fight the jealousy.  If I share how I made something no one will be jealous of it because they can do it too.  I always try to spread my light because a candle loses not of it's light by lighting another.  That is one of my favorite quotes.

I've accepted that I get jealous and when that happens I turn it around and make it my intention to share my success with others in a way that they, too, feel successful.  One of the biggest things I'd like to be known for in my life is that I made others feel like they are worth something, like they are successful, like they can do it, like they are a somebody.

So those are my thoughts on the sin I struggle with, hope you found this post a little bit informative and a little bit relatable!

What do you struggle with?  How do you take control of it and turn it around for good?

xoxo, Moe

2.03.2015

Trend Tuesday // Gotta Have a Plan (+ A Little Announcement)

If there is one thing I've fallen for lately, it is planners.  Every day I stalk planner hashtags on Instagram - #planneraddict #filofaxlove #fauxdori - and just swoon over all the planner goodness there is to offer.  So today I thought I'd do something I haven't done in a long, long while.  I am doing a wish list style post featuring some of the planner things I've been lusting over!  Let's get into the goodies:
First I've been in love with discovering new brands of planners.  I just found out about Webster's Pages Color Crush Personal Planners.  You can get a kit which includes everything you really need to start off with when you're thinking of becoming a crazy planner person - monthly and weekly inserts, page marker, 5 patterned dividers, a dashboard kit, and a paper pad.  That is literally everything you'd want to get started with!  Such a no hassle option if you're at a loss of where to start.  This option is even super affordable, much more affordable that a just a Filofax with plain inserts.  Or you can pick up the planner/binder by itself if you're looking for another planner to add to your collection.  There are also tons of accessories on the site as well!

I've been in love with the Fauxdori that I made using this tutorial on YouTube and so I've been on the hunt to see how others have made their own.  Sam from Happie Scrappie has an amazing option of a custom fauxdori (or Happiedori as they are called!) on her online shop.  Unfortunately the custom option isn't open right now but I am keeping this in mind if ever I want to add another fauxdori to my collection.  I just love the colors.  I'm also digging all the other accessories in her shop as well.

This gold ring bound planner is also from the Happie Scrappie shop.  I remember back in the late fall (I think) everyone lusting after the gold and silver Filofaxes that were released.  I wanted one soooo bad but seriously, a Filofax is expensive from the website - I don't even think the gold/silver ones were released on the US site - and buying the crazy popular ones second hand can really break the bank.  So this amazing gold one is a super affordable one and one that is readily available.  It does state on the website that it is available for preorder but at least it's there to get your hands on!

Finally, I've had my eye on a Kikki K style planner for a bit.  I couldn't really justify another planner because these ring bound planners can get expensive.  However, I saw the medium size lilac Time Planner on sale for half off so I snatched it up.  I will be opening my Etsy shop back up soon with planner printables and needed a way to showcase the personal size inserts I'll be offering.  My favorite color is purple so I figured I wouldn't hate it...it would be a nice addition to my shelf and a pretty good prop for the shop!

Pretty planners and functional printables have been a really fun thing to get into latelty.  Keep a look out for the planner printable shop opening probably mid February but if you want some free planner printables, click here.

What is on your wish list?

xoxo, Moe

2.02.2015

Make it Monday // Create a Custom Monogram

I'm not really a monogram person but ever since I did the custom planner cover DIY, I've been thinking of other ways to customize things.  How much more personal can you get other than a monogram?  Seriously?  So while the first thing that came to mind was a custom planner cover (when will I get away from the planner DIYs?) You can monogram anything with this tutorial..well, almost anything.  So here is another digital DIY using my favorite online power house - PicMonkey.  I promise one day I will get away from the digital tutorials, but I'm just all about them right now!  This free service is awesome!  Here's how I did it:
Supplies: circular 3M (or any brand) labels, full sheet adhesive labels, or full sheet, clear adhesive labels, word processor (I used word but Open Office or even Google docs will work well for this), PicMonkey.com online photo editor
First, research some monogram styles you like.  I looked on Pinterest to find a style I liked and attempted to mimic it with PicMonkey.  Now, PicMonkey is pretty powerful but it can be pretty limited.  Sometimes you'll have to be super creative to recreate something fancy but I would say 8 times out of 10 there is a way you can do it.  I chose a pretty simple style to mimic, so lets get started.
From the PicMonkey home page choose a square canvas.  You don't have to make it an specific size because we'll resize it when we get to Word.
On that canvas, design to your hearts content!  I started off by adding two squares then making the center transparent and the outside line black.  You can change the color now if you like but I like to design in black & white first.
I resized my first two squares to take up a big part of the design space.  Then I right clicked (or two-finger clicked on my Mac) to duplicate the squares.  I rotated them to be a diamond shape.  I resized all as needed to get the design above.  Another tip to make this a watermark to use over photos is to change the background to transparent - under the top crop tool on the far left of the screen - then save your image as a .png file.  You can learn more about creating a watermark with PicMonkey here.
Going for a bit of a modern monogram, I used the font Franchise which is a free font on PicMonkey.  You can also use your own fonts or upgrade to Royale for $4.99/mo or $33/year for some more features.  (Sign up here!)  Once your satisfied with your design save it to your computer.  If you think you might need to modify your design after you print, be sure to keep PicMonkey open so that you still have access to edit it.
Next open your word processor, I am using office and the template here for the 3M circular adhesive labels I have.  You can use any type of label sheets you may have or even full sheet adhesive labels in clear or white.  If you print them on clear adhesive you won't have a white boarder so that is perfect for a notebook, laptop decal, or anything you don't really want to put a white sticker on.  I dragged the monogram image I'd saved from the Finder to the word document.  It automatically resized itself.  Then I copied and pasted the image in the boxes I needed to.
It took me a bit to figure out my label template so you can always print a test sheet before printing on your real label sheet to make sure things line up.  I dragged my monogram from to the word document and the copy & pasted to put all the monograms in line.
Then I printed and stuck them on everything.  Creating your own monogram is a fun and really personalized way to say 'hey, that's mine!' And, like I mentioned above, it doesn't have to be for your planner!

xoxo, Moe

You can find more PicMonkey tutorials on the blog here.