10.29.2014

Revisiting October 2014 Four Simple Goals

October is over....my favorite month just flew by.  I got about zero of these goals done.  I just wasn't feeling it this month I guess.  Sometimes I find myself really wanting to do something but I have zero motivation to do it.  Like, I'd really like to open up my etsy shop again and work on some stuff in my Zazzle store but I am just not feeling it.  But anyway, lets just look at the goals, shall we:

Get the Blog Sidebar & About page organized - Well, I did it.  I finally took out the post grad part of my about me.  Can you still claim that 3 years after graduation and when you have a full time job?  I mean I still feel like I'm parading around in my adult suit but I guess moving into your late twenties means you can't really consider yourself fresh out of college.  I need to find a new way to identify myself!

Clean out the garage (again) - didn't really happen.  However we pulled all the carpet up from the upstairs in getting ready to do the remodel, doesn't that count? No, it doesn't.

Make something new - I made a few new things this month actually.  I got a loom for loom knitting and I made a hat.  I'm not quite sure that I like loom knitting.  I thought it would have been something easy to do but I don't quite like the end result.  It's definitely easy but I think that crocheting is easier.  I also made a DIY soft box that I might share in a Make it Monday later on.

Go to the Pumpkin Patch - We didn't do this but we did get our pumpkin carving on.  I got some big ol pumpkins from a local market down from my work.  So we just sat in the floor and carved away.

It always feels good to look back on my goals even if they didn't really get accomplished the way they were intended.  This Four Simple Goal project keeps me accountable.  Here's to a successful November!

xoxo, Moe

10.28.2014

Revlon Moisture Stain vs. Wet n Wild Vicious Varnish Lip Stain

Today I wanted to share something interesting I found while playing in my crazy make up collection - the new Revlon ColorStay Moisture Stains are quite comparable to a cheaper drugstore product - the Wet n Wild Fergie Collection Vicious Varnish High Shine Lip Stains. (Long name but longer  lasting than the Moisture Stains!)  We're doing some remodeling on the house which involves the upstairs, which in turn involves the bedroom, where my vanity is.  So I had to move all my make up to the bathroom and in doing so I played around a bit.  Honestly, I can't clean up my collection with out playing around and swatching all the things I have!
Currently I have quite a few of the Vicious Varnish stains but only two of the Moisture Stains.  The Wet n Wild stains are about $3.99 (.17 oz) & the Moisture Stains are around $9.99 (.27 oz).

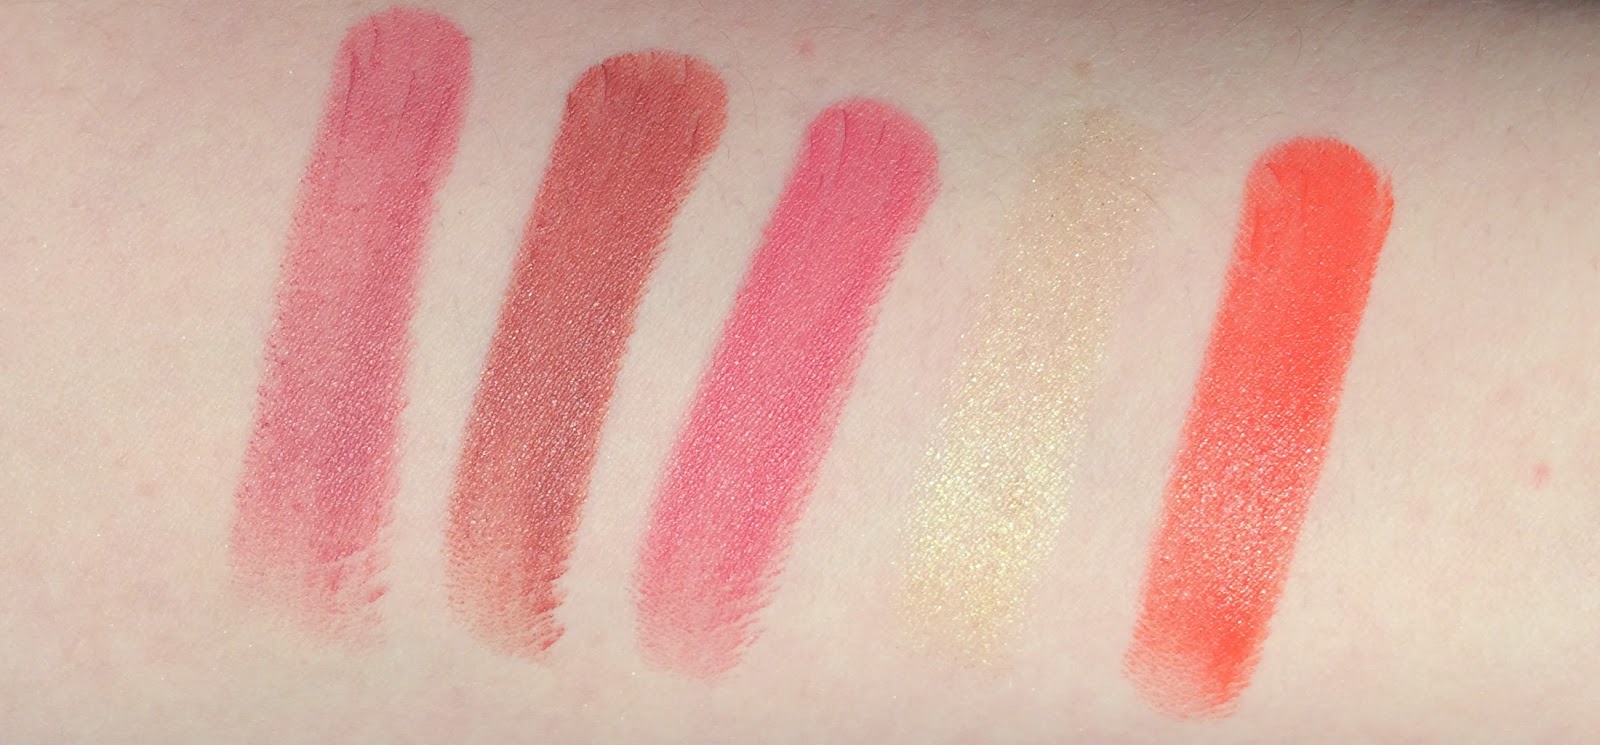
Each of these has the same sort of sticky, glossy texture - so the formula is quite similar.  Now, that stickiness doesn't mean they are annoying, at least to me.  Personally I think each of these dry down or set and leave a long lasting, gloss finish that is comfortable to wear on the lips.  When it comes to application the WnW stains are a bit thicker and apply more evenly.  The Revlon stains seem to be thin and can skip over your lips when you're applying it.  The consistency is a bit thin, and you do have to go over the same bit a few times to build up the color.  But be sure not to go over the same place too much as you'll pick up the color as the formula starts to set.  Another difference to note is that none of the WnW colors have shimmer or glitter in them, but in the example above Revlon's London Posh (the lighter peach shade all the way on the left) does have shimmer.

Each have a doe foot style wand.  The Revlon wand is similar to the Maybelline Color Elixirs (which I don't own but I don't think the formula of those are like these stains at all) in that it is a tear drop shape.  The WnW wand is more of a skinny, paddle shape and is less stiff than the Revlon wand.  Each foot has a bunch of little fuzzies on it and I think that the fuzzies work better with the thickness of the WnW version but it seems that since the Revlon consistency is really thin, the fuzzies sort of pick up the product as you move across the lip.

The lasting power for each is pretty much the same.  Each has a unique texture - and by that I mean each feels the same but they don't feel like any other lip color/product I've ever used - and it is the texture that lends itself to the long lasting nature of these stains.  If you pick up a lighter color of each of these products it's not going to stain your lips as much as the darker colors.  For example the deeper shades pictured above - WnW Throwing Shade & Revlon India Intrigue - will stain better than the lighter shades - WnW Legendary Face & Revlon London Posh.  Additionally, each do live up to their names - The Vicious Varnish is very glossy and the Revlon Moisture Stain is moisturizing.  Both come of very glossy which does last and both lock in moisture because of the texture of the product.

Overall, I would recommend you pick up the Wet n Wild Vicious Varnish High Shine Lip Stains over the Revlon Moisture Stains.  I think they are very comparable, but in price and performance the Wet n Wild comes in slightly better!  With coupons that are often offered at the drugstore and sales that run every now and then you're getting a better deal with the Wet n Wild option.

Have you tried either of these?  Which do you prefer?

xoxo, Moe

10.27.2014

My First Project Life Album

Well, isn't this a long time coming?  Today I want to share with you a picture heavy post - my first completed Project Life Album!  In the next week or so I'm going to share with you my journey with Project Life - what I've learned, what I will continue to do, what I hope to do, etc.  Today I just want to share with you my first experience with Project Life.  I tried a few things, realized I didn't like a few things, and really fell in love with the process.  So get comfy, this is a picture heavy post!
This album goes from when we first me in October of 2011, to we we moved to Michigan, to when we moved into the house, through working on the house, and ends after Christmas 2012.   


More photos after the jump!

10.22.2014

October 2014 Ipsy Bag

It's that time of month again! I get so excited when I get my tracking email for my Ipsy bag every month. I love getting new, fun make up & beauty products in the mail every month. Here is this month's bag:

The Bag
This bag is like a quilted, patent leather style fabric. The bright teal color doesn't really scream fall to me but the theme of this bag is Beauty Candy so the quilted style of the bag and the color is quite fun to go with the theme. Unlike many of the other bags I've recieved this one is actually lined, which is very nice. Gives it a bit more substance.

Skyn Iceland Glacial Clansing Cloths, Ecru New York Acacia Protien BB Cream for Hair, NYC Big Bold Curl Mascara, Starlooks Gloss in Guilty Pleasure, Figs and Rouge Hand Cream.
Redeemed with Points - Milani Bella Eyes eyeshadow set.

I have to say I wasn't too pleased with this months samples. First off, getting a full sized drug store mascara isn't really want I wanted to get, nor what I expected to get. This NYC mascara is $4.99 at CVS and actually readily accessible by me. I usually expect to get products that are new or interesting that I might not be able to get my hands on everyday. The teeny, tiny Starlooks lipgloss sample is just rediculous. Now, the actual formula is rather nice and I might just throw it in my purse but the size is crazy tiny. Again, not what I expected from my Ipsy bag. The facial towlettes are always handy and it's nice to have a spare package. The hand cream will probably go in my bag as well and it's really smooth and hydrating. A nice sized sample in my opinion. Another decent sized sample is the Ecru New York BB Cream for your hair. I like that it is color safe as I just dyed my hair but still need some hydration.

I am so very glad that I had points to redeem this go round because the only thing I was really excited about was getting the new Malani Bella Eyes eyshadows. The set of three colors Bella Ivory, Bella Gold, and Bella Espresso (review coming soon!) were available so I snatched up the set because I didn't know if these eyeshadows were really worth it. I am so very thankful for every one that signs up for Ipsy with my link - these points allow me to try things I wouldn't neccessarily try to review for you all!!

This is probably one of two or three total bags I haven't been 100% pleased with but sometimes that is the luck of the draw. If you'd like to sign up for Ipsy, please click here.

xoxo, Moe

10.21.2014

Beauty Review // Maybelline Dream Wonder Fluid Touch Foundation

Today's review is on a new(ish) foundation to the drugstore: the Maybelline Dream Wonder Fluid Touch foundation. Honestly I was going to skip over this foundation because the reveiws and videos I saw online didn't really wow me. But when it was on sale the other day at Meijer, I decided to go ahead and pick it up. Although I have a zillion foundations, I needed to pick up something lighter in shade as we move into winter. Currently I'm combining my Summer foundations with the lightest foundation I have - the L'Oreal Infallible 16 hour foundation. But a girl's gotta have options, right? So I grabbed it up.
From the Website
Breakthrough texture fuses with skin to create a finish so imppecable, yet undetectable. Medium to Full coverage. Exclusive dropper
taken from the Maybelline website here.
First Impression & Application
The foundation comes in a tear dropped shaped, glass bottle. Prices range but I find the cheapest place to find foundations, or make up in general, are big stores like Target, Walmart, and Meijer. While they don't always have the best sales you'll get the best full price option from these stores. I found mine at Meijer on sale but listed as a full price of $8.99 (get a $4 coupon here!). For that price you get .67 fl oz which is significantly less than the 1 fl oz in other foundations all around - high end and drugstore standard is usually around 1 fl oz.
To dispense the product there is a tear drop shaped dropper attached to the inside of the top of the cap. The dropper is shaped this way with a point at the end and it's supposed to drop the foudation on to you fingers, etc with out contaminating the product. Even though this foundation is quite liquidy, it's not liquidy enough to freely drop from the dropper in any significant quintity. If it were able to do that I believe you'd get it everywhere! So I took the little dropper and rubbed in on the back of my hand.

The consistency of this foundation is very, very runny. It reminds me of the Physician's Formula Spotless foundation in that it can go everywhere it's so runny. However the Maybelline Dream Wonder Fluid Foundation comes in much more shades.

First off, let me mention that I have oily skin. We're getting into the cooler days here so it's not too bad in the Fall/Winter but I still am looking for a foundation that will combat the oil or at least keep me looking matte for longer. As a person that works all day long I'm looking for a foundation that won't go anywhere, won't slide around, and will keep me looking fresh all day. I feel like I've only said my skin type a few times here when I do reviews and it's pretty helpful to know what skin type a reviewer has!

I applied this foundation to primed skin (I used Rimmel 002 Primer & Boots Matifying primer) using an angle top kabuki face brush (my favorite is in this set on Amazon...so affordable!). Like I mentioned above I used the dropper to lay some product out on the back of my hand then I dipped my brush in and buffed it into my skin. I was afraid that it would be very streaky because of the texture and consistency of the foundation but it actually blended in quite nicely. I found that the cleaner your brush, the smoother the application to the face. For some days I also used the Real Techniques sponge to apply this foundation. I did not find that the sponge soaked up the foundation at all. I was able to achieve the fullest coverage - up to about medium - with sponge application.

I was super surprised about the coverage! If you've read or watched any reviews where someone says that there is coverage with this product but your natural skin shows through....it is true. Try to imagine with me now - When I applied this foundation I was in awe at how it blurred the imperfections in my skin but really kept it looking natural. I would say the coverage on this is sheer to medium, however I built it up to medium because of the imperfections on my skin. It looks as though I have less imperfections on my face than I actually do. It looks natural but my imperfections are blurred. The texture once applied to the face isn't quite a liquid to powder finish, but it is unique. It feels soft and smooth on the skin with out feeling sticky and with out looking powdery. As always I powdered my face after applying this foundation - I used the NYX Stay Matte But Not Flat Powder Foundation.
Wear Time
On my oily skin I do think it lasts pretty well through out the day. At around the 3 hour mark it still looks flawless, I did notice a subtle dewiness (or oil if you want to be specific) but it wasn't too bad. At this point it didn't looked like my foundation was slipping and sliding it just looked radiant. Once around the 5 hour mark I noticed more oil showing through in my T-Zone and not in a pretty way. I blotted using the all so expensive face tissue and the foundation wasn't disturbed. It went back to looking pretty good. At this time the only bit of wear was creasing around the nose. 

At the 8 hour mark it wasn't looking too bad, not the greatest but still not bad. It looked like I'd worn foundation for 8 hours - it was still hanging on and maybe with a little touch up I could transition into something to go out to dinner in with out completely redoing my make up. I noticed some imperfections showing through but I could tell that overall the foundation was still there all over my face. If you blot this foundation it actually bounces back pretty well. Very little to absolutely none of the product transfers so you're only picking up the oil when you blot and not picking up your coverage. I also found that the matifying primer from Boots was the most successful at keeping the foundation looking good the longest. Additionally my blush stayed on my cheeks all day long which is a big one for me.
I was swatching Wet n Wild lipsticks before this...can you see the stain they left behind??

Overall Impression & Recommendations
Overall, I'm definitely impressed with this foundation! If you have oily skin with very few imperfections and it's in the cooler months you might get a lot of wear from this foundation. Although the light weight feel of the foundation would be perfect in the summer, I would be hesitant to use this in the heat as it might melt, slip & slide, and just overall not look very pretty. If you do get oily, don't worry about transferring your coverage when you blot off the oil. The coverage does stay and I would say it's because the liquid really sets into the skin.

This foundation doesn't sink into my pores and really does even out my skin tone. The problems I have that I like to correct on my face are scarring and some redness. This foundation definitely cancels those problems out. I would consider this a foundation to wear on a good skin day. If you have active blemishes, cystic acne, darker scarring, or the like, this foundation probably wouldn't work for you. It is not high in coverage enough to distract from those problems - this is just personal preference! I know I prefer to have a fuller coverage foundation to cover redness and acne when I have a bad skin day because the fuller coverage covers everything and gives an even canvas.

The color range of this foundation isn't great - it's no Revlon Color Stay - as there are only 12 shades. Additionally the color of the bottle sort of reflects the color of the product meaning that the bottle is actually colored but you can see the product through the glass.

All in all if you have dry to moderately oily skin you might like this foundation. If you have great skin or are having a good skin day and want something very light, you might like this foundation. I would be interested to see how this foundation performs on my mom because I am thinking she might like it.

What new foundations have you been loving from the drugstore?

xoxo, Moe

10.20.2014

5 Things that Make Me Feel in Control of my Life

Sometimes in life it's the little things that make me feel accomplished..and by accomplished I mean make me feel like I have my shit together. I type this from my recliner as I look at all the shit that has piled up on my coffee table from the past three days. Really? It's only Monday? Why can't I keep this shit straight. I posted on the blog a while ago how I tidy and clean the house and I even have a cleaning schedule that makes perfect sense for me. And the truth is I really do try to stick to that schedule but a few things have gotten in my way - bad days at work where I come home and give zero fucks and just veg out in front of YouTube, but more than that right now is the fact that our house is in a state of dissary because of the remodel upstairs. Every since getting into the mind set of everything has a place it is really, really hard for me to have things find new places. Now, I'm not saying my house was perfect before, but it was tidier. Everything had a place to be and it was easier to stick to my cleaning routine because I didn't feel like I was shuffling shit just from one room to the next. There is no room for anything because other things are takikng up the room where these things go. I feel like when I clean I'm just moving shit to another pile then moving it back. But there are little things that make me feel accomplished and like I'm not totally losing my mind:
When all my curlers are in my head before 7:30pm
Weird? Yes. Neccessary? Most definately. There is like zero stuff in my life that I can control - it's true for all our lives. But I can control my hair. Right now I want my hair to be curly and to do that I need to have the curlers in for as long as possible. So coming home and immediately putting curlers in my hair is a big deal that makes me feel accomplished and in control. Do I feel less insane? Yes. Do you think I'm still insane? Probably.

When there is not shit on the coffee table
We spend the most time in the living room so a lot of things get done there..mainly my hair right now, so there are curlers everywhere....and so the coffee table get so much junk piled on it. And I really just want to take a trashbag and dump it all, but I can't. Also, since Zach likes sleeping with the TV on he uses the coffee table as a night stand so there's a lot of stuff on it now. If I can get this one thing cleared off and the living room vaccuumed then I stop freaking out. Until I walk into the next room.

When I can follow my morning routine to a T
Please, please, please don't interrupt my routine. I have this planned down to the minute -ish. 5am alarm. Hit snooze 3 (4 tops) times, get up at 5:30 if I'm good, 5:40 if I'm bad. Pee (edit: of course I wash my hands after this...I just was them again before touching my face after doing all the dog stuff!!). Take dog out. Go upstairs, feed dog. Wash hands, brush teeth, wash face, other face things, contacts. Back downstairs chill on the bed with phone or iPad to get the waking up going on. Iced coffee? Sure, maybe, probably not acutally right now, too cold out. 6am go in the bathroom, play Colbert if it's Tuesday-Friday AM. 6:13am I should be onto my eyes. Done with make up by 6:17am hopefully. Clothes on. Curlers out. Dog in his house. Out the door between 6:30 & 6:33. If I get this done you can bet I feel accomplished - all my things are done and I'm at work on time. Obsessive? Just a little bit. If my routine is interrupted and not on my terms I tend to have a bad day. Now I'll ask again..obsessive? Oh yes, yes it is.

When the kitchen counters and sink are tidy
Just like the Coffee table its just one of those things you see. Now, I could have like 30 dishes in the sink but if the stainless steel part of the sink is clean along with the counters I lose less of my mind. I just can't stand cluttered or messy counters. I can't. And we have a lot of counter space so there is lot of room to clutter up. Nope. Get that shit outta there. As I'm typing this it really is stressing me out that I can't get into my cleaning routine because everything it so jumbled up here!! Gah! Please do not stop by my house any time soon!!

When I'm making a list of things for the blog and I end up with 5 things or 3 things
I almost ended this post with only 4 items on my list. Now that is crazy, right? I wouldn't say it's tooooooo obsessive, it doesn't bother me tooooo much. But I do think twice about publishing a list of 2 or 4 things. Just seems odd...you know?

Anyway, this post was just something for me to do while I stressed out about having a cluttered coffee table, to pay for another freaking tire before even making a payment on my car, and procrastinating taking a shower. So there you have it. Happy Monday.

Is there anything you want to share with me to make me feel less (or more) insane? Please do, we can start a club.

xoxo, Moe

10.16.2014

Boost Your Blog // 3 Must Have iPhone Accessories for Bloggers

With the release of the new iPhone 6 aaannnddd the fact that nearly everything is bigger and better including the camera, I thought I'd share with you some awesome must haves for making the most of your iPhone photography.  If you've found that your phone is the camera you carry with you the most and you like to edit your photos on your phone, here are three accessories that will make the most of your photos:
This can take your shaky phone photos to the next level.  If you find that you do a lot of staged blog photography with your iPhone, a tripod mount steadies your phone and leaves your hands free to compose your shot.  I love using my mount and the gorilla tripod it came with but if you have a real tripod you can also tilt your phone to more steady angles instead of carefully perching it on the nearest, tallest thing.

Even the cheapest remote works perfectly for this.  I have this one and it does the job.  This also leaves your hands free and reduces the shaking from pressing the button on the screen of the phone.  You can also carry this one easily in your pocket if you're taking outfit shots or group shots.

If you're trying to get that close up shot and capture the intimate details of your subject - like a flower or details of stitching your stock camera lens probably won't cut it.  You'll definitely need the micro lens that comes in this set.  If you're trying to capture the widest angle possible, like a group shot is nice scenery, you'll appreciate the wide angle lens in this set.  However, with the wide angle you'll get a little bit of warping at the edges of your photos.  

All in all if you're trying to step up your iPhone photo game you might want to consider these three accessories.  I've found them individually on Amazon but also found a great set (plus a selfie stick!) here. 

What are your top tech accessories?

xoxo, Moe

10.15.2014

Things You Should Want to be When you Grow Up

Sometimes I like to think about where I am in life.  I like to think about where I am compared to where I was two, three, four years ago.  The great thing about having a blog is that you can totally go back and see exactly what was going on in your life at a specific time.  Sometimes I like to think about who I was when I was in college.  The biggest question that was asked from preschool to college graduation was what do you want to be when you grow up?  Well I finally have six answers to this question.  These are the six things you should be when you grow up:
Happy - becaue happiness is underrated when it comes to being an important part of life.  You could have anything you'd ever want but if you're not happy, you're not happy.  Happiness could mean working a job that gets you by so you can enjoy the things you love.  Happiness could me spending your afternoons walking with no worries.  Happiness could be in low paying job giving the most reward to your soul.  After all, you can't take it with you when you die & the best way to be remembered is to give to others.

Able to ask for help - You should be able to ask for help becuase it is a reflection of your understanding of yourself and your limits.  If you ask for help, you're showing others that you are humble.  If you ask for help you are showing others that you are vunerable.  If you ask for help you're showing others you are human.  You should also accept help when it is offered, accept it gracefully and humbly so that you may give help later.

Able to give help to others - You should be able to give help becuase this is a demonstration of how well you know your strenghts.  If you give help you're showing others your strength and compassion.  If you give help you're showing your willingness.  If you give help you're being thankful for the help you've recieved.

Willing to teach - You should be willing to teach because it shows what you have learned. Not only does it connect you with your student but it connects your student with your teacher.  You each are a part of a long line of others who share a love for a craft, for a skill, for changing a tire.  You are connect yourself to the line of humans you have come from and that is humbling.  A candle does not loose it's light by sharing it with another candle.

Willing to learn - You should be willing to learn because you are never too old to learn something new.  You should come at eveyday with an open mind and a willingness to accept.  Learning connects you to others.  You as a student are connected to the teacher who in turn is connected to his teacher.

Proud of yourself - You should be proud of yourself because you've been through hell, you've grown a lot, and you're standing today happy, willing to ask for help, willing to give help, willing to teach, and willing to learn.  You've lived a life that no one else has lived and you've reflected on your strengths.  You've figured out that you're good at parallel parking but not so great at cooking.  You're great at listening but not so great at thinking before you speak.  You've reflected on yourself, on your growth, and on your opportunities.  You haven't let life pass you by.

You don't have to know what you're going to do when you grow up but these six things are the six things you should want to be when you grow up.  Don't take life too seriously, you don't get out alive anyway.

xoxo, Moe

10.14.2014

Trend Tuesday // New Halloween Wet n Wild Collection

I finally found it guys! The new 2014 Wet n Wild Enchanting Halloween Looks collection. I had been searching for ages to find it. Went into every Walgreens when I'd first heard about the sightings but none seemed to have it. They had the Fantasy Makers stuff but not the official Wet n Wild collection. I have to admit I am a bit crazy for Wet n Wild and I grabbed up everything that looked promising to me. The biggest thing I was excited about were the other neutral palettes from the line. I grabbed those and one of the gray palettes! Side note: does anyone else feel guilty after raiding a fresh display? The picture I posted on Instagram was after I'd taken the last of the limited edition things I wanted. Sometimes I feel guilty when I clean out a display but I also feel victorious when I know I've gathered all the things I wanted!
The Lipsticks
First off when I was grabbing up the lipsticks and looking at the bottom for the names, I saw one labeled Urban Night which instantly reminded me of the shade Urban Nights from the LE Matte Collection.  Originally I'd skipped over it but after I took the swatches below, and after hearing that it is in fact different, I went to grab it.  Nope.  They are pretty much the same....so don't sweat your head.
I grabbed up the colors Rose to Fame, Coming in Latte, Rose-Bud, Sunset Stripped, & Tangelinos.  All of these colors except for Rose-Bud are LE colors for this collection. If you don't already know this - Wet n Wild is the go to drugstore lipstick for an affordable and long lasting lip color. While some can be a little drying where else are you going to get a bright orange lipstick for under $2? These did not disappoint. The color Sunset Stripped impressed me the least but if you're going for golden lips for a halloween look, honey you've got to try it...even when it disappoints I'm not that disappointed.
Swatched left to right: 
Rose to Fame, Coming in Latte, Rose-Bud, Sunset Stripped, & Tangelinos

My favorite color out of the bunch was Coming in Latte because that brown tone is all the rage right now. It's also not that drying and has a little bit of shine. I rarely find that these black packaged lipsticks have any shine to them but this one is a perfect pout!

The BalmStains
If you haven't tried the Wet n Wild BalmStains you're also missing out on a great product. In the Halloween display there are three limited edition BalmStains and at first I only grabbed two (the two I have swatched for you) but after I took these swatches I decided to keep on the hunt and was able to find 2AM Call Time!  I'll have that in another post with my 4 fave Purple lips for Fall.
The colors I was able to grab are Señorita and You're Golden, the third is 2am Call Time. When I swatched Señorita, immediately I was in love. Talk about a deep berry red for fall. This one is so glossy and the plus side of these lip colors is that they stain. However, You're Golden really, really freaked me out. When I saw the initial display, I thought this one would be a nice nude - but boy was I wrong. Honestly I didn't even look at it in the packaging I just snapped up all the LE things I knew I wanted! 
But it is, as you can see in the swatch a beautiful champagne color that would probably be best suited to an eye color. However, this is a Halloween collection so I can't be too disappointed because if you were going for like a robot, futuristic kinda vibe, this would be a great lip color.

The 5-Pan Eyeshadows
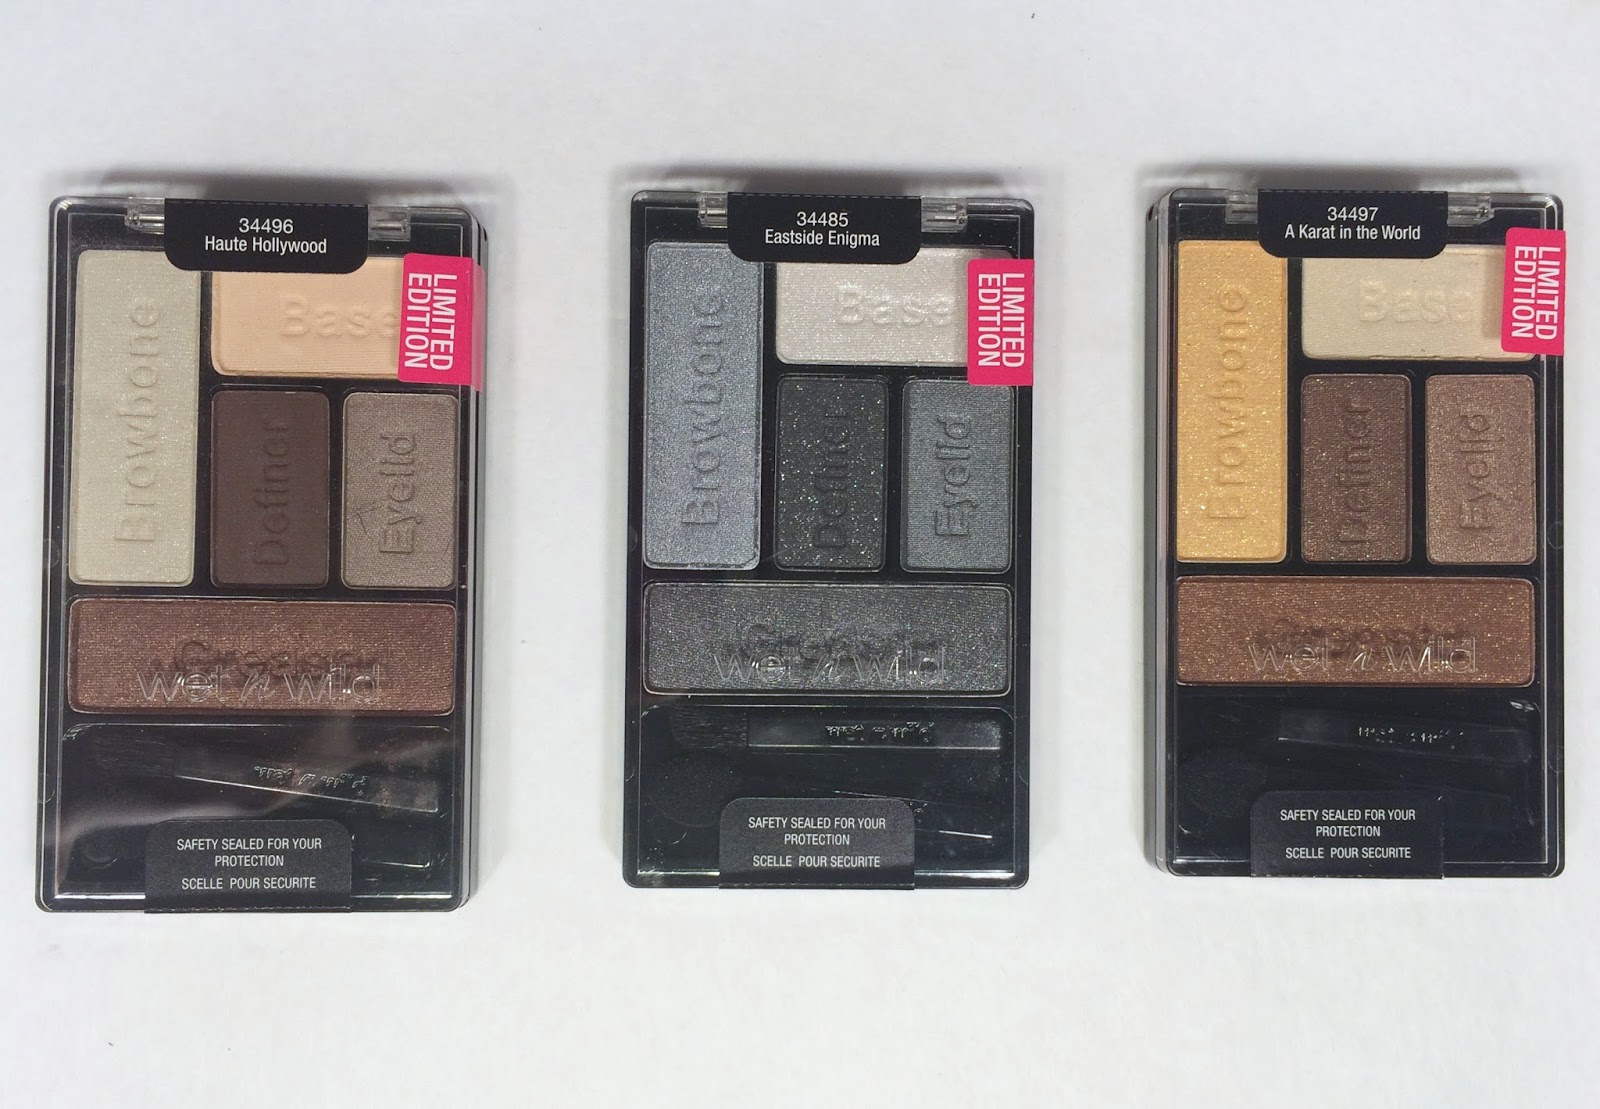
The collection had a total of 5 Limited Edition 5-Pan Palettes in the display, I only picked up 3 because I knew those would be the ones I would use. I also read on Nouveau Cheap that Wet n Wild has reformulated their 5-pan palettes to have a similar texture to the old trios and 8-pan palettes. This started with the 2014 Fall Collection (I have a review on two palettes from the collection here.)
I picked up Haute Hollywood, East Side Enigma, and A Karat in the world. The two neutral palettes were the ones I was gunning for but I really wanted to branch out with out being too colorful so I grabbed up East Side Enigma.
I accidentally switched them around here! A Karat in the World, East Side Enigma, and Haute Hollywood.
Now I have to say I was quite surprised to find that Haute Hollywood and the permanent 5-pan palette The Naked Truth are exactly the same shades. In the store I was a little skeptical they would turn out to be the same and instead of just walking over to the permanent display and comparing I threw it in my basket.  And I believe I was disappointed in the palette The Naked Truth - it was fine to have in my bag if I needed something but not great enough to really recommend.  I think I sent it a long to my sister though because I can't find the palette to show you the comparisons.
 A Karat in the World
 swatched left to right: Browbone, Base, Definer, Eyelid, Crease
 East Side Enigma
 swatched left to right: Browbone, Base, Definer, Eyelid, Crease
Haute Hollywood
 swatched left to right: Browbone, Base, Definer, Eyelid, Crease

The formula of these is amazing and does very much remind me of the original palette/trio formula.  Smooth, pigmented, easy to blend....we're back to what we know & love from Wet n Wild!  However of these three palettes there is at least one miss shade.  You can see from the swatches that the bright gold and sort of cream, opalescent color from A Karat in the Wold swatch patchy and flaky.  Same with the base shade of both the East Side Enigma and the Haute Hollywood palettes.  But these are still pretty affordable.

All in all I am not disappointed with this collection.  This is the biggest collection I've seen from Wet n Wild in a while.  There are also Limited Edition lashes, lip glosses, eye pencils, and nail polishes...so this collection is huge!

What did you grab from the collection? Anything you were dying to have?

xoxo, Moe

10.12.2014

Favorite Fall/Winter Lipsticks

First off, it is cold as crap here in Indiana......I just turned the heat on this weekend. Secondly, one of my favorite parts of fall are all the deep lipsticks you can bust out. Of course you can wear whatever you want, whenever you want...but I like to wear darker lips in the Fall. Here are my favorite colors:

The Nudes/Pinks
from left to right:  Model Co. Dusk Til Dawn, Wet n Wild LE Coming in Latte, Revlon Matte Mauve it Over, Hikari Cabernet, Maybelline Matte Lust for Blush, Wet n Wild LE Rose to Fame.

For the Fall, deeper nudes a pinky-nudes are what I'm into.  I'm really digging the brownish colored lip trend as well!  I pulled out some oldie but goodie lip colors from my collection like the Model Co lipstick I got in a Birchbox or Ipsy bag last year.  It is a wonderful sheer, shiny nude.  It smells a little fruity, too.  Coming in Latte is something you need to go grab up if you can find the Wet n Wild Halloween collection!! It is a beautiful deep, brown nude that looks beautiful on the lips.  It has just the right amount of glossiness to it but it will stick around all day.  The lasting power of the Wet n WIld lipsticks is amazing.  I have worn this color a lot to work!  Revlon's Mauve it over is a lighter nude that be a staple in Summer to transition into Fall.  And it is matte so that gives you a different texture to work with, too.

If I'm looking to go the pink route I've found that berry-pink-mauve route is the way to go.  FIrst is a lip color I could have sworn was red when I pulled it out of my Ipsy bag this month.  Additionally, when I wore it I thought it was red.  Clearly, I was wrong!  It is more of a berry-mauve color and depending on the pigmentation of your lips could come off a bit darker.  I've also fallen for the Maybelline matte line and this color Lust for Blush is a nice dusty pink for fall.  Finally, Rose to Fame - another Limited Editon color - is a part of the Halloween collection from Wet n Wild as well.  It comes off semi-matte and is very comfortable to wear on the lip.  It is a nice brown-rose color that is on trend as well.
The Reds
from left to right Wet n Wild LE BalmStain in Senorita, Wet n Wild Cinnamon Spice, Wet n Wild Cherry Bomb, Revlon Fifth Avenue Red, Revlon Really Red

Deeper red lip colors are also something I look forward to in the fall.  Of course, as we move into Winter, they become a holiday outfit staple.  Who doesn't love a festive red lip?  When I first saw this LE BalmStain from Wet n Wild (also in their Halloween display) I knew instantly it would be great to create that blood-red-lip for halloween.  It looks a bit more berry here, but it totally creeps me out for Halloween.

As for deeper, brick reds, I'm in love with Cinnamon Spice and Cherry Bomb from Wet n Wild.  Each have a semi-matte finish and as you can tell, each is just a teeny bit different.  Cinnamon Spice is more brick red and Cherry Bomb is a little bit more of a purple red.  If you have a darker complexion you will be surprised how flattering these would be.  (Another shade in this range would be Urban Nights or Urban Night)

Going for a traditonal red that would be beautiful for the Holiday season I have pulled out two options.  If you were able to pick up Fifth Avenue Red from Revlon back in the Summer, pull it out again because it is a wonderful red color for Fall.  Slightly shiny and a little more blue toned means your teeth will look whiter.  If you're looking for a more orange-red, this matte color Really Red by Revlon.  It is a bright red that would be great for any holiday party.

The Purples/Plums
from left to right Wet n Wild Viscious Varnish in Throwing Shade, Wet n Wild LE BalmStain in 2AM Call Time, Maybelline Vivid in Brazen Berry, Wet n Wild Ravin Raisin, Wet n Wild LE Matte Bordeaux Boulevard, Wet n Wild Fergie Collection Ferguson Crest Cabernet

The purples and the plums are my favorite part of Fall so I saved the best for last!  First off I want to mention the Wet n Wild Viscious Varnish High Shine Lip Stain.  Not only are nearly all the shades in this line wonderfully pigmented, glossy, and long lasting but they are comfortable to wear and they are the affordable alternative to the Revlon Moisture Stains. (I'll have a comparison up on the blog shortly!)  The color I love for fall is Throwing Shade.  It's a nice berry color with a lot of gloss.  Another glossy shade, that lasts long, that is also a deep purple is another LE BalmStain called 2AM Call Time.  Pick this up in the Halloween 2014 collection as well!  I loooooove the smoothness of this lip color and the ease of which it applies.  The final purple shade is something that I keep out nearly all year round - it is a Maybelline Vivid lipstick in Brazen Berry and it is a true light purple shade.  It has an opaque color and depending on the pigment of your lips it may come off darker.

For a rich plum look I chose one permanent color - Ravin Raisin - and one LE color - Bordeaux Boulevard - to compare.  I love each of them for different reasons.  Ravin Raisin is a part of the permanent line of Wet n WIld lipsticks but it is less purple.  Bourdeaux Boulevard is part of the LE Fall Matte Collection and is a little more purple.  I actually find that these matte lipsticks have a nice, creamy application and applies better than the permanent line.  They are more comfortable to wear and are semi-matte.  The creaminess gives them a slight gloss and I find that they are less matte than some of the permanent shades.  Finally, a deep berry-purple is Fergie's Ferguson Crest Cabernet.  This was one of the first dark lip colors I'd ever purchased and I loved it.  It might have been the catalyst for this whole post!

As you can see there are a lot of Wet n Wild lipsticks in this post.  They are so affordable & so pigmented you can try as many colors as you like with out breaking the bank!  And when they come out with LE collections...you should totally go crazy!

What are your favorite lip colors for this time of year?

xoxo, Moe

10.10.2014

Free Journaling Cards for October

Taking a short break to buy my car really threw off my editorial calendar...sheesh.  So now you are getting so many dang freebies this month it's not even funny.  This time it's the monthly journaling cards that I should have put out for you at the end of September!  But like I said, some stressful things went on.....so here they are.
Just like last month there are 4 4x6 cards and 4 3x4 cards.  This is a PDF document so just download it and print on card stock, then trim.  Again, these were made using PicMonkey stock graphics!  If you want to make you're own, check out my tutorial here.  Also, remember you can get a day of Royale (the premium features of PicMonkey) free if you click this link!
Perfect for any Halloween themed stuff you might be doing in your Project Life albums or your Filofax weekly decorations.  Enjoy!

Download the PDF here
***Link should work this time around!**

xoxo, Moe

10.08.2014

Celebrating 3 Years Together // Free Scrapbooking Kit

In the month of October we have several celebrations.  Zach & I have been together for 3 years, we've been in the house for 2 years, and our little pupster turns 9 years old.  So there's a lot of celebrating going on around here and a lot of love happening over here as well.
In honor of all this love I put together a full on scrapbooking kit inspired by our little family and by love.  How many times can I say love?  As with my other monthly freebies, there are 4 4x6 cards and 4 3x4 cards.  But on top of that there are 4 12x12 papers and 3 .PNG overlays to use!

Download it all here

Right now I hope you can celebrate some love with this fun scrapbook kit!  (Want to know how to use the overlays with out Photoshop? Check out this tutorial using PicMonkey.)

xoxo, Moe

10.07.2014

Four Simple Goals October 2014

For nearly a year I've been keeping up with setting 4 goals a month revolving around me, family, and the blog. It's been pretty neat to see things accomplished since I've never been to great at setting an achieving goals before. I'd always set them then forget them and eventually get around to them. But I'd never been able to intentionally set and meet goals easily before. Setting four small goals each month revolving around the important things in my life has really helped me break that pattern and see some progress. Here are October's goals:

Get the blog sidebar & about page organized - A lot that is in my sidebar and on my about page has nothing to do with my blog or my shops any more. And it's getting to be weird looking. I'm not sure if people are clicking through and then wondering what the heck is happening or not but I know I need to take charge of it and put my best blog-face forward.

Clean out the garage (again) - It's gotten to be a place to throw everything again and thats not what this is all about. We need to clean it out so I might finally get back in the pottery mood....yeah, that hasn't happened yet either.

Make something new - This is a pretty vague goal I know but I want to try to make something new. Maybe I'll try weaving or loom knitting (I actually bought some loom knitting stuff). Or maybe I'll make a book, who knows. I just feel like I'm in a rut again and need something new to try my hand at. I feel like that always brings me out of it. Even though I need to finish some Project Life albums!

Go to the pumpkin patch - Last year we went to a small farm with a little corn maze but I'd like to find a place were we could go for the afternoon that maybe has some hot cider, a bunch of carved pumpkins, a corn maze, etc. Just a place to really spend the afternoon. And to get a pumpkin or two to carve!

Also I was just informed that our little pupster is going to turn 9 years old on October 14th so I have to do something to celebrate.  Dogs care about their birthdays, right?

Happy October!

What are your goals for the month? Anything new you want to try?
xoxo, Moe

10.06.2014

Make it Monday // Design Journaling Cards Using your iPad

A lot of my DIY inspiration has been digital recently.  A few weeks ago was a DIY desktop background to keep your organized using PicMonkey, then a few weeks before that was using overlays in PicMonkey.  Well now I'm onto using some apps on my iPad to get creative digitally.  I don't know if it was the recent release of the new Project Life app (side note: would you like to see an app review on that one?) or what but I've been feeling making some digital project life cards.  Of course, with any card you design you can totally print it out as well but sometimes it's fun to change it up a bit.  If I'm already creating a page on my iPad might as well use the same tool to make some cards!

For this DIY you'll need to spend a few bucks - the Stackables App is $0.99 in the iTunes App Store and TextMask is also $0.99 in the App Store (there is a TextMask lite, though I haven't played with it yet but you can check it out here, it's free!).  If you're not down for dropping two bucks for this DIY, I totally get it.  You can use the grunge option in an app like Snapseed, though you'll have little control over layers, opacity, and the like.  You can also use an app like Pxture for text masks that is also free.  If you already have Rhonna Designs on your phone ($1.99 in the app store) there is also text mask option there, too.  I chose the Stackables App and TextMask because they are apps I'd already invested in and have a lot of design options.  So if you're interested in dabbling in design these apps have a lot to offer when it comes to control.  Anyway, onto the tutorial.

First, from your iPad and an internet browser (Chrome, Safari, etc) go to the website ColourLovers.com.  I love this website for finding patterns, colors, and palettes when I'm starting a project.  (I've used Colour Lovers a lot on the blog, mainly in the Boost Your Blog section!)  Start by using the search bar to find a color you love.  Of course, I'm partial to purple which is what I used to create this card.  But for this one I want a deep pumpkin color.  (btw: I didn't crop out all the tabs I had open!  Can you tell we're shopping for a new dryer, trying to learn about casting, and are on Reddit a lot?)
Once you settle on a color, from the right hand side of the screen download the largest size possible of the color, usually it will be 1600 x 12000.  You want the biggest size so when you crop out the water mark on the bottom you'll still have enough resolution to print in wether you want to print the physical card or the final page created in the Project Life App.
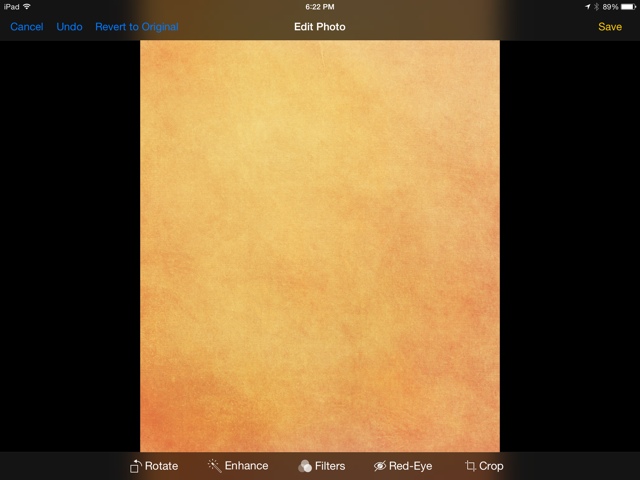
Once you've saved the image of the color you've chosen, open your camera roll and crop out the bottom watermark from the Edit option.  Use the original ratio and only crop enough to get rid of the watermark.  Don't crop too small or you will reduce the resolution.  Save the edits
Open the Stackables app.  Open your color image in the app.  You'll be asked to crop the image.  Skip this step by tapping the green check mark in the upper right hand corner.  You'll see on the left hand side is a column, this is your layers column.  On the right hand side you see a column with the textures.  To unlock some textures you'll need to follow Stackables on Instagram, others you'll need to buy.  But with what is provided in the app, you get a lot.
On your first layer, play with the textures on the right side.  Once you find one you like and want to keep, add a new layer by tapping on the + button in the lower left hand column.  Add another texture, and adjust the opacity with the slider on the bottom.  Once you're satisfied, add another layer.  Play around like this until you get a nice texture style going on that you like.  Make sure to add a new layer each time you want to try something new.  The whole point of this is to build up a bunch of fun layers.  I find that I can get a sort of watercolor effect by layering and playing around.
You can then use the menu at the top of the screen to scroll through textures, filters, color gradients, patterns, basic edits like brightness and exposure (this app is intended for photo editing but I like using it this way much better!), and your formulas.
If you like what you've come up with - your texture layers, etc - you can tap the green box in the corner and select Save Edits as Formula.  This way you can apply the same edits to the next image you work on.  If you're fully satisfied save your image to the camera roll.
Open your image in the Camera Roll again.  Crop again by selecting aspect ratio.  If you want to make a 3x4 card, select that 4x3 option and rotate vertical - but your image should already fit those constraints.  If you want a 4x6 card, select that option and this will crop your image to fit the correct size. Again, don't crop out too much as you still want to maintain the highest resolution.  You're not working from the most professional software here.  Make sure to save you're edits.

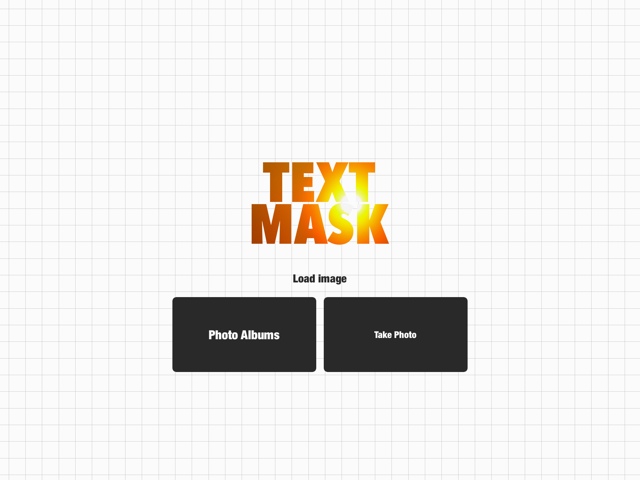
Now, open the image in Text Mask.  This app will give you the amazing mask effect and let the texture you just created show through.


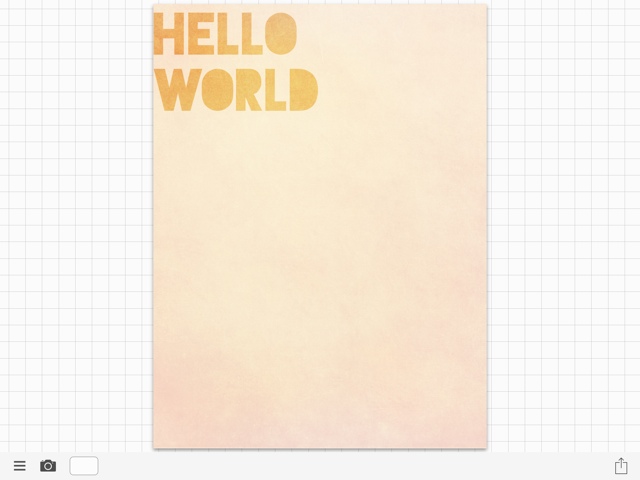
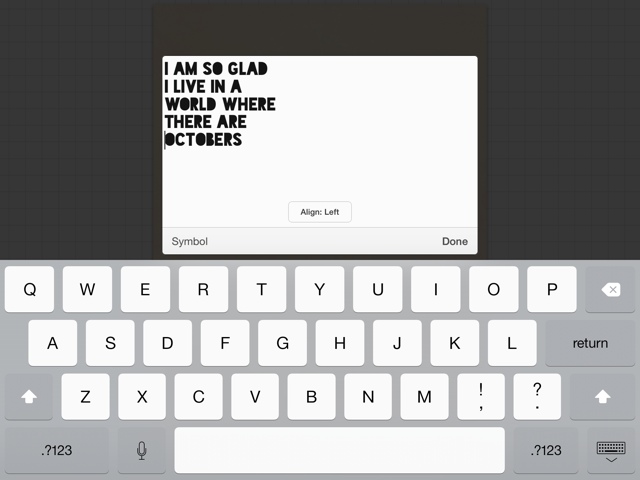
Add your text by selecting the little pencil icon at the bottom of the screen.  I pasted my text then formatted it the way I liked it.


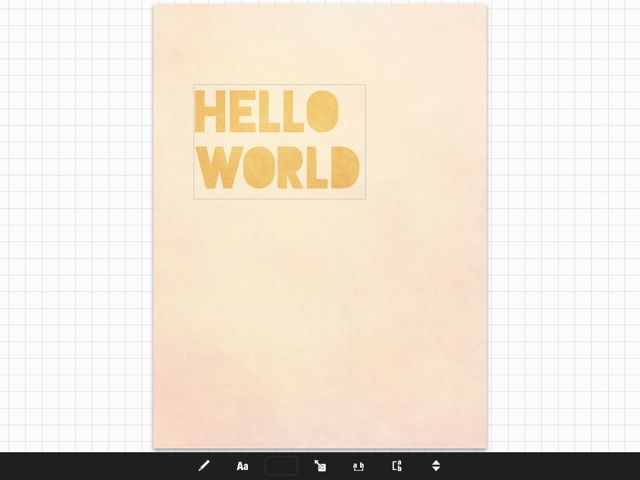
You can change the size by tapping the square with a little, double ended arrow.

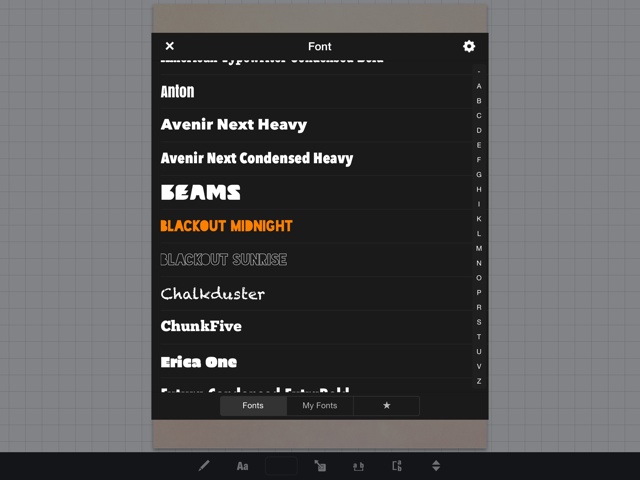
And change the font by selecting the Aa icon.  If you connect your device to your computer you are able to transfer fonts to use in this app.  (Here are the instructions.)

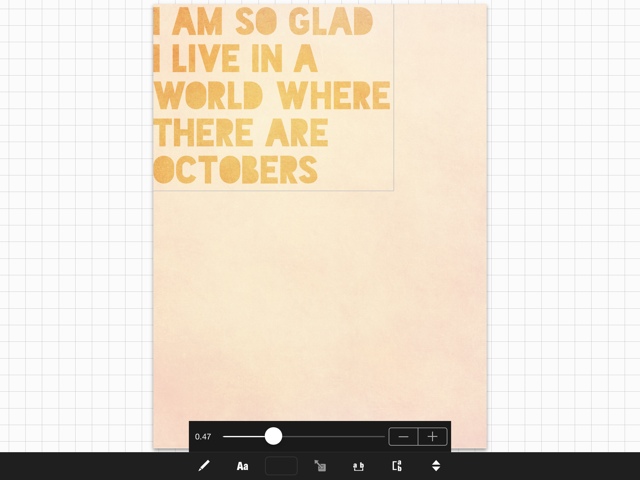
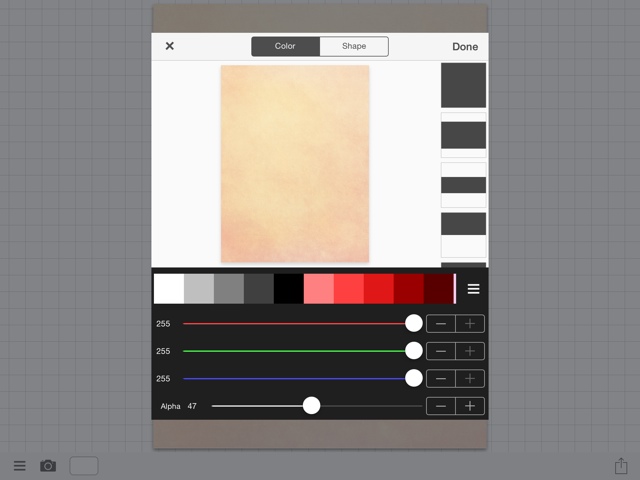
You can adjust the opacity of the mask by tapping the grid space outside of your image, then clicking the white rectangle near the camera icon.  The bottom slider called Alpha works the opacity scale.  You can also change the color of the mask from this screen.

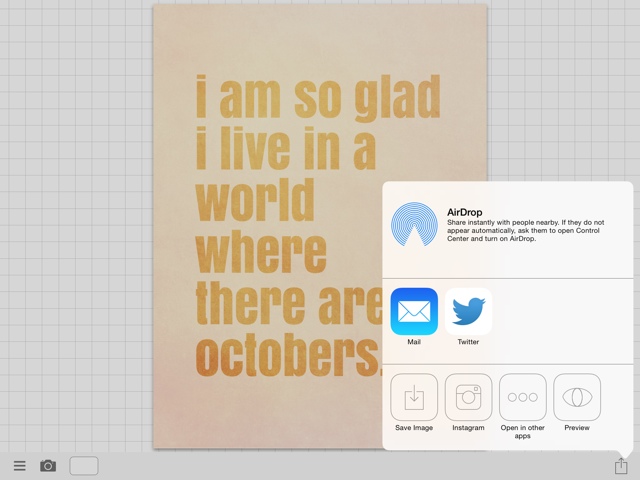
If you poke around in this app you will find a ton more design features, fyi, so sit down and play around!  Now save your image to the camera roll.  Keep the app open and play around, saving as you go so you can have all the images you find interesting.
There you go!  Now you have a fun journal card that has a watercolor type feel.  These two apps give you a lot of design power for $0.99 each.  For a $2 investment you can create personalized cards for your digital - or print - Project Life or pocket scrapbooking projects!

If you want to print the cards you've made you can email the images to yourself - or use fancy DropBox, Google Drive, etc to get it from your device to your computer - and use this tutorial to learn how to print 3x4 cards easily with Picasa.

If you'd like to download the card made using the tutorial, click here for the image.  Just right click and save image.  You can get an 8x10 print, 3x4 journal cards, and iPhone 5/5s background of the pink card in this post.

How do you create digital products to scrapbook with?

xoxo, Moe