1.30.2014

Boost Your Blog // How to Create Pinterest Friendly Blog Images

I struggled a lot with the title of this post.  Because it's not about how to add a pin it button to you blog but rather how to encourage others to pin from your blog.  What am I talking about?  I'm talking about those images on Pinterest that sum up the entire pin in a single image.  There are multiple ways to achieve this & multiple reasons to choose any of those ways.  Sometimes you want to highlight one item & sometimes you want to highlight a process or a collection.  But how do you continue to think about that when you're taking blog photos without over thinking it - I tend to do this.  You want to make sure these images are summaries of the posts, if that makes sense.  Here's what I do:

Highlight a Collection by Including it all in One Photo
From the What's in My Purse post here
From the Home Coffee Bar post here
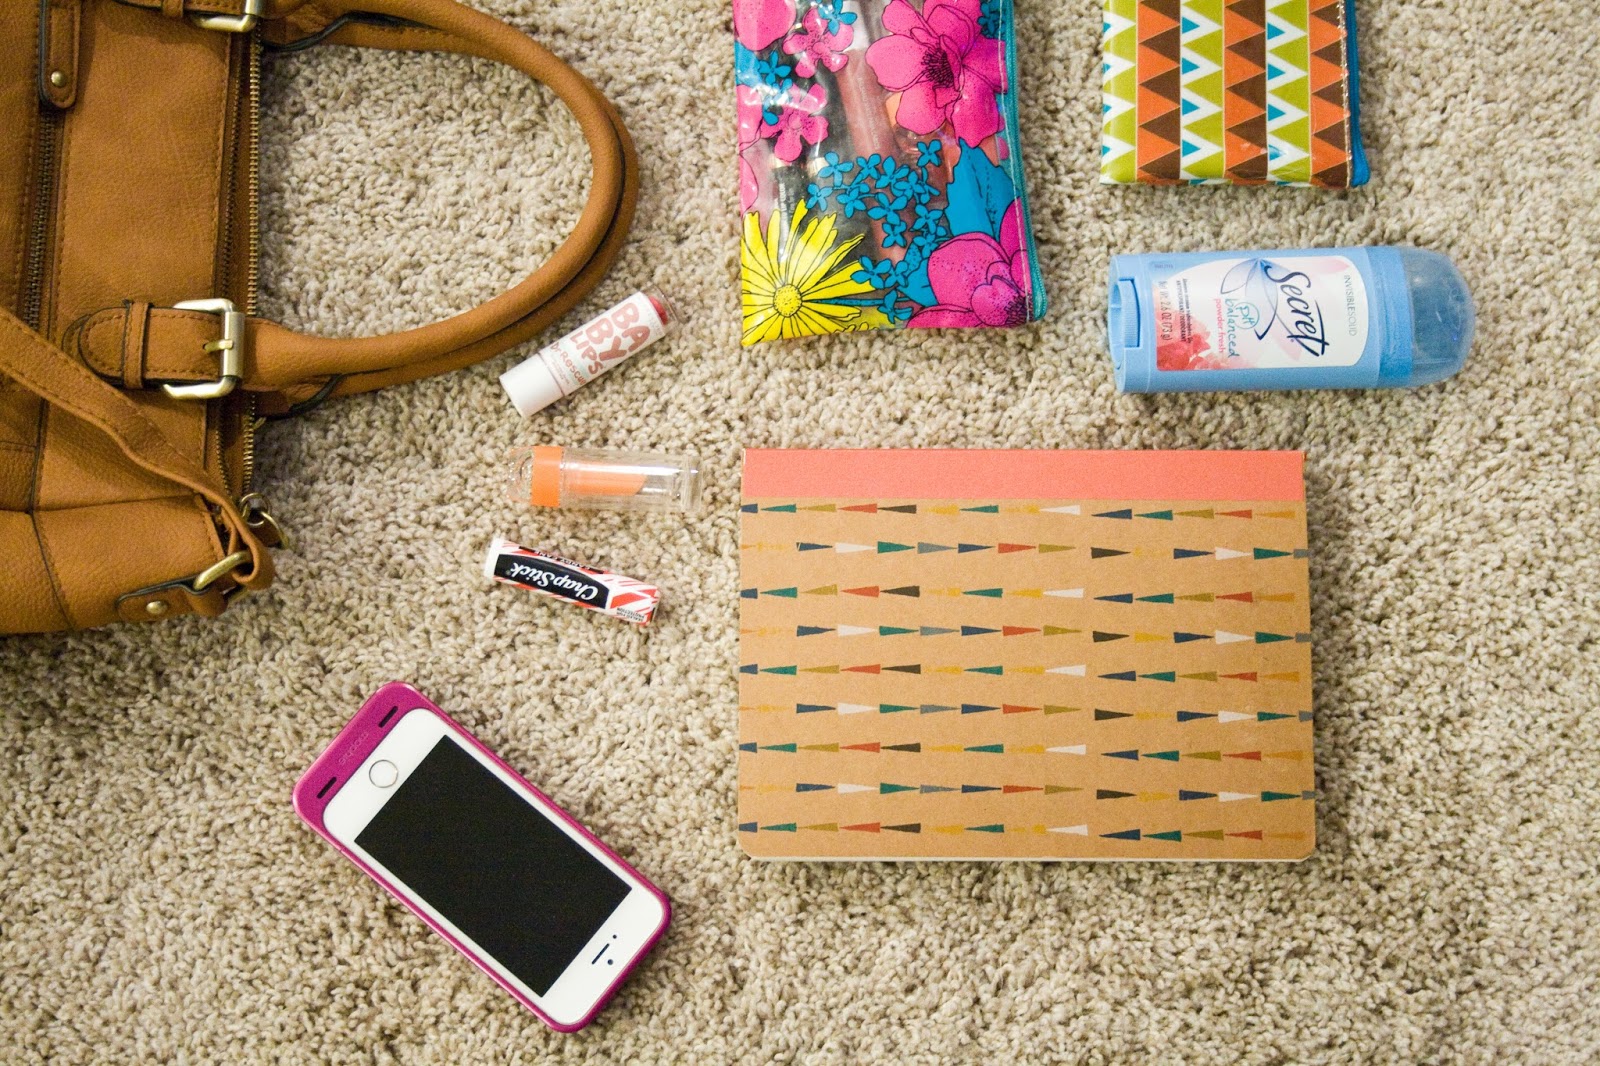
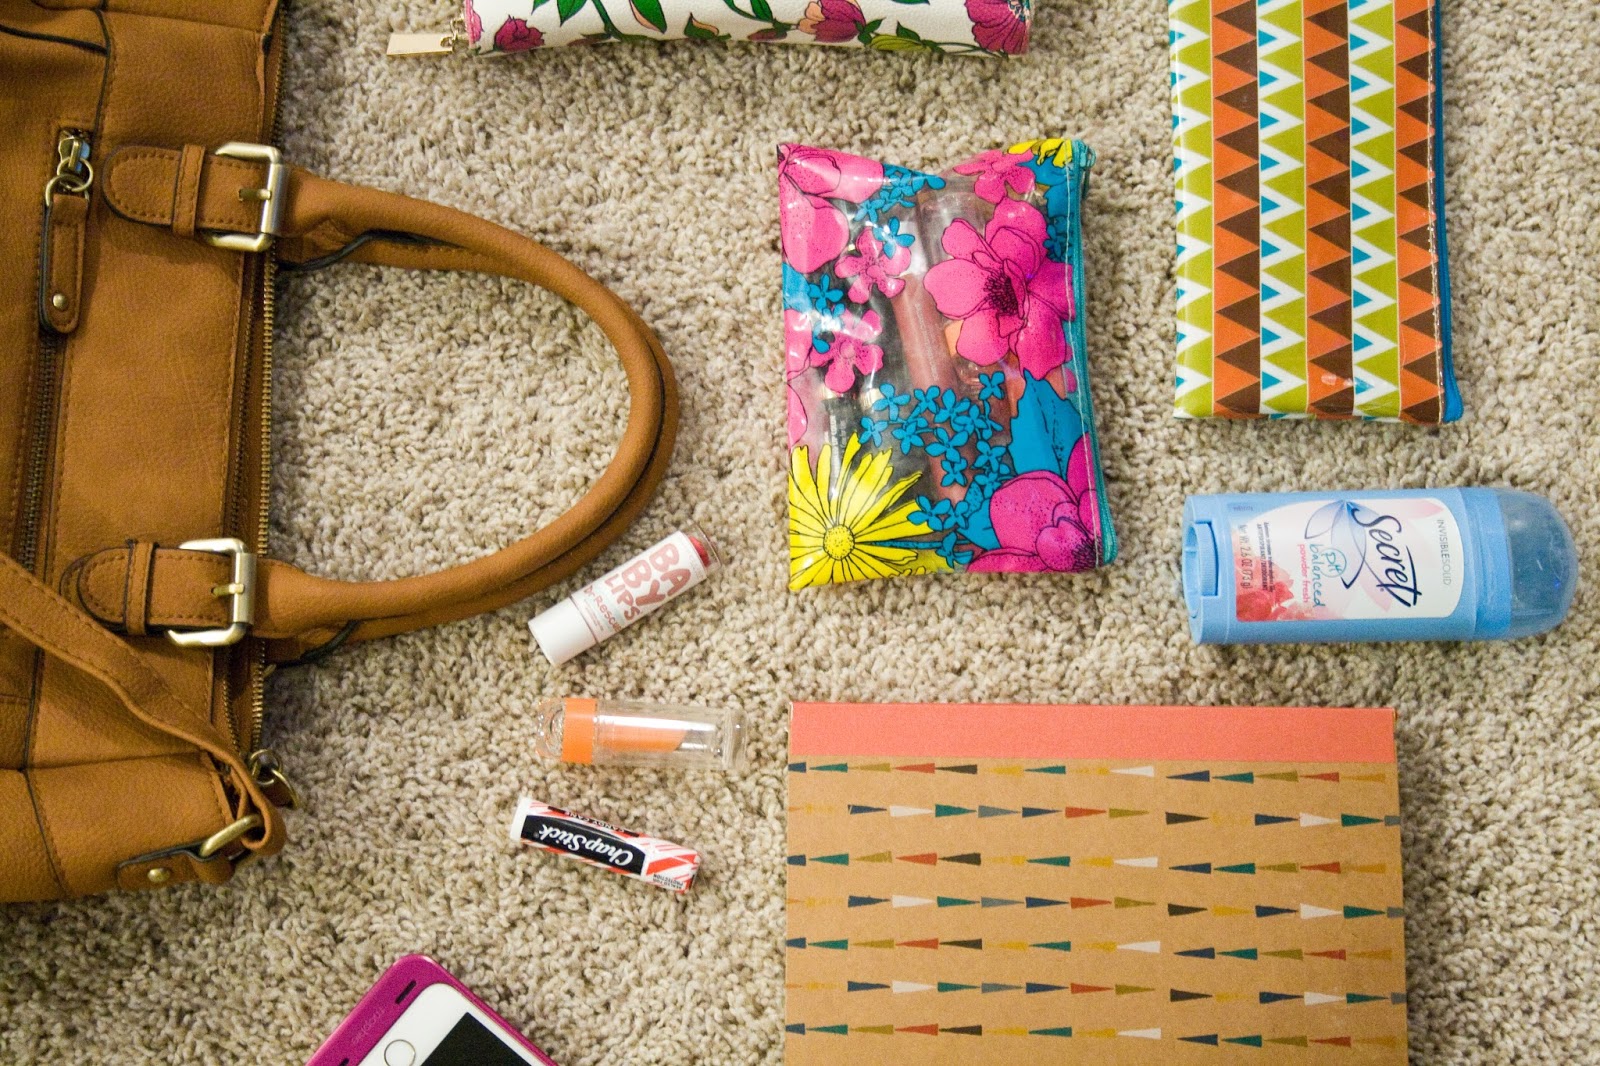
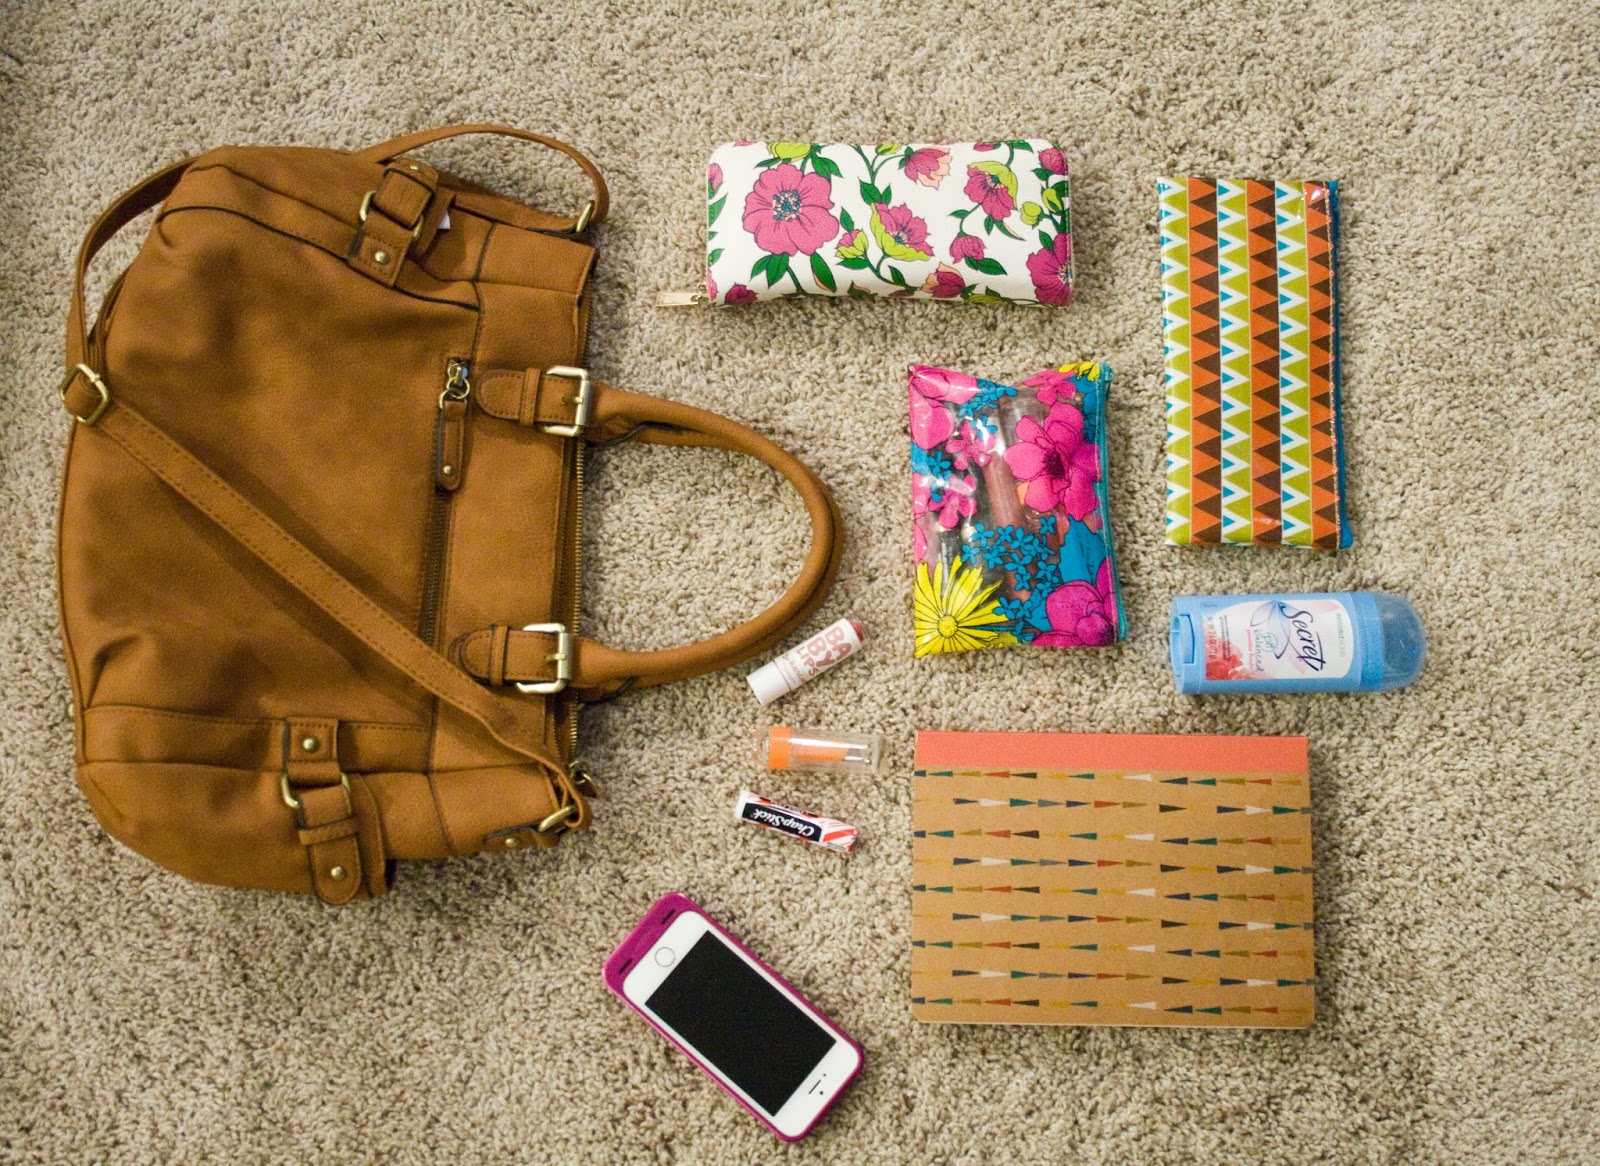
This works best when the post is about a process or a collection - think a about posts that include a lot of things.  This photo needs to sum up everything in the post.  That will be the easiest to pin & explain the post that is linked easily.  For example in my recent what's in my purse post I used a the top image as an overview of everything & when I pinned the post to promote it, that is the image I used.  It sums up the post in a single image.  If I'd just pinned my purse it might have seemed like the post was all about that purse.  So focus on getting the entire body of the post in the image not just one part.  This technique is great for posts that require multiple parts to make the whole.

Highlight a Single Item by Simplifying the Background
From this Salmon Recipe post here
From this Gift Idea post here
Sometimes there are posts where you're focusing on one item & you have multiple pictures of that one item.  So that others will know exactly what the link is to when they see the picture on Pinterest, simplify the background.  Move out the clutter, play with your depth of field (make the background of the image blurred while the foreground is focused - you can achieve this in a simple manner by moving the object closer to the camera).  Think about product images - there's no background to distract you.  Make the item you are blogging about the center focus of the image.  A crisp & clean background will put that item in focus.

Add a 'Beauty Shot' at the Top of Your Post
From this DIY post here
When I am a part of sponsored posts here on the blog, usually one requirement is to create a beauty shot & put it at the top of the post.  This is a styled image where the project or product is the sole focus but it's also in an environment that gives it purpose.  If you've made a craft that needs to live in certain environment - maybe it's a home decor piece - creating this beauty shot will put the item in it's place & show others how to use it.

Add text over your 'Beauty Shot'
From this Boost Your Blog post here
from this post
Along the same lines as the tip above, adding text on top of your beauty shot will let pinners know exactly what they are clicking on.  Describe your post or even add the title of the post to the image.  These are great pinnable images because you know exactly where you are going & which board to pin to.  I think these images encourage the most pinning because you don't have to write a caption to know why you pinned it.  Also this is a chance to add a watermark to your photo in a non-obvious way.  (See tip below)

Include a Watermark just in case
Learn how to do this here
I hardly (read - never) include a watermark in my blog photos...so in this case, do as I say & not as I do.  A watermark will ensure that if your link gets lost somewhere another pinner can google your blog name, find you blog, & maybe find the original source of the pin.  If you want an easy way to add watermarks to your photos, check out this tutorial here.  (Don't forget, if you click this link you can use Picmonkey Royale feature for free for one day!)

So these are the things I keep in mind when working on photos for the blog.  Giving the most info possible in a single image is the goal here.  You want others to know exactly what's going on with a single image.  A picture is worth 1000 words!

How do you create pinnable images?  Do you like others pinning from your blog?

xoxo, Moe

Connect on Twitter // Follow on Pinterest

1.29.2014

Revisiting January 2014 Goals

Can you believe that January is nearly gone already?  It's like crazy! You may remember that instead of setting a few huge goals at the beginning of the year I opted to set four small goals for each month.  These goals include two home related things, one business/blog related thing, and one family thing.  Keep a look out for February's goal list.  I hope I can keep up the momentum!

Here's an update on the goals for January 2014:

Clean out the spare bedroom completely & hang the mirror in the bathroom
Um, nearly check!  We got that room all cleaned out & for a bonus I got my desk cleaned off and my bookshelf organized!  That was a February goal but I swapped it in here because it was too darn cold to even think about cleaning out the garage.  My desk is nearly the way I want it! We got the guest room cleared & we had a guest stay.  The bathroom still needs some love - we have to hang the mirror & find lights that actually work above it, put some shelves up, get some matching towels/rugs/decor/etc.

Clean out the vintage stuff from the garage.
I swapped this out for something else - organizing my desk area - because it is toooooo cold to be working in the garage!  I also added a little laundry room make over too.  Hooray, this house is coming together slowly but surely.  Hey, I think it's a good thing.

Rearrange the Zazzle store
Pretty much I just took off the categories on the front page & rearranged where products fall.  So this goal is completed.  Since there's not really a custom store front anymore I'm going to focus on tags & more products.  I need to sit down & actually make more designs.

Find another restaurant to add to our list
Well, because of the snow we haven't really been able to try anything new.  Maybe in the Summer we'll be able to get our & go places.  I've found quite a few I want to try & can't wait to go out.  The snow is really cramping my style!

So there you have it - even though I swapped one for another, more achievable goal, three out of four isn't too bad!  I think I'm loving this goal setting thing.  Maybe this is the year of actually doing well.  This idea of focusing has really helped me seize the year!

What did you accomplish in January?  Anything grand or anything small is great!

Connect on Twitter // Follow on Pinterest

1.28.2014

What's in my Purse // My Make Up Bag

Keeping a touch up kit handy is great if you're on the go or have a long day at work.  Sometimes it just feels nice to be fresh faced if you're having a stressful day - which is nearly everyday where I work!  A touch up kit is also great to transition your look from day to night if you're headed out after work as well.  I recently posted What's in my Purse where I featured a little floral bag that held some everyday make up essentials so I thought I'd share what it contained:
Revlon Matte Balm in Sultry //  Flower Skincognito Foundation Stick in SF1 // Revlon Super Lustrous Lipstick in Spicy Cinnamon // Maybelline Fit Me Concealer in Sand Beige // Manna Sheer Glo Shimmer Lotion // Sally Hansen Vita-C Lip Plumper // Elf Liquid liner // Wet n Wild Eyeshadow in The Naked Truth // Profusion Khol Eye Liner // NYX Powder Foundation in Natural

Only part of these are for touch ups - the lipstick, concealer, powder, etc - but sometimes this little kit comes in handy if I'm headed out after work or going to do something totally different.  A little more eyeshadow or added a bit of smokiness to my current look transforms your eyeshadow from day to night in no time.  I like this Wet n Wild palette because it has many options & the brushes it comes with aren't terrible in a pinch!  This is also a simple travel pouch if you're got making a spontaneous weekend trip - which I need to take more of!

What make up do you keep in your purse?  Anything fun?

xoxo, Moe

Connect on Twitter // Follow on Pinterest

1.24.2014

Current Skin Care Routine // Early 2014

In a post a a week or so ago, I mentioned the 4 things I learned on my own about skincare that my dermatologist never told me.  I've also posted about my skin care routine before and about the oil cleansing method.  Now that I've discovered that consistency really helps with my skin I wanted to go further into how I go about taking care of my skin.  So this post is about my current routine here at the beginning of 2014.  I think I've found some things I really, really do like (holy grail products maybe) that I don't think will change but maybe I add or subtract things as I go a long.  I'm all for trying new things!

The basics of my skincare routine probably won't change that much I've found that a make up remover, cleanser, toner, spot treatment, & moisturizer routine works for me.  When I was doing the oil cleansing method (which I still throw in there when my skin is super dry) I didn't need a moisturizer.  Anyway, here's my current routine:

Make Up Remover Towelettes - my choice: Epielle Cucumber Cleansing Towlettes (found at Big Lot's)
These wipes are super, super cheap but amazingly awesome.  (You can read more about my experience with make up wipes in this post).  I love these because they are on $2 for 60 towelettes.  The towelettes are damp enough for me but a little too thin so sometimes I need to use two.  Since they are so cheap I also keep some by my vanity to wipe off my hand/fingers if I have make up on them.  The ones I use have cucumber, aloe, & green tea so they don't make my face feel tight or sticky as some other wipes can.

in the A.M.
In the morning I use these wipes just to get the excess oils off my face.  If I'm in a rush I use these wipes as the sole cleansing in the morning.  

in the P.M.
Each afternoon/night I use these wipes to get all of my make up off before I wash my face.  Sometimes I'll come immediately home & wipe off my make up.  Then I'll cleanse my face a little bit later.  Getting all my make up off before I cleanse my face means that I'm getting everything off & the cleanser can do it's work. The single step of cleansing just gets your make up off but doesn't do anything for your skin beneath.  I make sure to get all the make up off - these wipes are so cheap I can use two & not feel bad about it.

I love this little cleanser because it goes with the other products I have in my skin care routine.  I've mentioned this before as well, but I love trying a line of products not just products here and there.  The best example of this is my review/use of the Olay Fresh Effects line.  I feel that a whole line of products should go together & not compete with each other and I felt the Fresh Effects line did (read about that here).  So, I picked up this cleanser to go a long with the other Youth Code items in my routine.  I love that it foams & I do feel very clean after.  It leaves a slight cooling feeling so I feel it's good for calming my skin*.  However I would not suggest using this around your eyes to remove make up, just don't.

in the A.M.
This cleanser claims to be exfoliating.  There are no beads in this gel cleanser so I thought one of the ingredients must be a chemical or ezymatic exfoliant.  In a quick search I found that the ingredient Capryloyl Salicylic Acid is in fact an exfoliant.  I only use this cleanser as a quick little manual cleanse & not with the cleansing brush I use at night.  It's not overly drying & great to start the day.  However, sometimes I skip it & just wipe off my face with the make up remover towelettes.

in the P.M.
Whether I'm at the sink or in the shower I do a lot of dirty work with this bad boy with my cleansing brush.  This cleanser claims to exfoliate so I usually focus on cleansing my face for longer with my cleansing brush.  In the shower the hot water opens my pores & I feel I get a great clean pairing this cleanser with my CVS brand cleansing brush.  This cleansing brush is amazing and I love using it.  I switched from using an acne cleanser everyday because I felt like I no longer needed it.  I guess since I just moved into my late twenties it's time to start focusing on anti aging & not acne!
This is a gentle & natural toner that I love using.  I really like it because it tones naturally and I don't have to add more chemicals to my face.  Now I know I use a lot of other things that have chemicals but this makes me feel a little bit better.  It also just makes my skin feel natural.  Sometimes toners can make my skin feel oily or dry and I want to restore the PH in my skin not coat it in something crazy.  I was skeptical about the product at first after trying just the Dickinson's Witch Hazel - I felt that did nothing for my skin.  But this one claims to help pores - not that I've noticed - and is specifically a toner not just witch hazel.  So far I like it.

in the A.M.
After I wipe or cleanse my face in the morning I dampen a cotton pad & sweep it all over my face. It feels nice, that's it.

in the P.M.
After I cleanse my face in the evening I use this as a secondary residue remover but also to tone my skin.  I love that it tones with out drying.  For me this is the first step in hydrating my skin since this really brings it back to normal.

Spot Treatment - my choice: Tea Tree Oil from the Body Shop
I used to use an over the counter spot treatment with benzoyl peroxide or what have you & I had a love hate relationship with them.  Usually they'd do what they were supposed to but some would make my face swell up or make me itchy.  Also none of them did the overnight reducing that they all claimed.  I finally surrendered & picked up some Tea Tree oil in Ulta while I was home for Christmas.  Boy, I'm never going back to anything else.  It really reduces the redness & inflammation and it soothes.  Man, oh man I just love it.

in the A.M.
Unless I have a crazy breakout happening I don't use the tea tree oil in the morning.  Usually I just let it sit on my face overnight.  It's not irritating at all so I could put it on during the day but sometimes I feel like my breakouts get a little too dry during the day if I use it because it keeps treating.  The tea tree oil I have is already diluted, don't apply straight up tea tree oil to your face FYI!

in the P.M.
This is when I use the oil the most.  After cleansing & toning I dampen the end of a q-tip and dot it on all of my breakouts.  Sometimes I sweep it over larger areas but I try to concentrated on the actual zit.  If I need more oil I flip the q-tip over & dampen the other side so I'm not contaminating anything with the bacteria from my face.  

Moisturizer (step one) - my choice: L'Oreal Youth Code Texture Perfecter
I use this little serum from the drugstore that claims to minimize pores, improve skin's texture, & even out uneven skin tone**.  I first heard of this on YouTube & thought why the heck not.  After trying just the serum I was hooked on this line.  While I don't know any science behind this & many of the claims are based off of consumer self assessment**, I still think this product works.  Personally I've seen a reduction in my uneven skin & better pores.  I don't believe you can do anything to make your pores actually smaller but I've noticed just an overall firmness in my skin that I think really helps with pore visibility.  Again, consumer self assessment here!

in the A.M.
In the morning I usually just use this as a moisturizer unless my skin is really dry.  This serum does have a luminosity factor to it - if you look at the product after you've dispensed it onto your hand you can see a little iridescence - so using both this & the day/night cream is often too much for my oily skin.  But since it's the winter this is step on of moisturizing morning & night.

in the P.M.
I pair this with the Day/Night cream mentioned below because I feel like this serum really does the dirty work & the Day/Night Cream does the moisturizing.   This adds a little bit of moisture but it has a thin consistency so I like to pair it with something thicker.

Moisturizer step two -  my choice: L'Oreal Youth Code Texture Perfecter Day/Night Cream
This little jar adds the final step to moisturizing.  I feel that the day/night cream doesn't do any of the dirty work that the serum does it just offers more moisture though the website gives the same claims to the cream as the serum.  Again after using this paired with the cleanser & the serum, I've noticed results.  I've noticed the texture & tone of my skin improve most drastically.

in the A.M.
If my skin is feeling extra dry I'll use this after the serum in the morning. Usually on the weekends I'll do this step too just for a little more hydration.  Even though this can be a bit to heavy for my skin I have noticed that the shine I get through the day from the oily nature of my skin is more glow & less gross.  I don't look like my make up is dissolving I just look healthy - does that make sense?

in the P.M.
For added hydration I always use this in the evening.  Keeps my skin happy with moisture so I don't get overly oily during the day - I just develop a healthy glow.  I know that sounds gross but sometimes make up can make you look flat where as developing a natural glow gives you some depth.

And that is it!  The ends & outs of my skincare routine for the beginning of 2014.  I think that as we move into warmer weather something is going to change.  I believe I liked the natural moisture that coconut oil gave to my skin in the summer - not too heavy & just right - so I imagine I'll go back to it once the extra hydration isn't needed for my skin any more!

How do you care for your skin?  Any products to recommend?

xoxo, Moe

Connect on Twitter // Follow on Pinterest


*I read that menthol is derived from peppermint oil that can irritate the skin, sadly I did not save this link.  But I did find more info on menthol in cosmetics here.

** Claims taken from L'Oreal website here.

1.23.2014

Three Great Things Project for 2014

I'm probably setting myself up here with all the goals I've been setting here lately.  I'm no good with them - I mean I get to some of them eventually but really I am horrible.  But hey, there's a thing called life & it gets in the way when you're trying to plan..so there's that.  For example I have the Four Simple Goals I'd like to set & complete each month for 2014 now I have this little Instagram challenge?  What am I thinking!
This year I want to be better about posting things that make me happy.  Guess what - I'm a complainy/grumpy kind of person if you'll let me be.  I am always up for a woe is me session.  If you want to complain about things & just be an all out downer, I'm for it.  And if you try to cheer me up  or offer me advice when I'm complaining to you, you're missing the point - I just want to complain & I want you to agree with me.  ugh, it's so annoying..just let me be a grump!  But, honestly it's no fun being grumpy & complaining all the time so I want to start appreciating things more...even the little things.  Like the day I came back from my vacation I was expecting a lot of stress from work - but it was actually a nice day & I appreciated it!
I try to do this everyday but so far it's been a few times a week.  I set an alarm on my phone & sometimes I ignore it & sometimes I type out my three great things.  This project isn't to be too serious - most of the time I'm happy that I didn't fall clearing the snow off my car or that there's a TJ Maxx going in near our Khols.  Sharing things that just went right during the day or during the week has made me a happier person.  The app I use is called Phoster but you could use any sort of app that lets you add text over photos then I just post to Instagram.

So I've been doing this little project for a while now, posting every few days or so & tagging with the hashtag #ThreeGreatThings so I can keep up with my photos through the year.  If you want to join in, please do!  Let me know so I can find your Three Great Things!

What are your Three Great Things?  Any small things that make you happy day to day?

xoxo, Moe

Connect on Twitter // Follow on Pinterest

1.22.2014

January 2014 New, Used, & Empty Products

Earlier this week I posted a new video to my YouTube channel.  Posting videos is something I want to get into this year as it adds something else creative for me to do.  I've been feeling a bit lost in the creativity department so beauty products have given me something else to get creative with!  I hope you enjoy this little video about products I'm trying in January, products I used in December, & products that have become empty:
xoxo, Moe

Connect on Twitter // Follow on Pinterest // Peep me at Hello Cotton

1.21.2014

Drug Store Haul // Big Lot's

Don't ever let me pop in to Big Lot's ever.  Most likely I will come out with a few (or more) beauty items for no good reason.  I'd actually thought about giving up on Big Lot's after not finding anything great there lately but you know, one last stop down the beauty aisle couldn't hurt anything but my wallet right? Right.

So I came home with a bunch of discontinued & limited edition things from some of my favorite brands.  My favorite find was all four limited edition Color Sensational Vivids from Spring 2013!  You may remember that the Vivids were the first ever lipstick collection I got into in January of 2013 so to find these other ones was just pure awesomeness.  I actually found them between two trips to two different Big Lot's - one near my house & the other near my work.  Here's what all I found between the two trips:
I've been really into lip liners lately.  I love the staying power they add to a lip color but they can be really expensive - I guess not really expensive but if I'm already buying a lipstick I guess the extra $3 - $7 bucks at the drugstore is too much.  These are from Rimmel & I hadn't seen them before.  I'm sure they were repackaged for this but two fro $2 is a steal!  I love the pinks & nudes in this little collection.
These are the limited edition Maybelline Vivids colors from Spring 2013! Talk about a score for $1.50 each!  I need to go to other Big Lot's around & see if I can find the final color Pop of Cherry intact.  At my Big Lot's they were all mushed but I found these three colors in pristine condition! hooray!  You can still see the clearance sticker on them from what looks like Wal-Mart.  I'm not sure of the original price, probably somewhere around $7 but you can see they were clearanced to $5.50, then to get them each for $1.50 at Big Lot's....I think it was worth it!  I don't know how the Big Lot's system works but I'm never discounting them again!
Then I found these pretty colors for $1.50 as well.  I did some research but couldn't really find when they were released or when they were discontinued.  I saw posts as early as 2011 mentioning these & as late as January 2013 - so maybe they were discontinued last year?  Any ideas?  I'm loving the coral color & seriously can't wait to bust coral colors back out this spring!  Maybe I'll share my favorites - spoilers, they are both Maybelline!
This is a horrible picture but can you believe these Maybelline products for under $3?  I passed on the Dream Sun this summer but for $2.00 how can you not pick it up.  I also picked up a Fit Me foundation in a darker shade to see how it would work as a bronzer.  It's just a tad deeper than my skin color so I think it's going to be perfect.  They also had some discontinued colors of the Fit Me liquid foundation.  Not sure if they changed the formula or the colors or something in this line but this is still in stores!  Finally, can't ever pass up Wet n Wild.  I swear if we weren't in the middle of a crazy blizzard in the middle of me writing this I'd head to another Big Lot's asap.
I never saw these either this summer - but I wasn't as in to make up as I am now.  This one is a lovely nude color called Sandy Shores.  While I'm not a complete fan of these cream bases/eyeshadows I still do love them.  And getting a nude colored Color Tattoo for a dollar?  Heck yes!

If you're a fan of drug store make up don't skip the beauty aisle at Big Lot's, you never know what you might find!  I feel like I hit the mother load with this trip & really can not wait to stop in another Big Lot's.

xoxo, Moe

Connect on Twitter // Follow on Pinterest

1.20.2014

Make it Monday // Easy Crochet Fold over Bag

I've been on a crochet kick lately but usually it involves making half a project then ripping it apart.  I'm so indecisive.  I decided to whip up something quick in front of the TV this past weekend & came up with this little fold over bag.  It's perfect as a little make up bag for your purse or to hold anything you want, really.  It stands up on it's own as well.  I think it's a pretty cool piece & it's quite easy to make.
Supplies:  worsted weight yarn, size j hook, fabric button maker, spare/coordinating fabric, needle, thread.
Pattern:
This pattern is not worked in the traditional round way.  I created a tube of crochet then sewed one end shut.  If you're comfortable crocheting down one side of your foundation chain, then crocheting down the back of the chain - go for it.  But I thought a tube would be easier if you were a beginner.  Also, you could crochet a flat piece of fabric then sew down the side & across the bottom to create your bag.  You'll only need to know the chain stitch & the half double crochet for this project.  But get fancy if you want!

For the tube method, chain 50, join the first & last ch together, ch 1, do not turn (don't turn after each row for the entire project.

row 1: hdc in each ch until end, slp st to first hdc, ch 1.
row 2: hdc in joining st, hdc around, slp st to first hdc, ch1.
repeat for as many rows as you wish.  For a medium sized bag crochet 24 rows.
on your last row, estimate the middle of the back side of the bag.  Hdc until that point, ch 7 (or enough to fit around your button, hdc around, slp st to first hdc, bind off.
This bag measures ________
Create your button by following the instructions on the back of the button maker.  Sew it on near the bottom of your bag to create the slouchy fold over look.  Now fill with all your goodies!
I love that it stands up on it's own so if you are tucking it in your purse or bag for make up you can set it up on the counter - though it is just cloth so be careful, no spills!  You could also use this to store bits & bobs you may need to have handy.  The self standing feature lends this to be great for anything that needs quick access but also needs to be tucked away.

xoxo, Moe

Connect on Twitter // Follow on Pinterest

1.16.2014

4 Things I Wish My Dermatologist Told Me about Skincare

I've posted before on this blog about my struggle with acne & break outs.  Now that I'm in my twenties (correction: late twenties!) my skin is changing.  Coupled with the dry weather up here, I'm now noticing it's possible to have both oily & dry skin. Before I would have never classified my skin as dry.  It was always super oily & full of breakouts.  When I was younger I went to the dermatologist who prescribed me a bunch of different combos of pills & topical things to fight it.  Now that I'm older I've been able to discover a few things about skin care on my own and none of these were things the dermatologist told me:
this post contains affiliate links, please read my full disclosure here.

There is a proper way to wash your face

Now this may seem like an obvious thing but honestly it's more than wetting your face, creating a lather, & rinsing.  You have no idea what residues can be on your face from your make up and such.  I wore a lot of make up in high school trying to cover up my acne/redness so since I didn't properly wash my face I'm sure it left my pores clogged.  Where did I learn to properly wash my face?  After college when I got a job as an office manager at a school that trained aestheticians.  Now I feel I wash my face in a way that really gets it clean & use other products to refresh the PH & moisturize.  Before, during my oily days, I would skip on the moisture since I had such an oil slick.  But now, at least for me, I've noticed if I keep my skin hydrated & have less oil.  This is really prevalent when I use coconut oil as my cleanser.  I usually remove my make up with a wipe before cleansing so that my cleanser can do it's job.  Then use my spot treatment (tea tree oil!), witch hazel as a toner, and then a moisturizer.


There's something called Tea Tree Oil & it's amazing

Instead of all these ridiculous topical ointments that cost a million dollars, there's something natural called Tea Tree Oil & it works amazing to combat breakouts.  Seriously dries them up quite quickly!  I'd say it usually takes 3 days for the Tea Tree oil to dry a blemish up completely but I see results after 1 day.  I bought this on a whim not believing what others said about it and am so glad I did.  There are also a TON of other skin loving essential oils like Frankincense, Lavender, & Cedarwood that are perfect for rejuvenating skin & clearing breakouts! Read more about using Essential Oils here.

Consistency is better than any drug

If someone had just told me that washing my face everyday, properly, would help I might have stuck with it.  Usually I'd give up because whatever course of action I was prescribed didn't work and be stuck with inflamed, red skin.  But now that I'm older & have a preferred skin regimen I see results no mater what I use.  Which is why I get bored with my cleansers/routine easily.  So keeping consistent with a gentle cleanser, some exfoliation, a toner, & moisturizer keeps my skin happy.

You get zits all your life

Jennifer Lawrence is the one that told me this, actually.  I remember wanting so badly to have clear skin just like other people that I knew.  Going to the dermatologist meant hope for a cure - dramatic, I know.  No one told me I'd be battling my skin all my life. And at one point it really was a battle.  I didn't care what I did to my face, my skin needed to be punished & pumped full of things that would dry out my zits.  Things that would exfoliate & leave my skin red.  Spot treatments that would inflame my face (oh yes, that has happened).  Anything & everything no matter how much it stung, was there to punish my face into submission.  That didn't work, in fact I was left with a very angry face not a face that I'd conquered.  So I decided just to deal with it in college - it was always going to be this way might as well just accept it.  After working at the school mentioned above, I learned I could be friends with my skin.  If I treated it well, it would treat me well.  I still get breakouts but I know my break out areas & try to treat them before I get a break out.  The gentler I am with my skin the more it appreciates it.  But it's true - you have breakouts your whole life.  You have to be consistent in your skin care to have even a little bit of control over them.


I always felt sort of out of place with acne.  But we all have to grow to love the things about us that we don't particularly like.  Now I love taking care of my skin because, like I said, if I treat it well - it treats me well.

Have you ever felt like you've battled your skin?  How do you nurture yourself now?

xoxo, Moe

1.15.2014

New Wet n Wild Products January 2014

One of my favorite drugstore brands is Wet n Wild.  I still remember my moms' Wet n Wild nail polish from the 90s but lets be real for a moment - Wet n Wild has stepped up it's game.  It's now one of my top favorite brands ever.  They always come out with pretty cool stuff & I'm so excited to have picked some of the new things up:
All of the Balm Stains! Hooray! It really is the best feeling to walk into a store & see a fresh display ripe for the picking.  It is so very satisfying to grab up one of each thing (especially when there are $1 coupons attached!)  The texture on these is awesome.  Much better & smoother than I expected.  They are super creamy & beautifully colored.  I can't wait to try them all out!
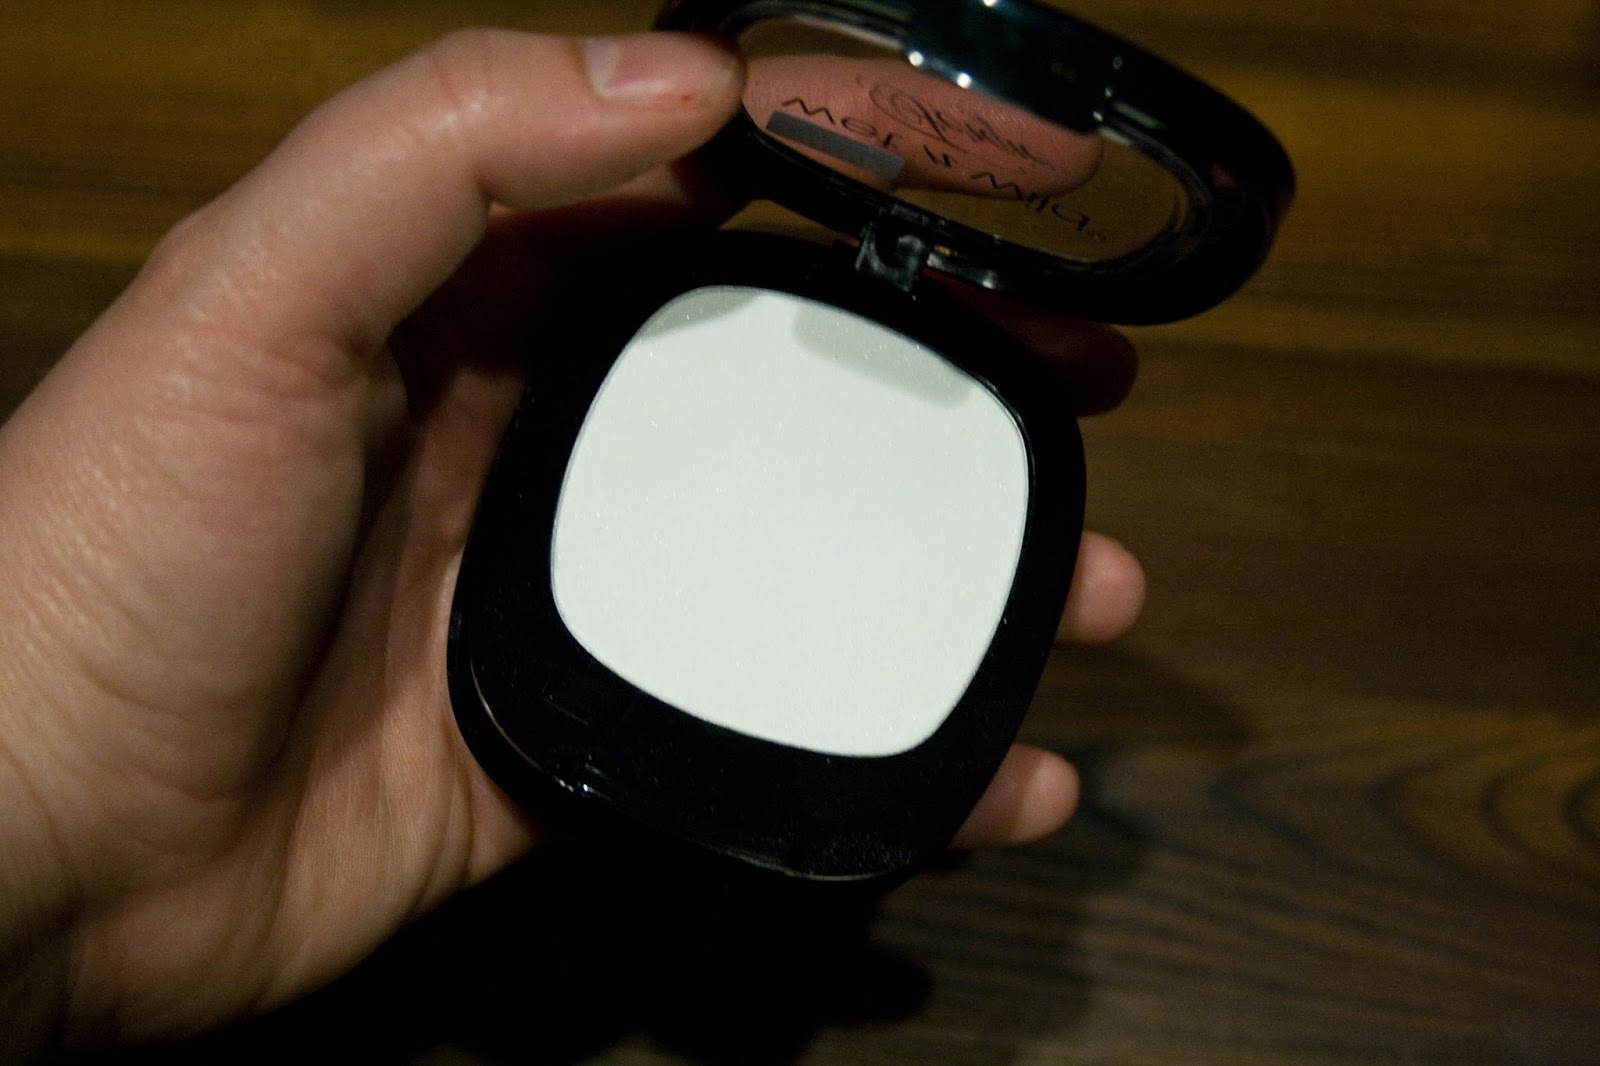
I also picked up the mattifying powder from the Fergie Collection on a whim.  I didn't even really pay attention to the packaging but it's much, much smaller than the Fergie Collection eyeshadow palettes.  But it does come with a whimpy puff.  Guess that's something.  Don't know if I'm excited about this one yet.  Also, you can't tell from the image above but there's a little bit of some sort of glittery-ness in there.  Not sure what's going on with that.
I also grabbed the single eyeshadow in Nutty.  While this isn't new, it's in a new display & fully in stock.  It's never in stock, ever.  So I snatched it up.  I skipped on the single glitter shadows though.  Nothing appealed to me about a creamy glittery disaster. But this Nutty shade is great.  All I ever wanted & more!
On the topic of eyeshadow I picked up one of the new 5 pan palettes but only in The Naked Truth.  The others just didn't appeal to me - I don't need all purples, all blues, a smokey look, or bright colors.  I think this will become a great travel neutral palette.  The consistency doesn't match the other ColorIcon trios or 8-pan palettes but it's alright.  It's the consistency of what you'd expect from the drugstore if that makes sense.  Still good & easy to work with but nothing compared to the original ColorIcon collection.
I've also been into lip glosses lately & when I saw these in the display I knew I had to pick some up.  Mainly because of the names.  It just so happens that Throwing Shade (which I still have to return - it was already opened!) & Giving Realness (the one pictured above) are the best names anyone could come up with.  So I picked up this lovely berry purple & beautiful nude color.  The nude is rather sheer where as the purple color seems to give a lot of pigmentation.  Can't wait to play around with these!

There was quite a lot more available but I passed on the clear mascara, the glitter eyeshadows, the colored eye liners, & the BB Cream from the Fergie Collection.  Though I may go back later & pick some of those.  I do wish Wet n Wild would come out with some different colors in their ColorIcon blushes.  Those four colors are awesome but I'd love to see more colors because who can ever have just one of anything, right?

What are you excited about at the drugstore?  Any new products you're in love with?

xoxo, Moe

Connect on Twitter // Follow on Pinterest

1.14.2014

Trend Tuesday // What's In My Purse

While I was visiting Virginia over the holidays I finally picked up a good purse.  First let's talk about how many purses I actually have - next let's look at the fact that the ones not made well tend not to hold up.  Also, lets add another thing to the list of things to do - get rid of old purses.  Anyway, off topic now - back to the purse.  I picked up another sturdy purse from Target that I call my business purse.  It's super professional looking, I think.  It is has a faux leather body - nothing pleather but like a sturdy leather-type fabric that I think will hold up well.  It won't flake away if you know what I mean.  Here's what I keep in my purse:
 First off I love this purse! Like I said above it's from Target - it's the Merona brand Satchel Handbag in Cognac.  I love the matte finish look of the material it's made of & I don't think it will fall apart anytime soon!  I love the different pockets inside & the two side pockets and middle zip pocket on the outside.  It holds e v e r y t h i n g .
 I usually keep my iPhone in it's purple Morphie Case in one of the outside side pockets so it's with in reach.  These three lip balms - peppermint flavored ChapStick, a Sally Hansen Vita-C Lip Plumper, & a Dr. Rescue Baby Lips - live in the small zipper pocket in the back inside of the purse.  Next I have a fun little notebook pulled from my endless notebook collection inside to jot down notes for the blog, shop, life, etc.  It was from Target as well.
In the small, clear bag with a flower pattern (from H&M ages ago!) I keep extra lip colors I'm loving or using at the time.  These include chubby lip crayons that are really easy to apply through the day.  I always have deodorant in there too, just in case.  I run out the door quite a lot with out putting on some D-O, whoops!
Another little zipper bag from Target that came from the same line as the notebook is used for feminine items & other doo-dads I may need.  I love the chevron pattern on this!  Opening my bag & seeing so many colors & patterns makes me happy!  And finally, the thing I need the most - my wallet, which is also from Target last year.  Man, Target makes some cute stuff, right?  This wallet is huge and I recently just cleaned it out because it was holding everything under the sun.  I like that it has a few inside pockets as well as a middle, zipper change pocket.  I mean I can fit all my cards, change, checkbook, moolah, & receipts in there.

Not pictured above but sometimes floating around in there are various cord chargers, my keys, & my iPad.  I love that this purse fits everything.  It also has two small handles & the option for making it a cross body bag with an adjustable strap.  Great versatility.  Cross body bags are much easier to shop with.

What's in your bag?  What are your daily essentials?

xox, Moe

Connect on Twitter // Follow on Pinterest

1.10.2014

Revisiting 2013 Goals

This year, more than any other it seems, was full of so much change.  I love change & I think change is good, but I'm not so good at recovering from big changes or changes that happen all at once.  This year was a knock down yet really awesome year.  It was truly a year of change - so lets look back on the 2013 Goals posted 12 months ago here:

Add some Valentines Day cards to the Stationery Shop
Yep, this happened.  Got some designs added in there & really liked them.  If you're looking for something for Valentine's day check out the designs here.

Add fonts/clip art to the Design Shop
Nope, that didn't happen.  But now that I read this goal I'm thinking of reopening my shop featuring fonts since I'm really done with blog designs for right now. 

Maintain the STUDIO blog & post once a week
Nope, didn't do that either.  After getting a full time job that really went by the wayside!  But Since I'm refocusing on the Stationery Shop this year perhaps I can get back into that blog.

Create Business Cards for the 516 brand & 516VINTAGE
I did create a whole line of branding materials/shipping materials for 516VINTAGE but now that we've closed that shop it's time to focus on the other shop that's open.  I want to grow Five One Six handmade again this year.

Create letter head, invoice, & packaging for 516VINTAGE
That did happen (see above goal) but our goal of reusing shipping materials in an effort to be more environmentally friendly & really stick with the whole idea of reusing (vintage items in the first place are eco friendly because you're reusing) didn't work out so well.  Sad to say something's broke.

Focus on Collections
I was really good on this in the first part of the year - full stationery collections in the stationery shops, full collections in the Five One Six shop, & collections in the Vintage shop.  But, again, time to refocus.  So I guess you could say this goal was achieved.

Open Five One Six shop
Yep, did it!  Recoded everything for the Storenvey storefront & have a wonderful custom looking shop now!  Looking forward to adding more things to it in the next year!

Focus on me & us time....focus on balance
I think we did a good job of that this year as well.  It is always a struggle to balance these things for me.  I need me time, I need creative time, I need us time, etc.  It's so hard to balance my dreams, us time, & a job.  I really am only good at doing two of those at a time but this year I realized there's just not enough time to do everything and somethings got re-prioritized. 

Create meaningful connections
I'm not that good at staying in touch with others.  Sometimes we'll talk every minute of everyday, then one day I just won't.  It's not because I don't like you any more, I just suck at keeping in touch.  But I do think about you often - both blog friends & IRL friends.  I like people I can just pick back up with.  That's just how I am - I'm trying to be better!

Create a cohesive Ceramics line
Nope, studio isn't even set up yet.  That's a goal to roll over for this year.

Find a real job
Found one, it's ok.  It's getting better.  And it's actually funny because this is the original goal from the goals post:
I've been struggling so hard with the unemployed/self-employed thing.  I made a decision to move & that's been the cause of not having a job.  But finding another one has just been so disappointing.  I am going to go looking around for random jobs next week.  I don't mind working at Taco Bell, I just know that I'll get stuck working at Taco Bell for the rest of my life because who wants to hire an office manager, let alone a 25 year old who doesn't have a professional job.
Guess where I got a job & worked for two days? Taco Bell.  Did you know that? Probably not, I don't think I told anyone because I was so ashamed.  I literally cried for a week straight after I got hired.  Then I well balls to the wall & applied to every office job I could find.  I worked two days at Taco Bell before finding out that I was hired at my current job.  I mean, there's nothing wrong with working at Taco Bell - I actually appreciate everyone & their lives more (not just fast food employees) because I met people who had been on the line, making tacos for 12 years.  I don't rush at a fast food place any more because all day these guys move a lightening speed to reach a goal of making a taco in less than 10 seconds.  I also don't judge people's journeys/lives any more (not that I was very judgmental in the first place). This experience made me realize that there are people out there who make your tacos & there are people out there who run corporations.  If we didn't have either, what would we have.  I'm nicer, more patient, and definitely a big tipper after working at Taco Bell for two days.  Oh, also - if a corn tortilla is cracked, it goes in the trash.  There are children, families, people who have nothing & you throw a cracked tortilla in the trash because it doesn't look nice. Yeah, whatever.

Make a living off 516
Nope, definitely didn't happen!  But now I know that Zazzle & passive income is the way to go for that.  I can't wait to put a bit more effort in & see what comes about.

Keep the house clean to have a clean working environment
Let's just say the house is clean enough but we're already working on keeping everything in it's place.  Keeping house is hard when you've got a blog & life to run. :)

Phew, that was a lot of goals huh?  I can't believe I set that many goals at the beginning of the year.  But I guess I didn't anticipate what was to come and what came was a reduction in time to actually accomplish things.  But I think we still had a pretty good year.  I dunno life has a way of teaching you things even if you didn't plan on learning it.

Hope you're last year was prosperous!

What did you accomplish in 2013?  Anything unexpected happen?

xoxo, Moe

Connect on Twitter // Follow on Pinterest // Peep me at Hello Cotton

1.09.2014

Boost Your Blog // Use Picmonkey to Create an About Me Graphic

One of the most important pages of a blog (or any personal site) is an about page.  On this page readers will get to know you from a few sentences & pictures and decide if they really want to stay.  I thought about a cool way to share short & quick info about yourself on your about page based on the ever popular subway art printables.  This little graphic is easy to make & fun to stick on your about page!  You can make it purely text based or add bits & bobs with the simplicity of Picmonkey.  Here's how:
First, head on over to Picmonkey & choose your layout from the Design tab.  This projects is completely doable with the free fonts available but I upgraded recently to Royale & here's a hint if you use this link (here) you get a free day of Royale*!  So get to clicking!
 I chose the 5x7 option but if you wanted to print this, say maybe you're actually doing this for a child's room to describe all the things they love & not for your blog, you could chose 8x10 or even a custom size.  Picmonkey is a great, online tool to create beautiful things for your blog & your real life.
 Choose your background color.  I chose white since I didn't want to create a block of color on an about page & it looks cleaner.
 Now start adding your text.  Like I said earlier, there are plenty of free fonts on Picmonkey but the Roayle feature adds so much more & it's only $4.99/mo or $33/year.  Affordable if it's your go to photo editor & design option for your blog.
 Now here's another tip - don't just use the fonts for words, use the fonts as accents.  You want to vary the font, size, & position of your text on your canvas.  Move it around as much as you want to get a well laid out design.  Use the ampersand as an accent & used the period in a font as a dotted line or separator.  This keeps the design dynamic & interesting.
 Different fonts give different effects.  Layer them & group them together.  The dotted line at the top of the canvas separates the words associated with the '&' symbol.  Again at the bottom the fact that '26' and 'years old' are grouped together in an obvious way allows others to understand that they are supposed to go together.
You can even add little overlays (a stamp or clip art from the sidebar) elements that add a bit of fun to the design.  Size the overlay to the size you'd like then right click & send it to the back.  That way it's not sitting on top of your design.  Repeat adding whatever you'd like 
If the overlay or clipart is too dark, make it a lighter shade of the same color.  I made these accents a lighter gray so that they were subtle & the fonts stood out.  This keeps the design easy to read.
So there you have it! Now you can save this & add it to your about page.  Just upload the image to your blog, select the size option & roll with it.  If you think you may need to edit your design later (it might be too small to read, etc) don't close the Picmonkey window!  Leave it open for a bit until you've fixed any mistakes because you can't go back!  Double check your spelling, etc just to make sure.

Now you have a fun & interesting about page to draw in readers with a quick look at who you are.  Another idea is to make the words that describe you best or the words most important to you bigger.  This emphasis will let others know the words that describe you the best.  Don't forget to click here for a free day of royal!

xoxo, Moe

*At the time of writing this, the free day of Royale feature is available on the Picmonkey site.

Connect on Twitter // Follow on Pinterest