Guys - I'm participating in 30 Lists. You may remember that I've tried this like two times in the past and failed horribly at it. I've been working on my own listing journal and that has taught me a lot about this process - intention and priority are two of the words that journal has taught me - and I plan on finishing my 516 listing journal this coming weekend since it will be a 3 day weekend!
this post contains affiliate links, please read my full disclosure here.
But today's DIY is about creating a small journal using the Cinch tool. This tool is one of my favorite high end craft tools and it gets very little use in all honestly. So I thought I'd break it out for this little listing journal since I needed to whip one up in a hurry. Let's get into it.
supplies :: Cinch tool, pliers, cinch 1" binding, at least 30 4x6 grid journal cards, 2 4x6 journal cards for cover, laminating sheets, laminator, scissors, assorted 3x4 decorative journal cards, assorted 6x6 paper pads, corner rounder, assorted washi tape, paper trimmer, library pockets (optional)
First, choose the 6x6 papers to use for this project. I chose about 20 patterns to use from quite a few paper packs. My inspiration for this journal came from two bright neon library pocket envelopes I had in my stash. I'm pretty sure they came from the Dollar Tree in the teacher section at one time, but I'm not 100% sure. The bright neon pink and electric green inspired the colors I chose from various paper packs. The paper packs I used for this project are Amy Tangerine Sketchbook, Heidi Swapp Favorite Things, an American Crafts paper pad, and Pink Paislee Citrus Bliss. Next, choose the coordinating 3x4 cards you'd like to use - the kits I used that went well with my color scheme were the Heidi Swapp Favorite Things and the Project Life Sunshine Edition packs.
Using the paper timmer, trim the 6x6 papers down to 4x6 size. Round the corners with the corner rounder. This is one of my favorite punches because it has multiple options depending on the corner radius you need for a project. The sharpest radius is the one that matches the Project Life radius the closest.
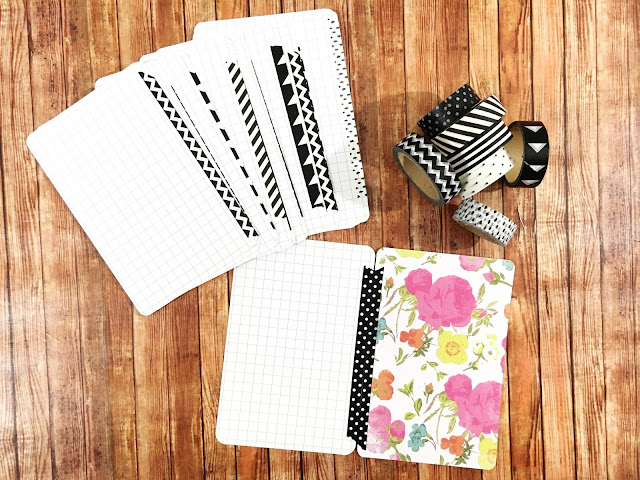
Because these paper pads aren't double sided, the washi tape will create a 'double sided' look to the journal pages. Place the tape along the side of the 4x6 grid card (it is easier to make a straight line this way), align the two journal cards wrong sides together, fold the washi tape over on to the patterned paper. Repeat for as many 4x6 patterned papers you have. You don't have to have 30 of them, it is better if you have just slightly fewer. 20 - 25 patterned papers should be good.
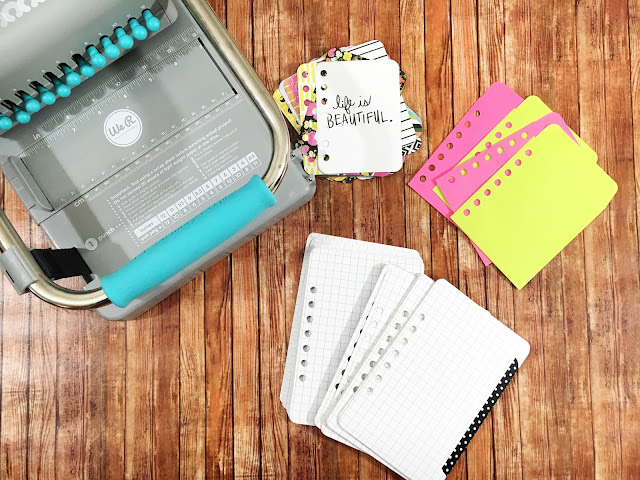
Using your Cinch tool punch the pages in the alignment you'd like. I use the info printed on the Cinch as guidelines (kinda like how pirates use rules....just as guidelines) for punching holes. But I also just make it up as I go. To repeat the spacing I did - pull out the first two knobs as well as 10 - 12. Leave the guide pushed all the way in & punch all the 4x6 cards excluding the front covers. Once the front covers are laminated, pull out the guide just a tad (one click) and punch the two covers. To punch the 3x4 cards push in all knobs 1 - 7, and pull out all knobs 8-12. Bring the guide back to its original position and punch all 3x4 cards.
Assemble the cards on the coil, back and front covers right sides together (back cover on the coil first) then add your inserts the way you'd like. Use the back end of the Cinch to close the coil. You can see detailed instructions in this post.
And now you're done! I love this little guy - a great way to use up scraps and create a cohesive look. I've found the way to create something I really like is to form it around an inspiration piece and come at the project with intention. Some projects can be created all willy nilly but some projects need to be planned. I really wanted this project to be super simple so the only other elements I'll add into this listing book are the scraps from this project, a black pen, and highlighters. I do plan on stamping the list numbers - I'm not going by date because I know I won't finish it like that! - using some ink and stamps I have already. If all the work is done, all I have to do is write. And I wanted all elements to fit in a small pencil bag!
And now you're done! I love this little guy - a great way to use up scraps and create a cohesive look. I've found the way to create something I really like is to form it around an inspiration piece and come at the project with intention. Some projects can be created all willy nilly but some projects need to be planned. I really wanted this project to be super simple so the only other elements I'll add into this listing book are the scraps from this project, a black pen, and highlighters. I do plan on stamping the list numbers - I'm not going by date because I know I won't finish it like that! - using some ink and stamps I have already. If all the work is done, all I have to do is write. And I wanted all elements to fit in a small pencil bag!
Do you do any journaling? Have you tried any list challenges?
xoxo, Moe


No comments:
Post a Comment
Hi there, thanks so much for taking the time to comment. I love &value each & every one! If you have a question, I will respond as soon as I can. Don't be afraid to shoot me an email! If you have a blog, I will pop on by :)